支援與服務
BIOS Update Procedure Locally (Instant flash)
There are 2 methods for updating the BIOS using Instant Flash.
Method 1:
- Save the BIOS files on a device such as USB disk (FAT32 format), hard disk (FAT32 format) and floppy drive.
- Press [F2] during POST to get into BIOS setup menu.
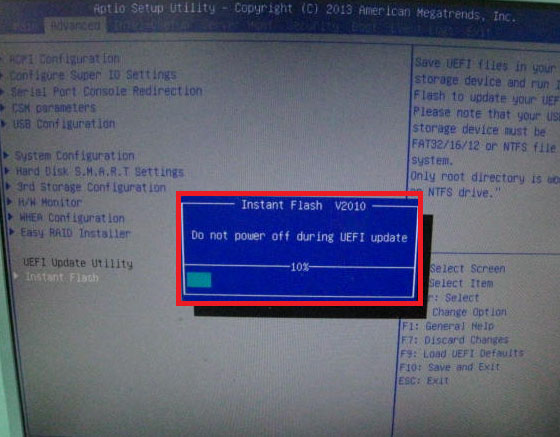
- Select the Instant flash under [Advanced] menu to execute it.

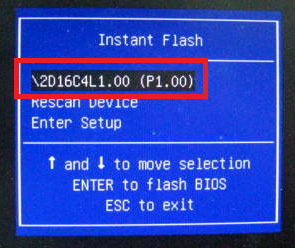
- ASRock Instant Flash will automatically detect all devices and only list those BIOS versions which are suitable for your motherboard, and select the suitable BIOS version and flash.

- Please DO NOT power off during BIOS update.

- After update success, it will pop up below massage. Please press Enter to reboot system.

- After system restart, press [F2] or [Del] to enter the BIOS setup utility during boot up to check BIOS version.

- In Exit menu, please select "Load Default Settings" and press [Enter] to continue.
- Select "Exit Saving Changes" and press [Enter] to exit the BIOS setup utility.
Method 2:
- Save the BIOS files on a device such as USB disk (FAT32 format), hard disk (FAT32 format) and floppy drive.
- Press [F6] when you see this (or similar) page.

- Select the suitable BIOS version and flash.

- Please DO NOT power off during BIOS update.

- After update success, it will pop up below massage. Please press Enter to reboot system.

- After system restart, press [F2] or [Del] to enter the BIOS setup utility during boot up to check BIOS version.

- In Exit menu, please select "Load Default Settings" and press [Enter] to continue.
- Select "Exit Saving Changes" and press [Enter] to exit the BIOS setup utility.
- Now, system is booting up with new BIOS.
If you encounter problems while updating the new BIOS, DO NOT turn off your system since this corrupt BIOS might cause your system failed to boot up. Just repeat the process, and if the problem still persists, update the original BIOS file. If the Flash Memory Writer utility was not able to successfully update a complete BIOS file, your system may not be able to boot up. If this happens, your system will need service.