Wsparcie
BIOS Update Procedure Remotely (IPMI AST2400)
- Make sure you have connected a LAN cable from the laptop (client) to the dedicated IPMI LAN port on the Server. Prepare an USB device with the BIOS firmware installed.

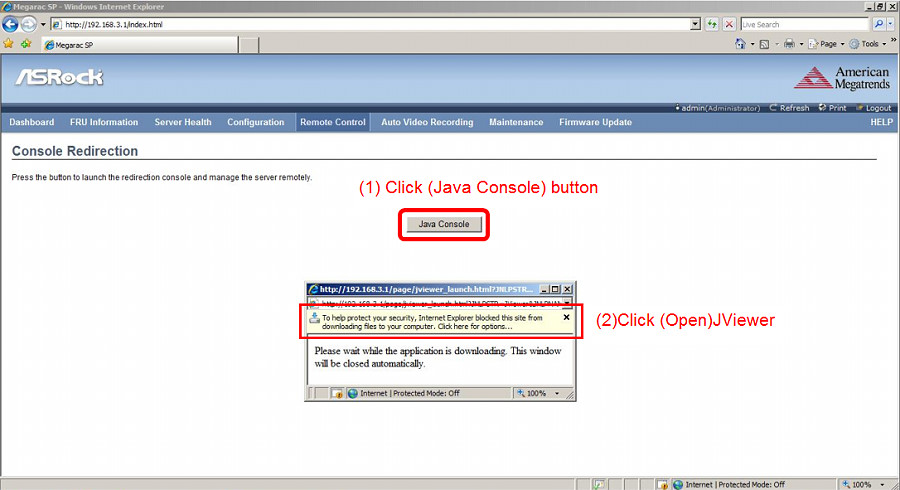
- Enter the management system from your laptop (client). Go to Remote Control > Console Redirection.

- Click Java Console > Open to open the JViewer.
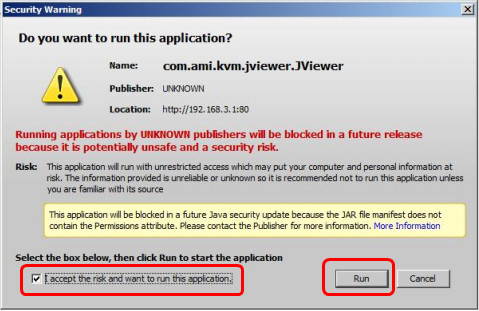
- Select “I accept the risk and want to run this application.” and click Run to launch the JViewer.
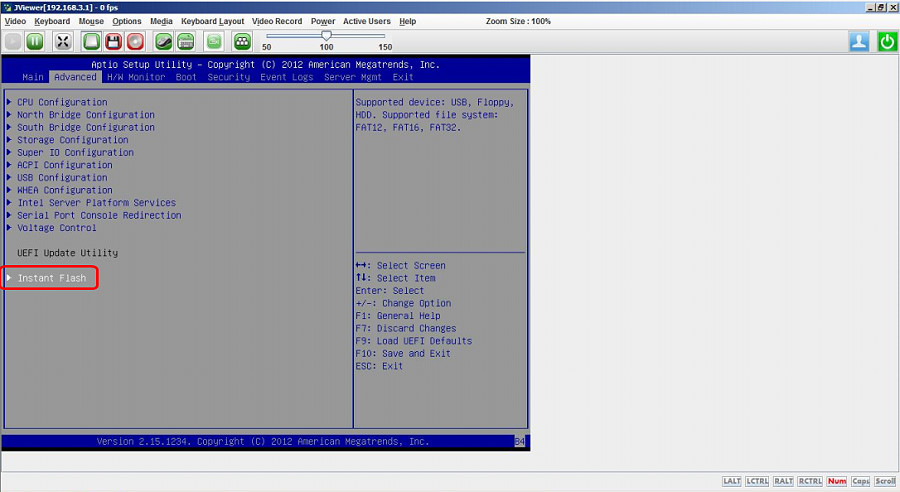
- In the BIOS screen, go to Advanced > Instant Flash.
- Insert the USB device with the BIOS firmware installed into your laptop (client).

- Click Hard Disk/USB Redirection.

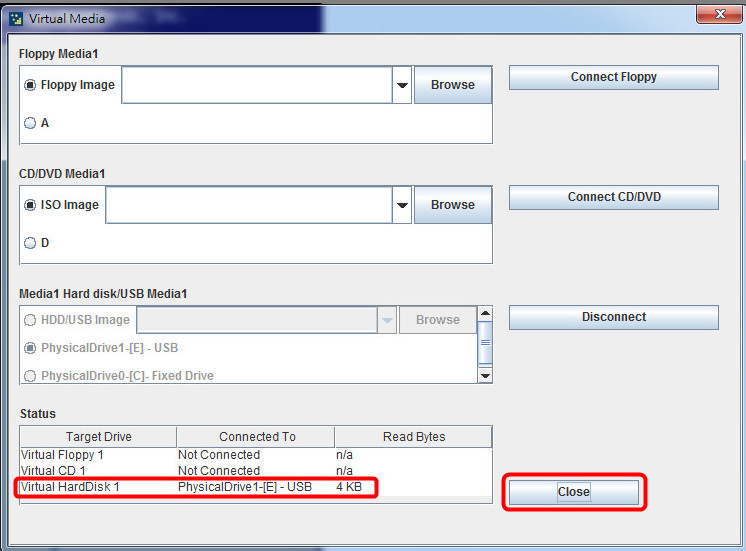
- Select the inserted USB and click Connect Hard disk/USB.

- Confirm the inserted USB device is found and click Close to exit.
- In the BIOS, go to Advanced > Instant Flash and press the [Enter] key on the keyboard to select.

- Choose the desired BIOS firmware and press [Enter].

- The BIOS updating begins.

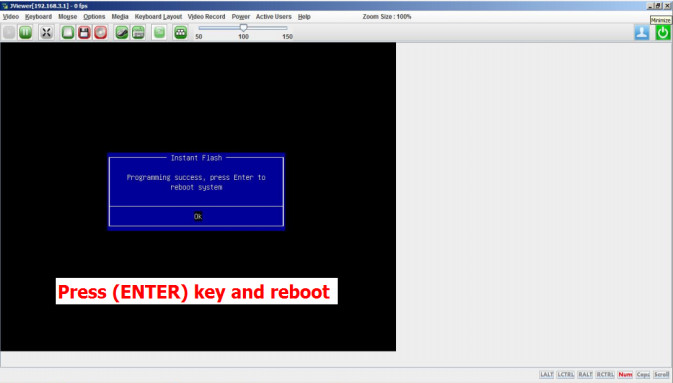
- After upgrade, press [Enter] key to reboot the server and confirm the BIOS and BMC versions.
