고객지원
How to remotely update BIOS via the BMC WebUI on an IPMI AST2600 system?
Steps:
1. Access your system’s BMC WebUI by visiting https://IP_address with a web browser. Then login with the correct credential (default login username and password are both admin), you should be directed to the Dashboard of your system.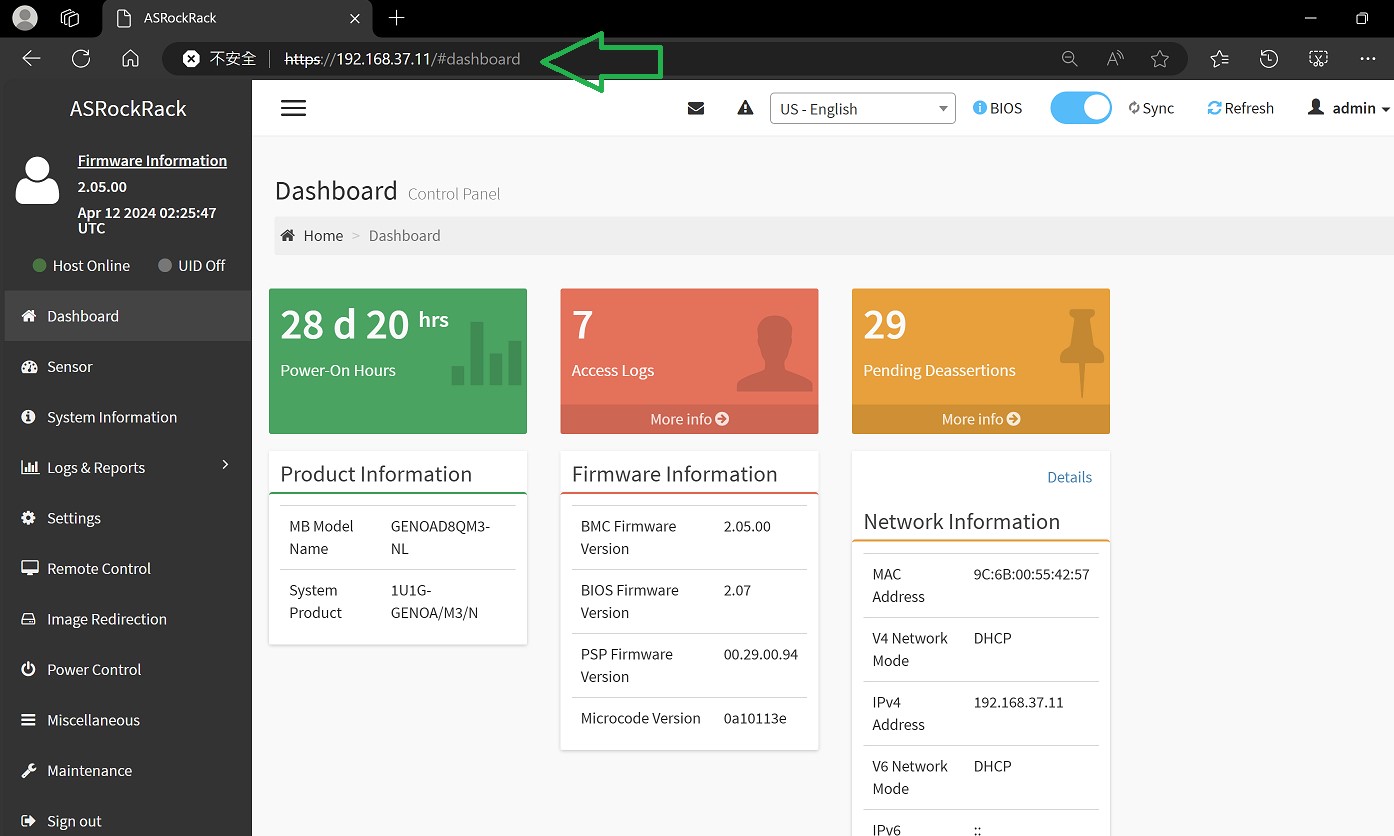
2. Click on “Maintenance” on the left, and choose “BIOS Update”.
3. In the BIOS Update page, we recommend keeping the default settings, which is to NOT Preserve BIOS configuration; As for Option, choose Immediately shutdown server to flash BIOS to perform a cleanest and most stable BIOS update. Then proceed to Select your firmware image, make sure you are correctly choosing your BIOS firmware to flash to, and then hit the Start firmware update button: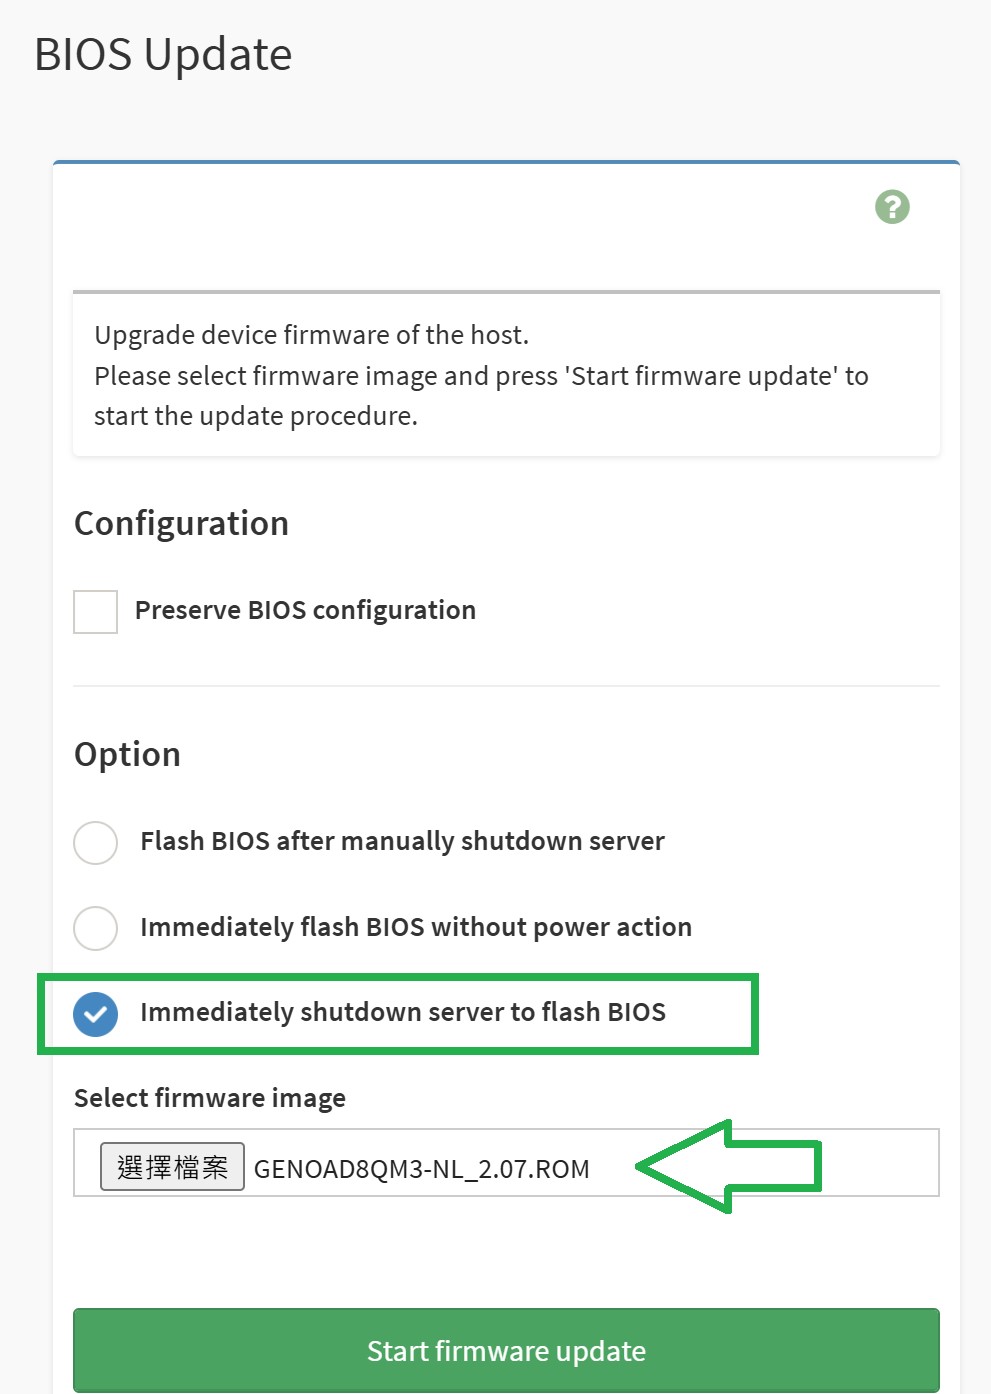
4. After that, the firmware upload shall begin. When it is done, please confirm your current and new firmware version, then hit Proceed and OK to continue to your BIOS update.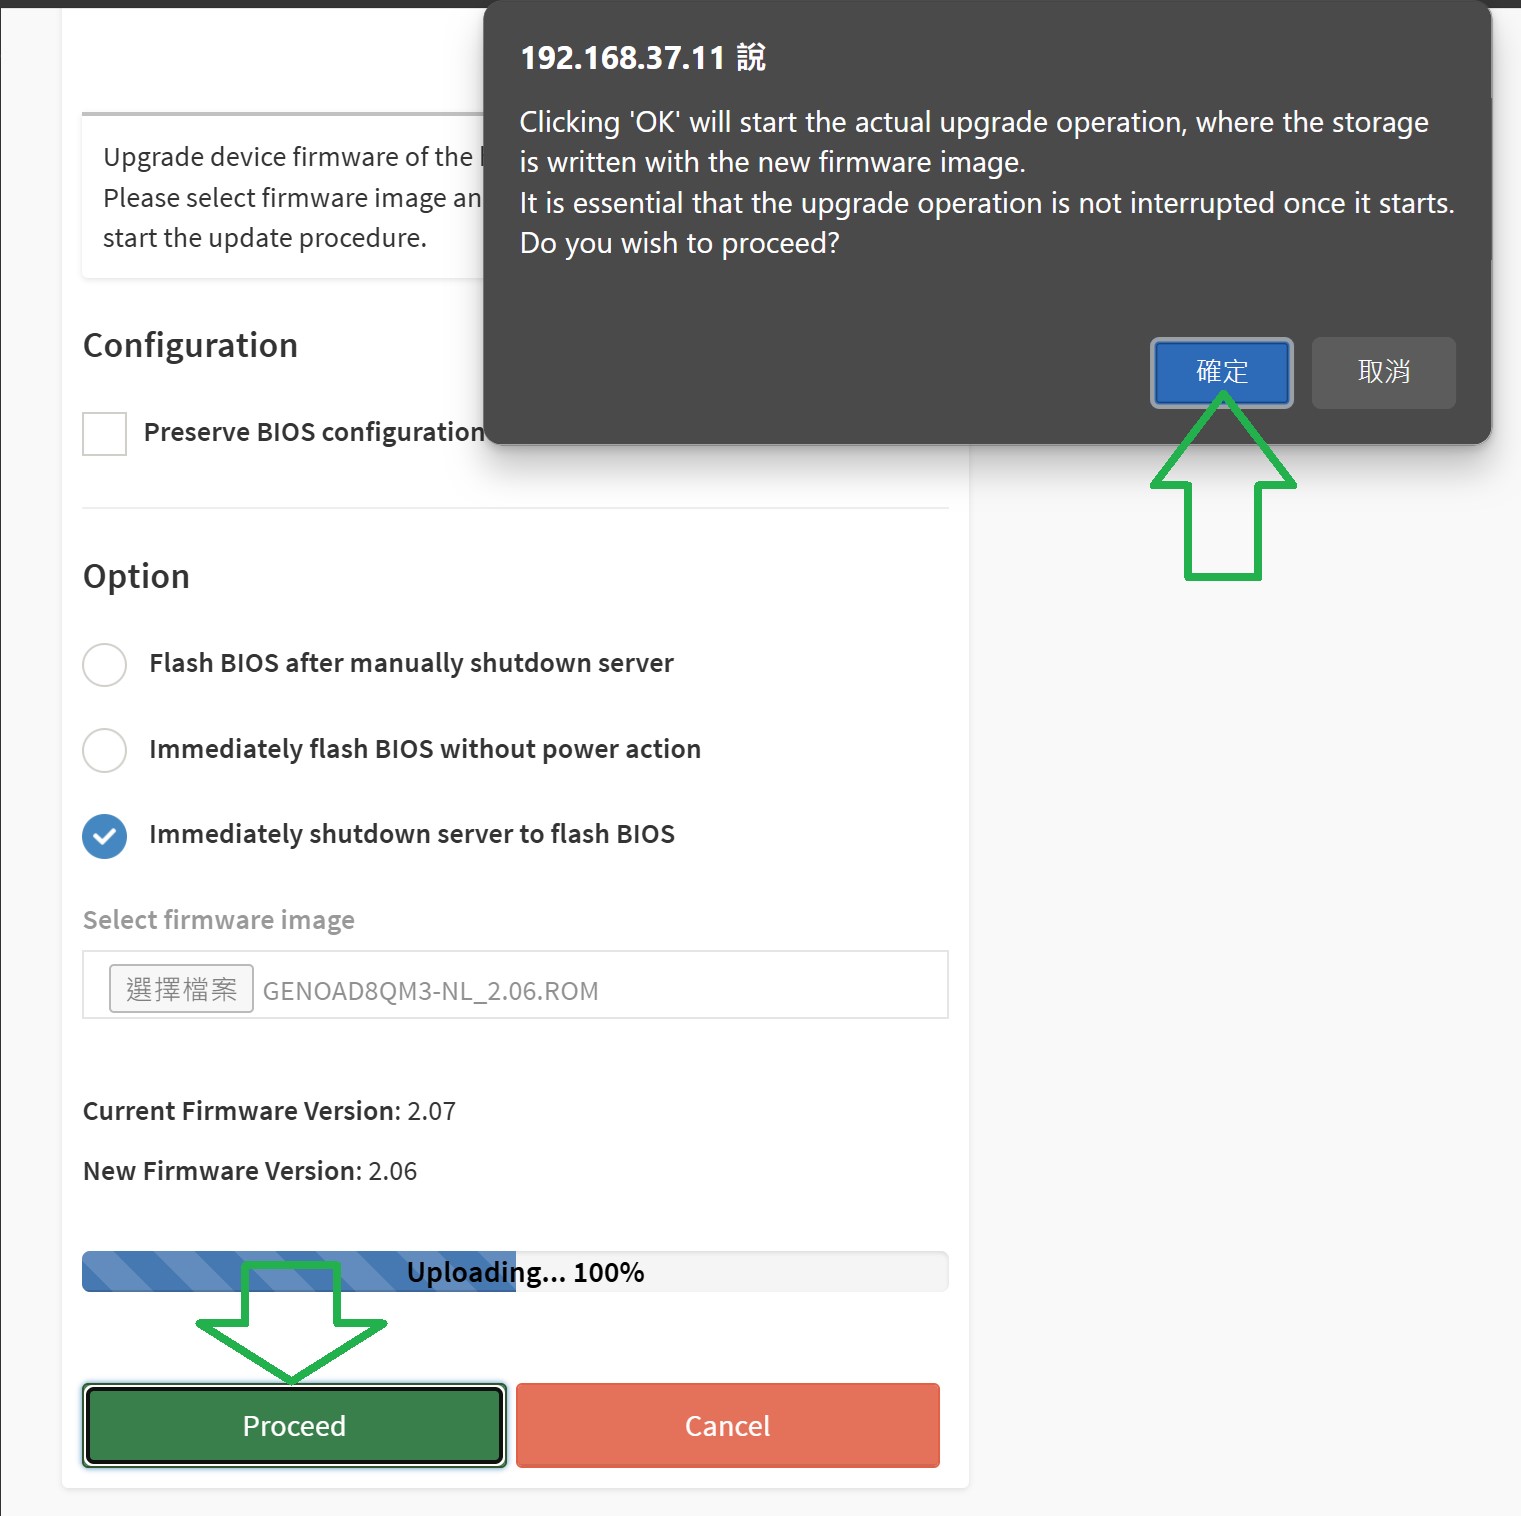
5. You shall receive a message upon the BIOS update completion, hit the button to confirm, and your system shall be rebooting with the newly updated firmware.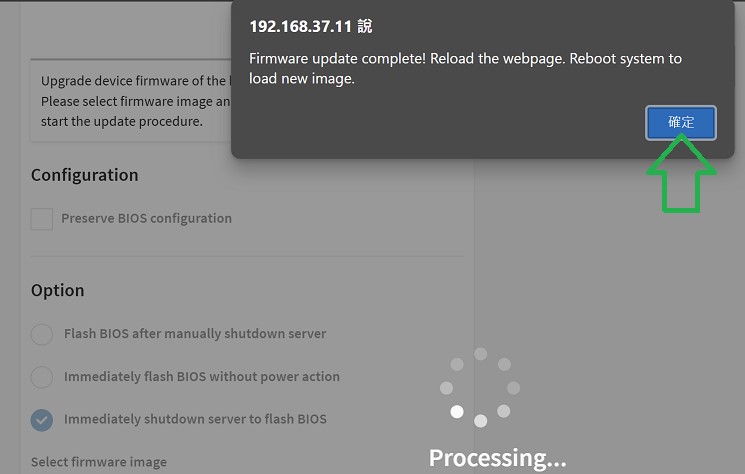
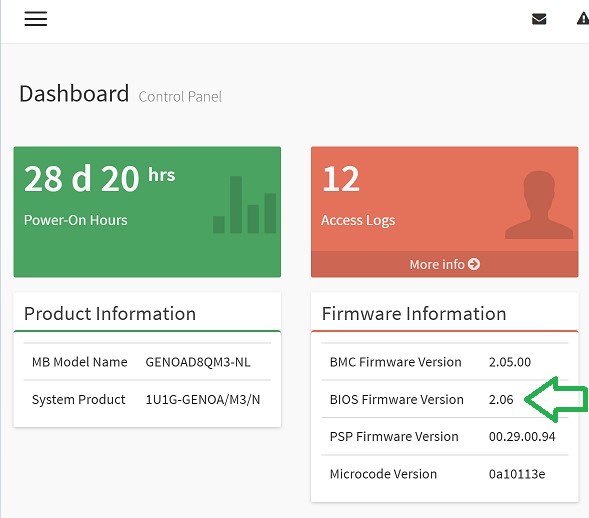
6. After the system has completed its auto reboot, you can now refresh your Dashboard page and find that the BIOS Firmware Version is updated as expected.