고객지원
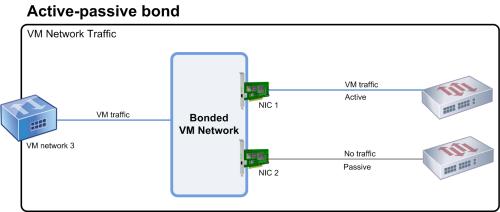
How to configure network bonding through IPMI WebUI?
Preparation:
The IPMI connection to the very system to configure network bonding function must be established first.
Step:
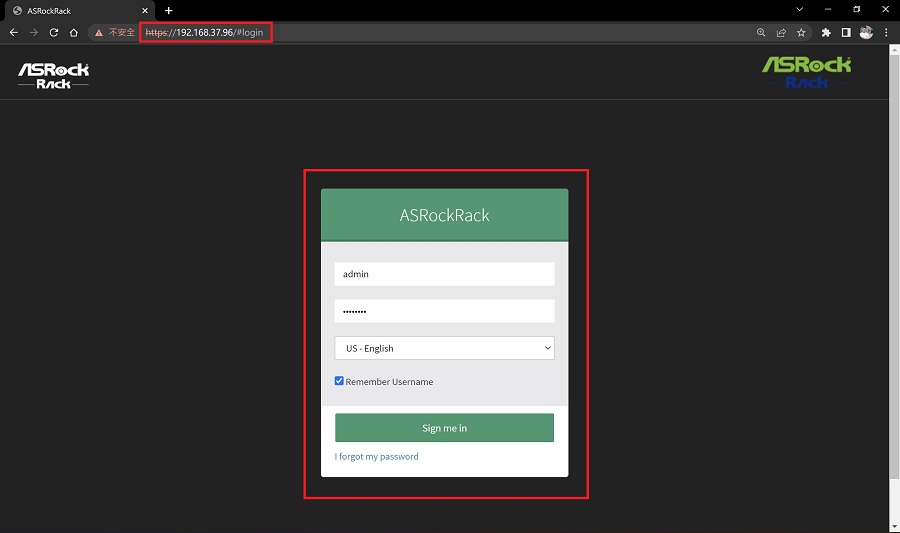
- Access HTML5 Web GUI using IE or chrome browser with the link https://[IP address] , and log in using IPMI user under the right domain.
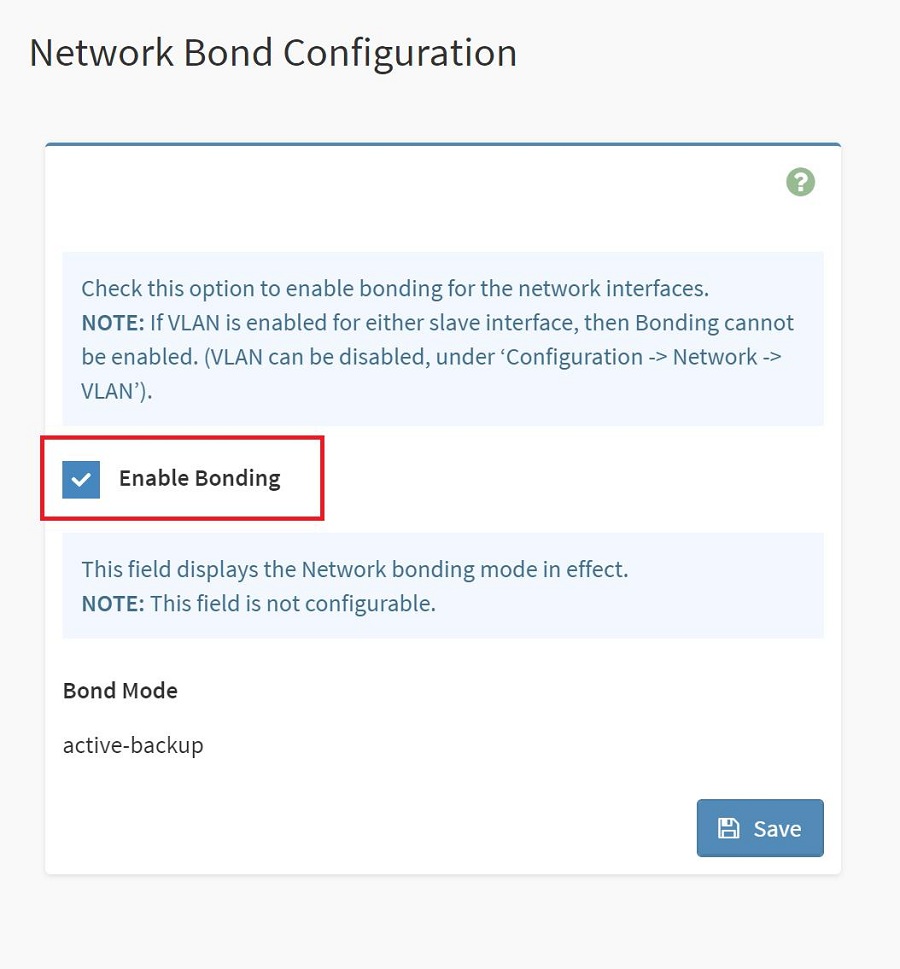
- To access bonding function in IPMI, go “Settings > Network Settings > Network Bond Configuration” and you shall see an “Enable Bonding” checkbox. And the bond mode is shown below as well. Tick the checkbox on your demand to configure bonding function, and click save.
 *Note that changing LAN settings will restart BMC network services. You will need to reconnect using new browser session after applying changes.
Bonding function check (with WebUI):
Bonding function could be checked with IPMI WebUI. If bonding is enabled, go “Settings > Network Settings > Network IP Settings”, you shall find the bond shown in LAN Interface.
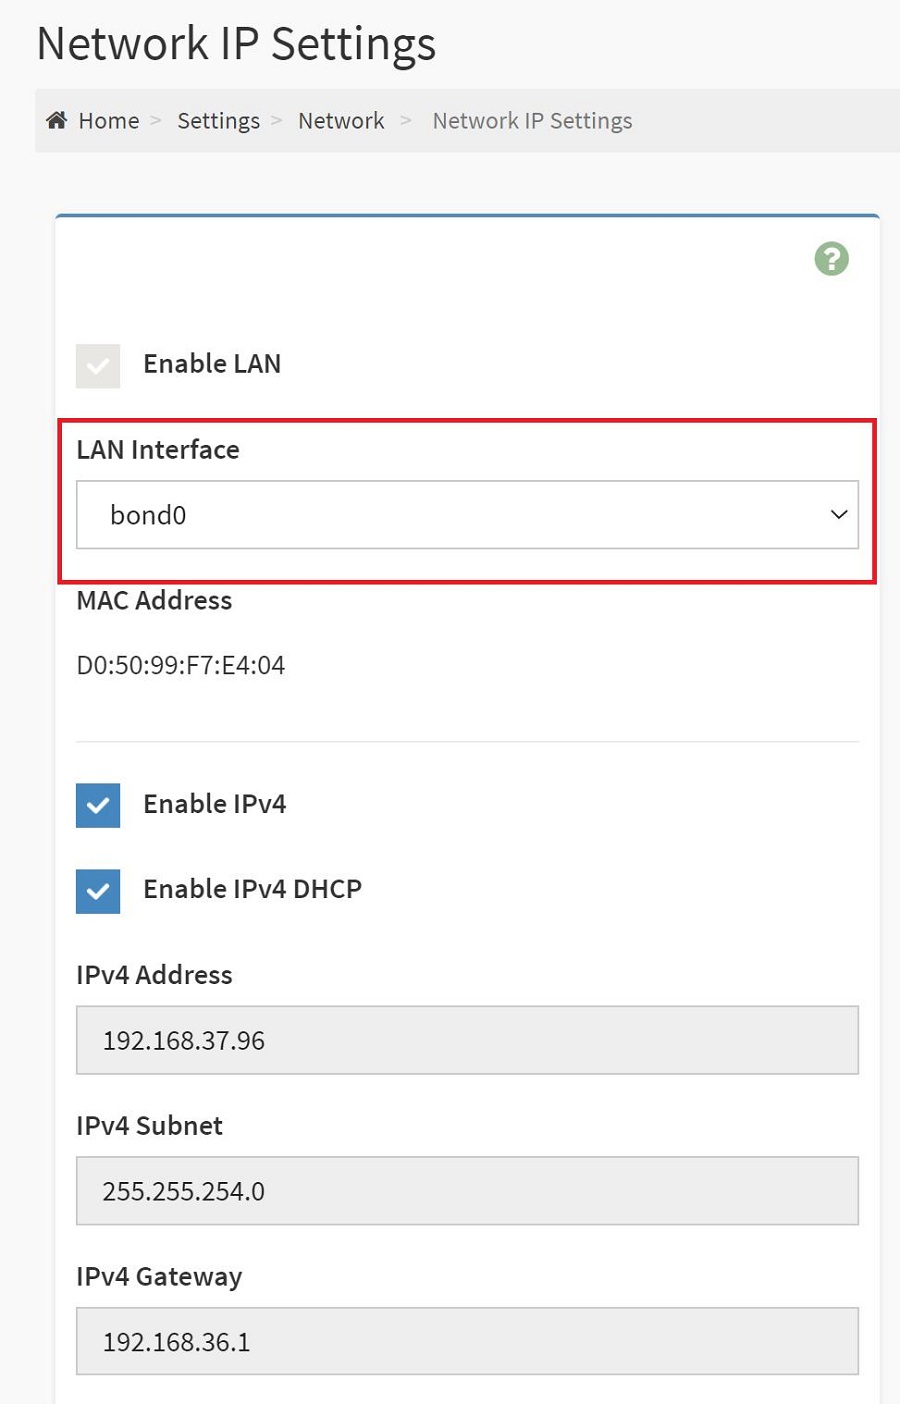
However, if the bond is disabled, you shall find the LAN inputs shown individually in LAN Interface.

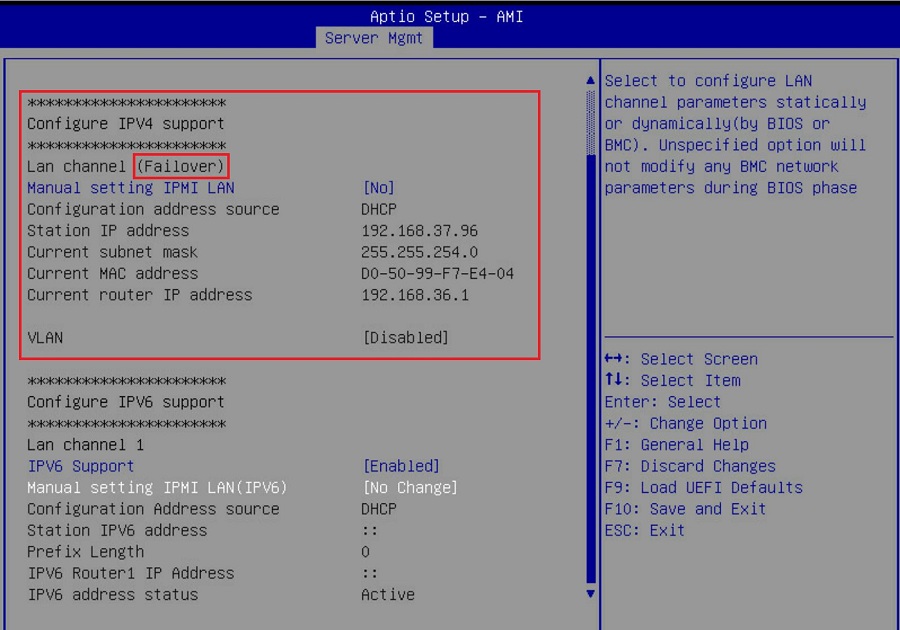
Bonding Function Check (in BIOS):
To check if the bonding function is working and configured successfully, we may check it out in BIOS menu > Server Mgmt > BMC Network Configuration.

If bonding function is enabled, you shall find one and only one LAN signal detected with “(Failover)” written after the Lan channel.
On the other hand, if the bonding function is disabled, you shall find Lan channels detected individually and listed below.

Done!