Category: BMC
To update the BMC firmware via IPMI, please follow the steps below.
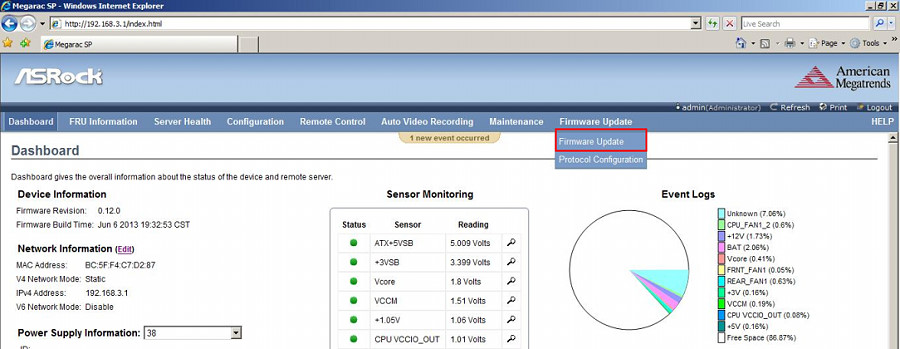
- Enter the management system and click the Firmware Update from the top menu bar.*Note: please make sure your browser is IE v11.0.9600.17239, FireFox v31.0, Chrome v37.0.2062.120 or above version.
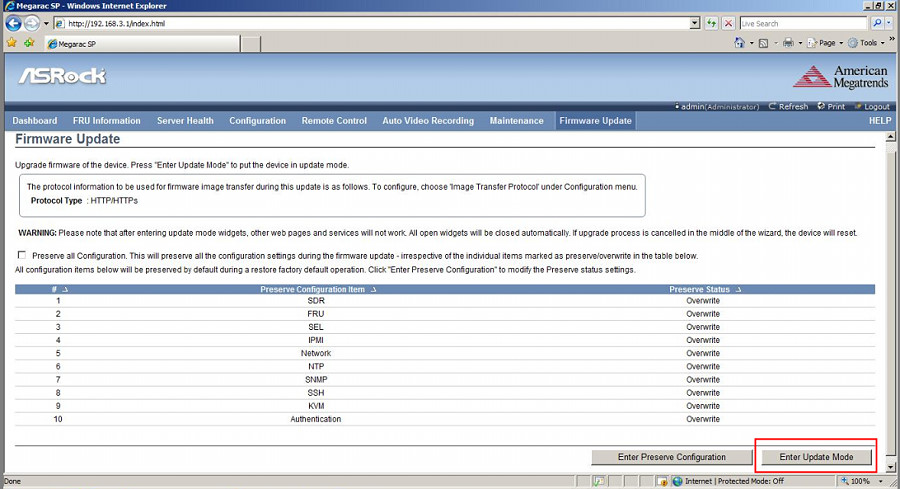
- Click Enter Update Mode > OK.
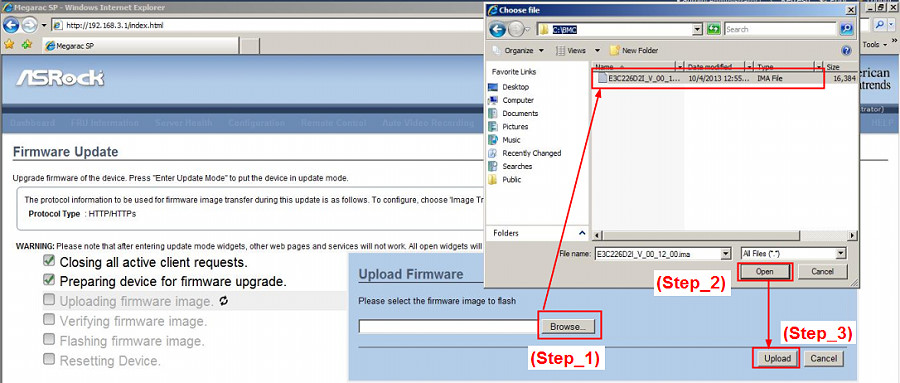
- Click Browse… to select the BMC firmware file from the directory. Click Open > Upload.
- Click Proceed > OK to start.
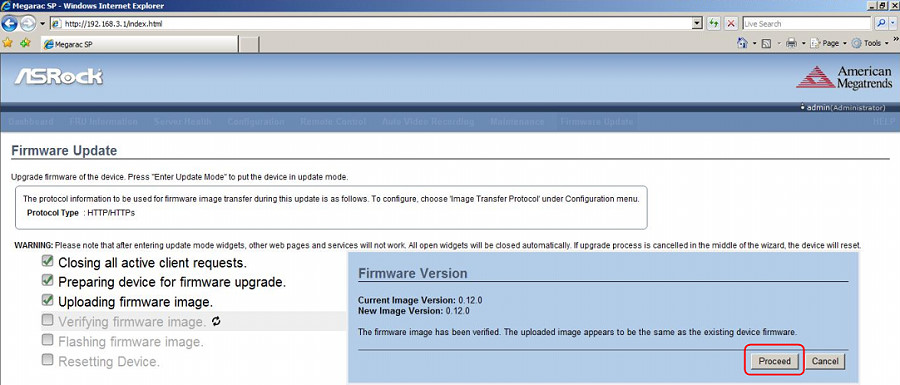
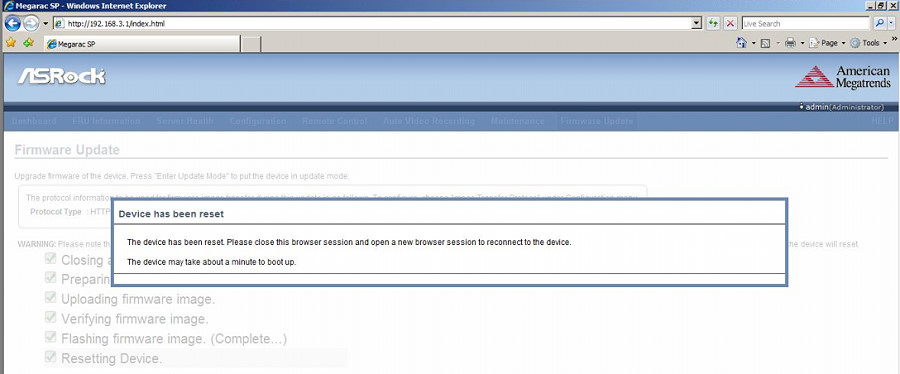
- When you see the screen below, firmware upgrade is completed.
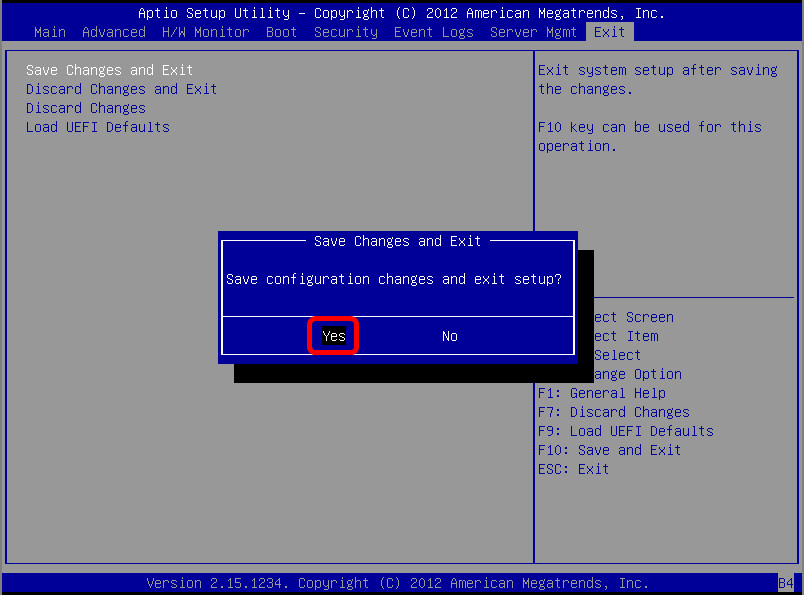
- Go back to your server and, in the BIOS screen, press [F10] and Yes to save the configuration changes and reboot the server.
 The format of our documents are in PDF files. If you have not installed Adobe Acrobat Reader, please get it from Adobe.
IPMI Configuration User Guide (PDF)
- Equipment preparations:
RJ45 Ethernet cable
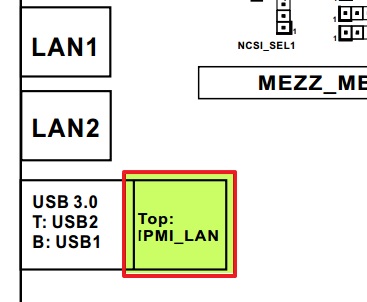
- Make sure RJ45 port plug into IPMI_LAN port on the server side board, the RJ45 port plug into general LAN port on client side.

- Please follow the BIOS setting for the server side: Advanced→Serial Port Console Redirection→
SOL
- Console Redirection: [Enable]
- Console Redirection Settings:
Bits per second: [115200]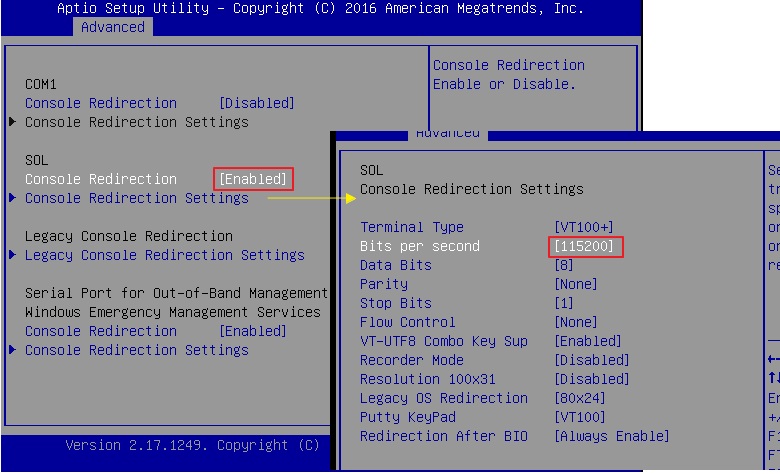
- Legacy Console Redirection
- Legacy Serial Redirec: [SOL]
Legacy Serial Redirec: [SOL]
- Windows EMS
- Console Redirection: [Enable]
- Console Redirection Settings:
Out-of-Band Mgmt Port: [SOL]
Bits per second: [115200]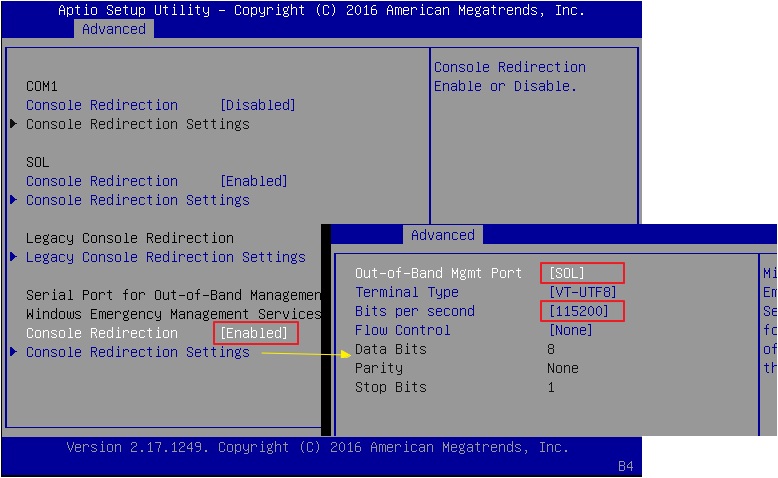
- Megarac SP setting (client side): Remote Control→Java SOL
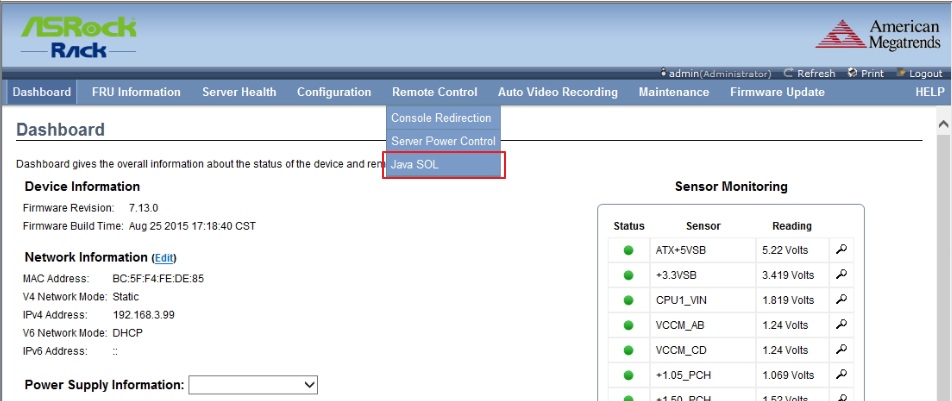
Click the [Java SOL]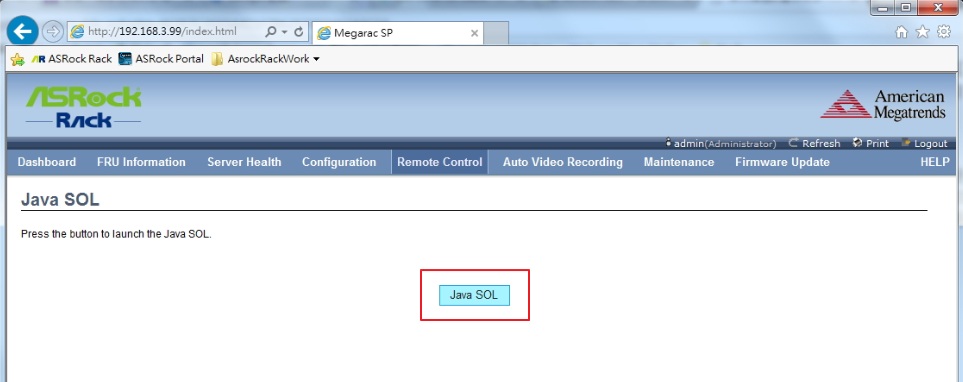
NOTE: A compatible JRE must be installed in the system prior to the launch of the JNLP file. - Please follow the Java SOL setting, and click [Connect].
BMC IP: {Station IP address}
Username: {Megarac SP login ID} ** “admin” in default
Password: {Megarac SP login password} ** “admin” in default
Volatile-Bit-Rate: [115.2K]
Non-Volatile-Bit-Rate: [115.2K]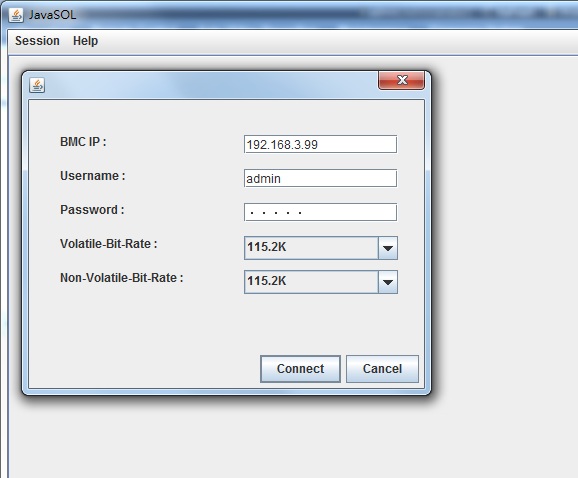
- eboot server system and SOL has start working.
SOL to BIOS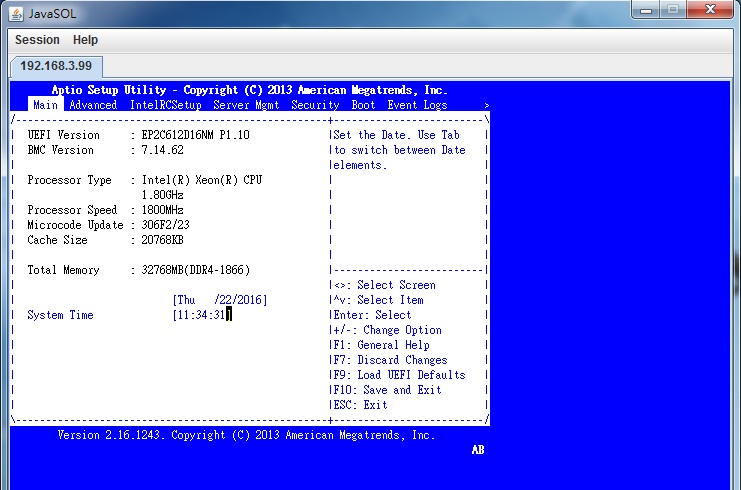
SOL to PXE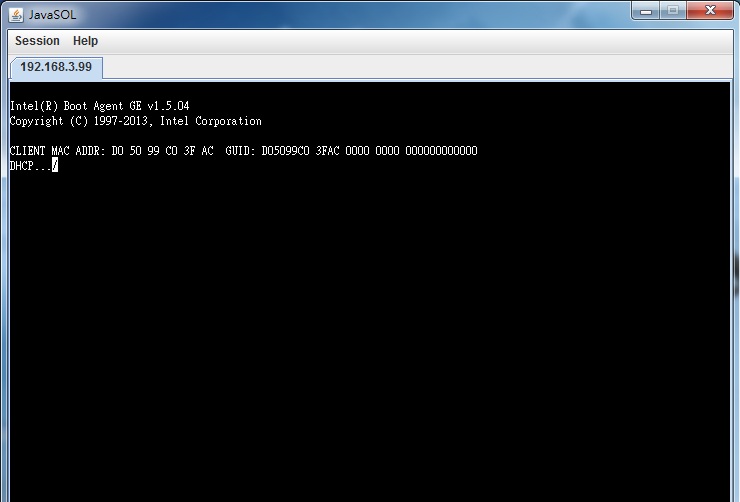
SOL to UEFI PXE
SOL to OS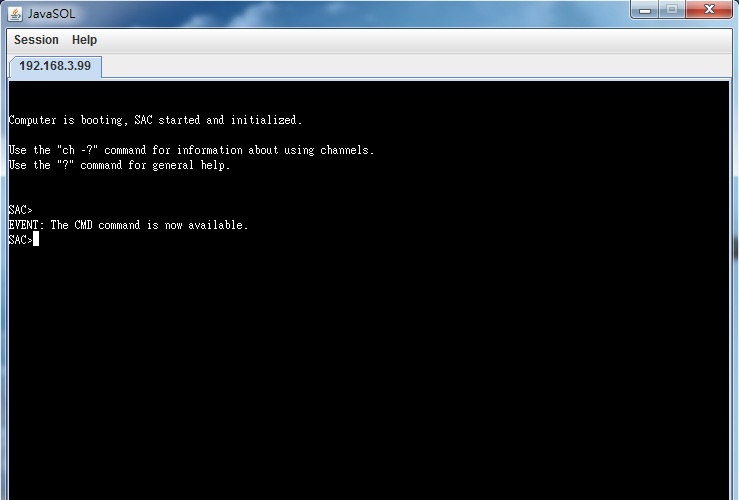
- For Megarac SP Console Redirection does not work on JAVA Version 8 Update 131, kindly rollback to Java version 8 Update 121 for the temporary solution.
We will release the updating BMC FW to website. Please keep track your model' latest BMC FW on our website from time to time. - Setting of Java Version 8 Update 121 to run Console Redirection
- 1. Uninstall the JAVA Version 8 Update 131, and install to Java Version 8 Update 121.Download link:
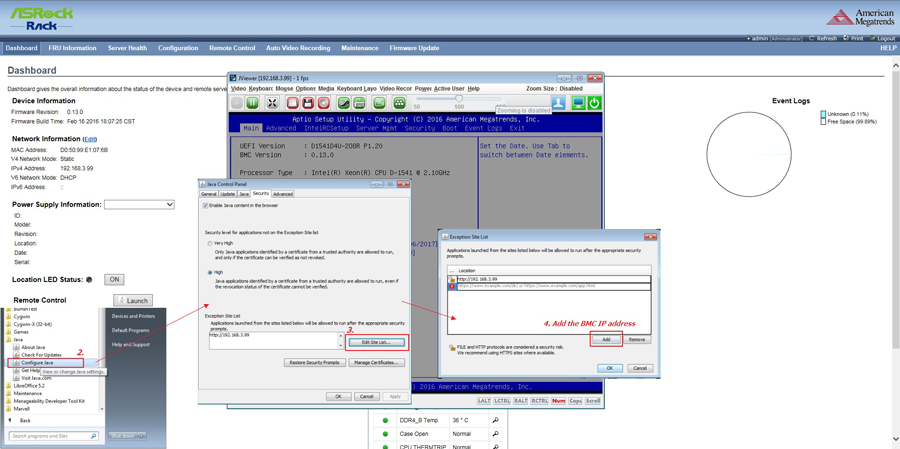
http://www.oracle.com/technetwork/java/javase/downloads/java-archive-javase8-2177648.html - 2. After Java Version 8 Update 121 installed, open the “Configuration Java”.
- 3. Select “Edit Site List…” from “Security” tab.
- 4. Add the BMC IP address into the Exception Site List.
- 5. Open a new web browser to connect to the Megarac SP and launch the JViewer.
Steps to update BMC firmware via IPMI webUI
(Supports server motherboard built with BMC AST2500/AST2600 controller)
BMC Firmware Update
[Maintenance] -> [Firmware Update]
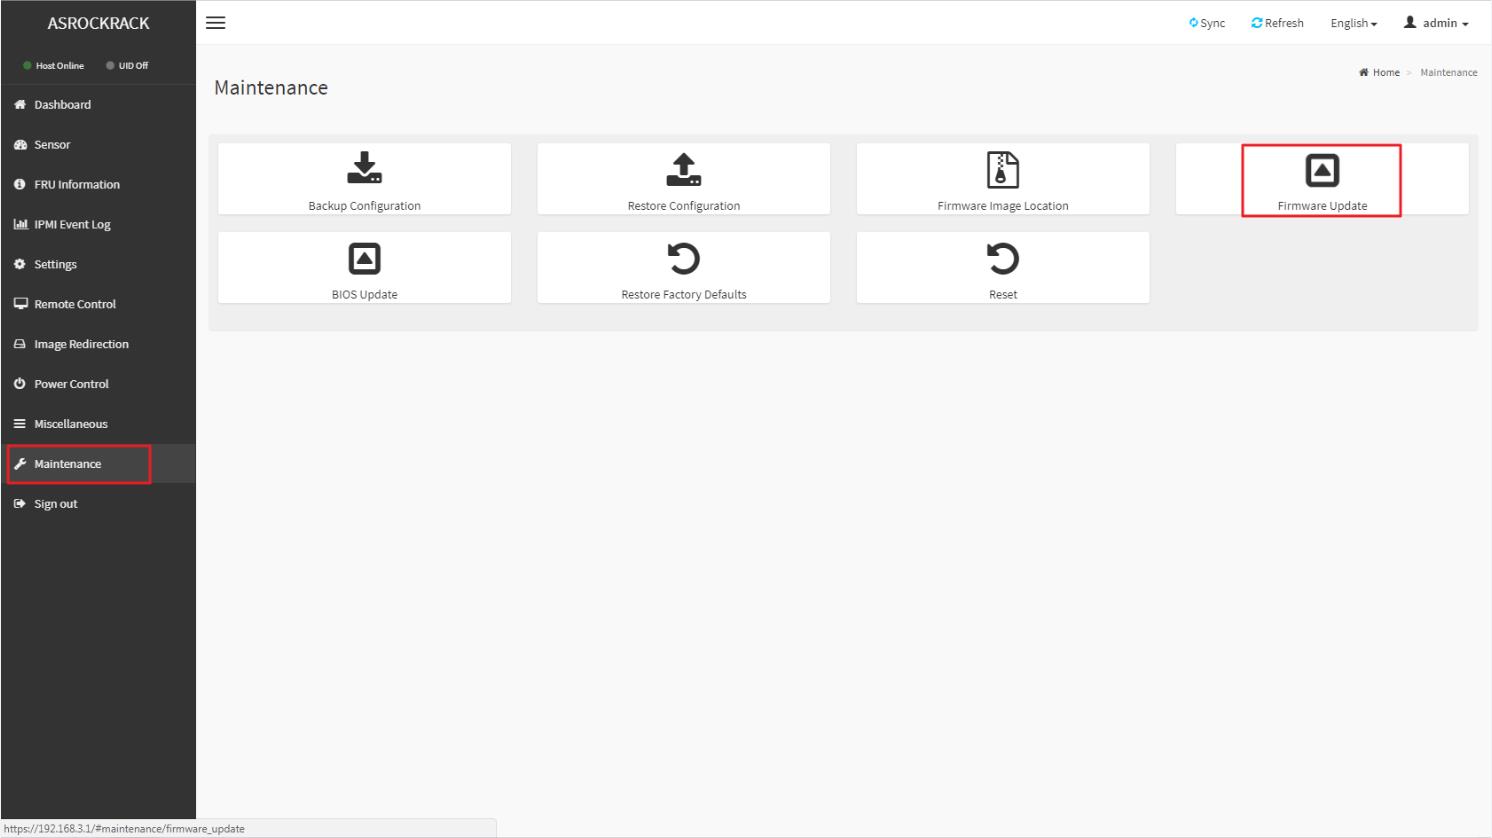
This wizard will takes you through the process of firmware upgrades.
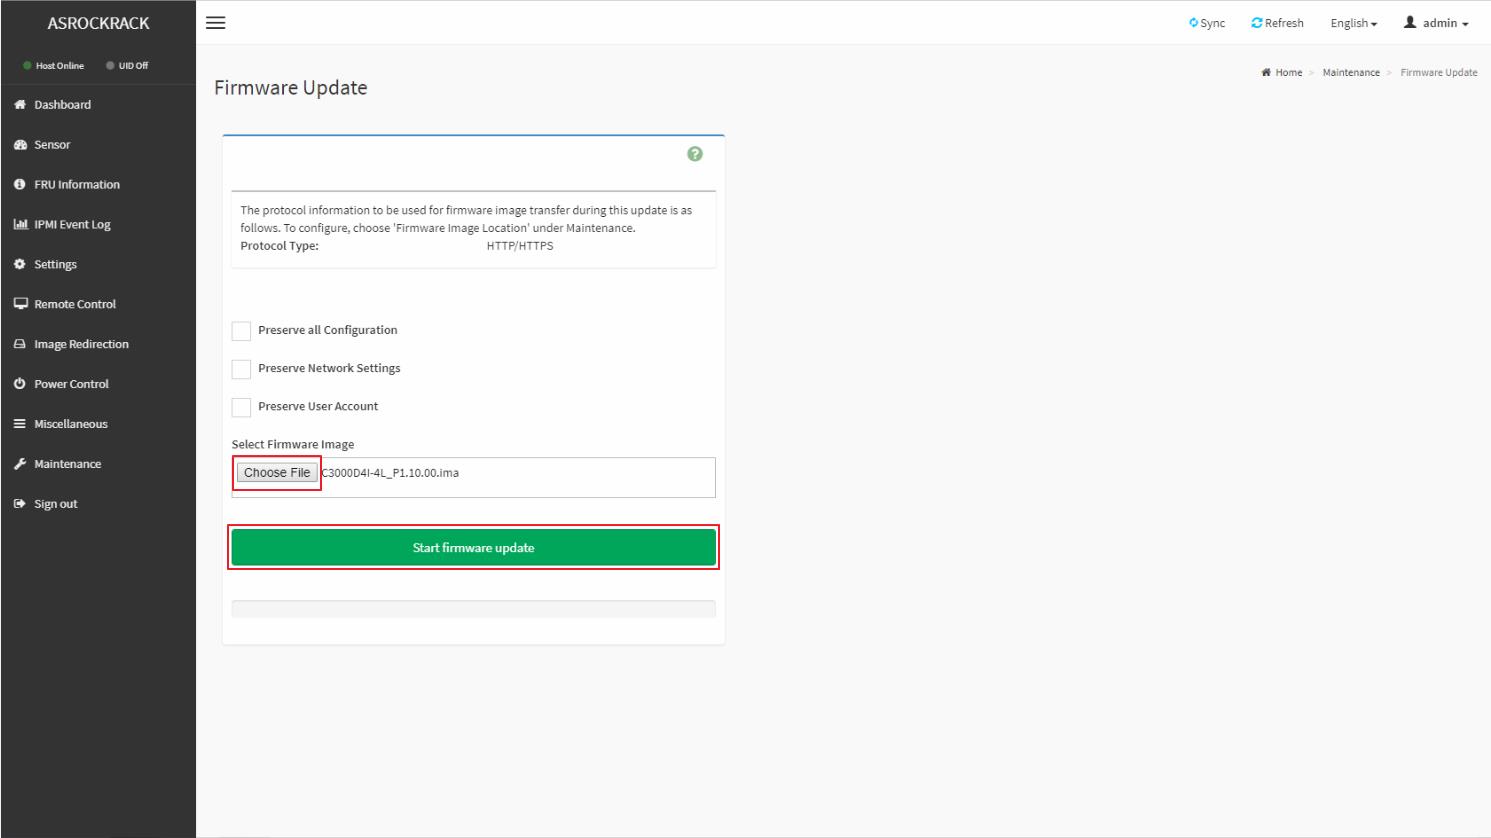
Click the “Choose File” to select the BMC FW file. Then click “Start firmware update” for the upgrade process.
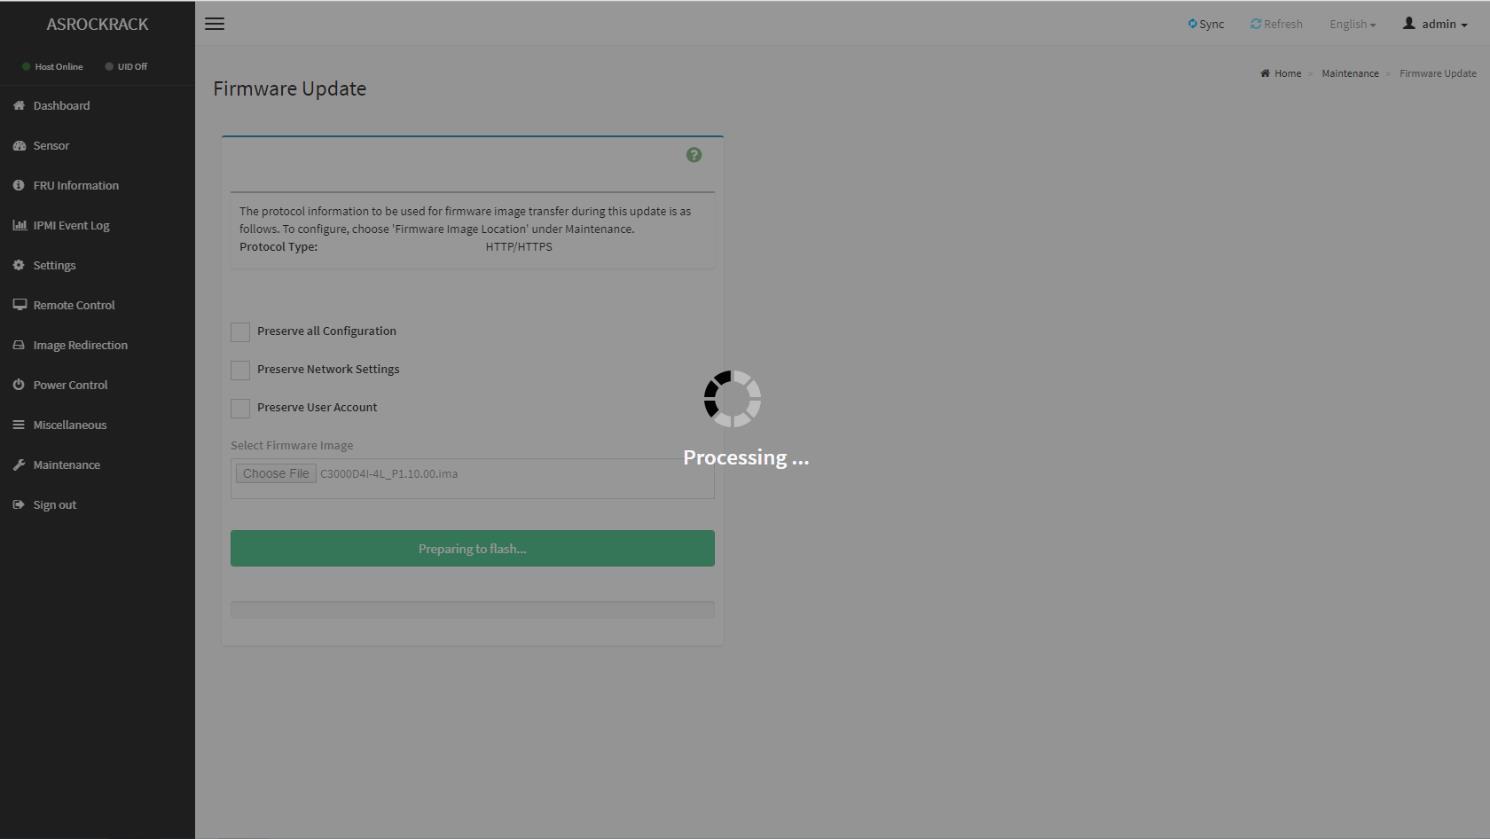
FW verification processing, please wait a few second..
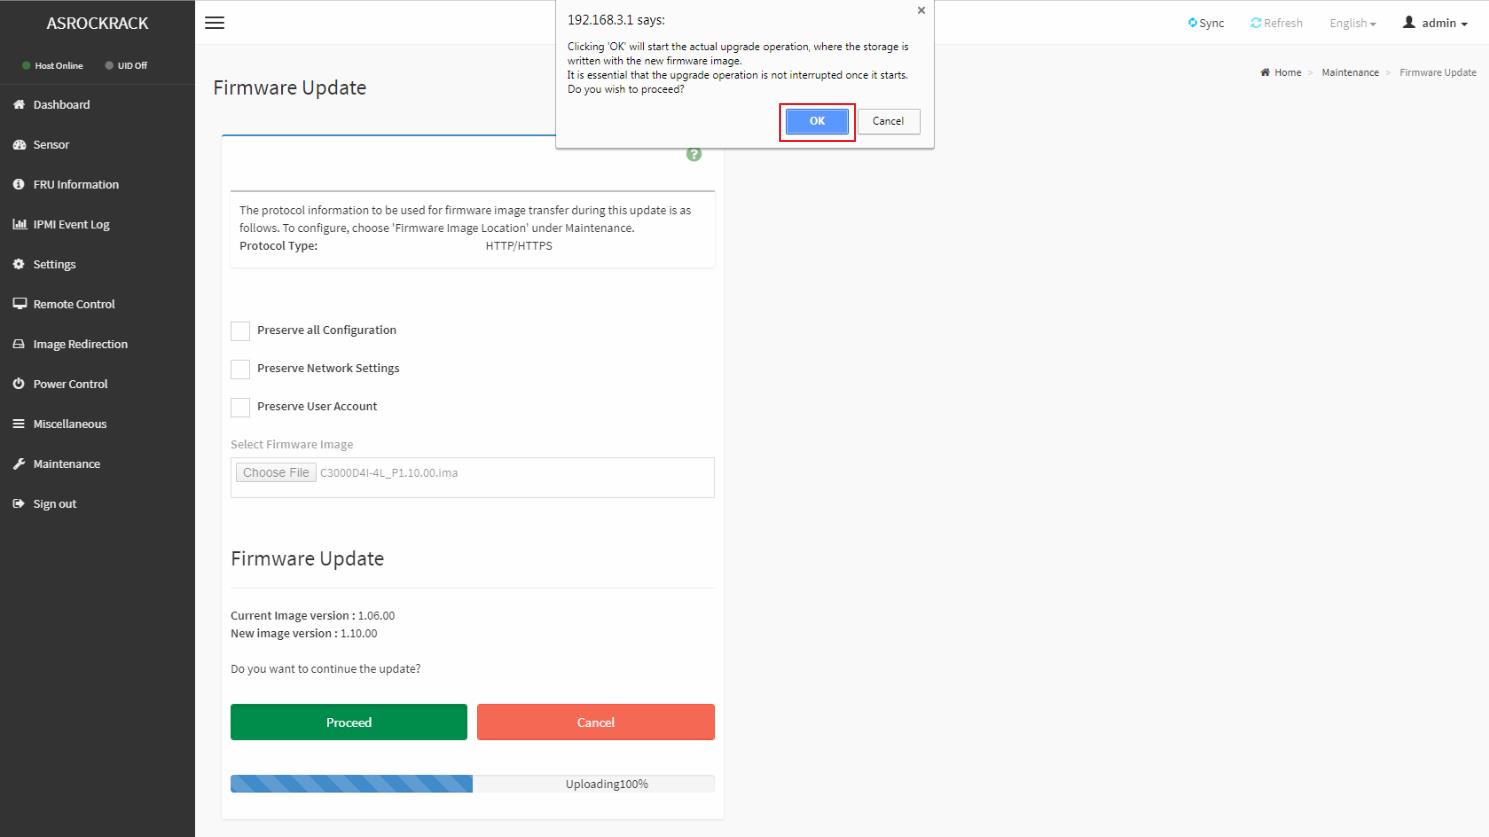
Click “Proceed” to continue the BMC FW upgrade process.
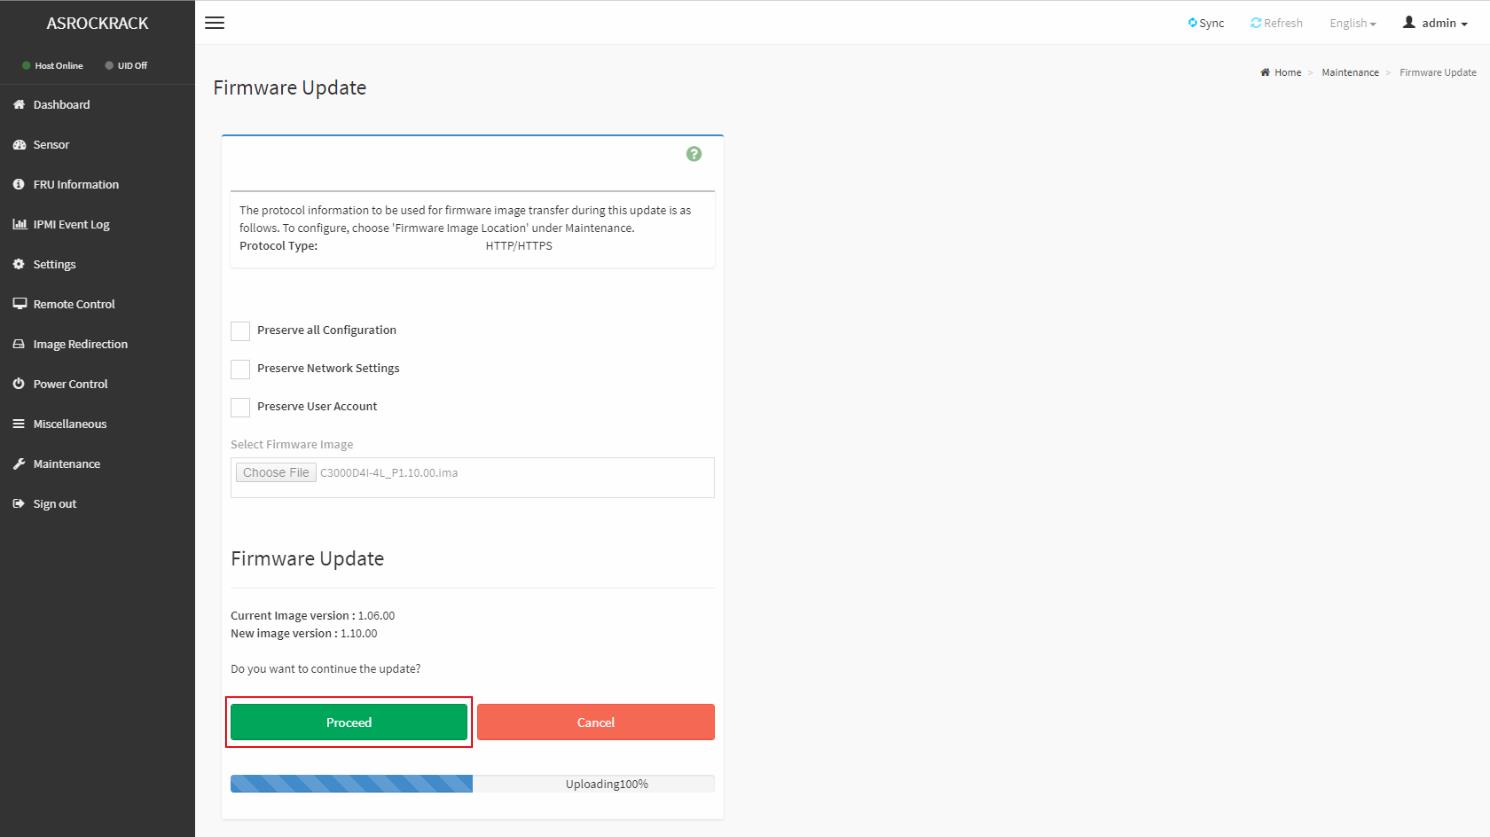
Click “OK” to start the actual BMC FW upgrade operation.
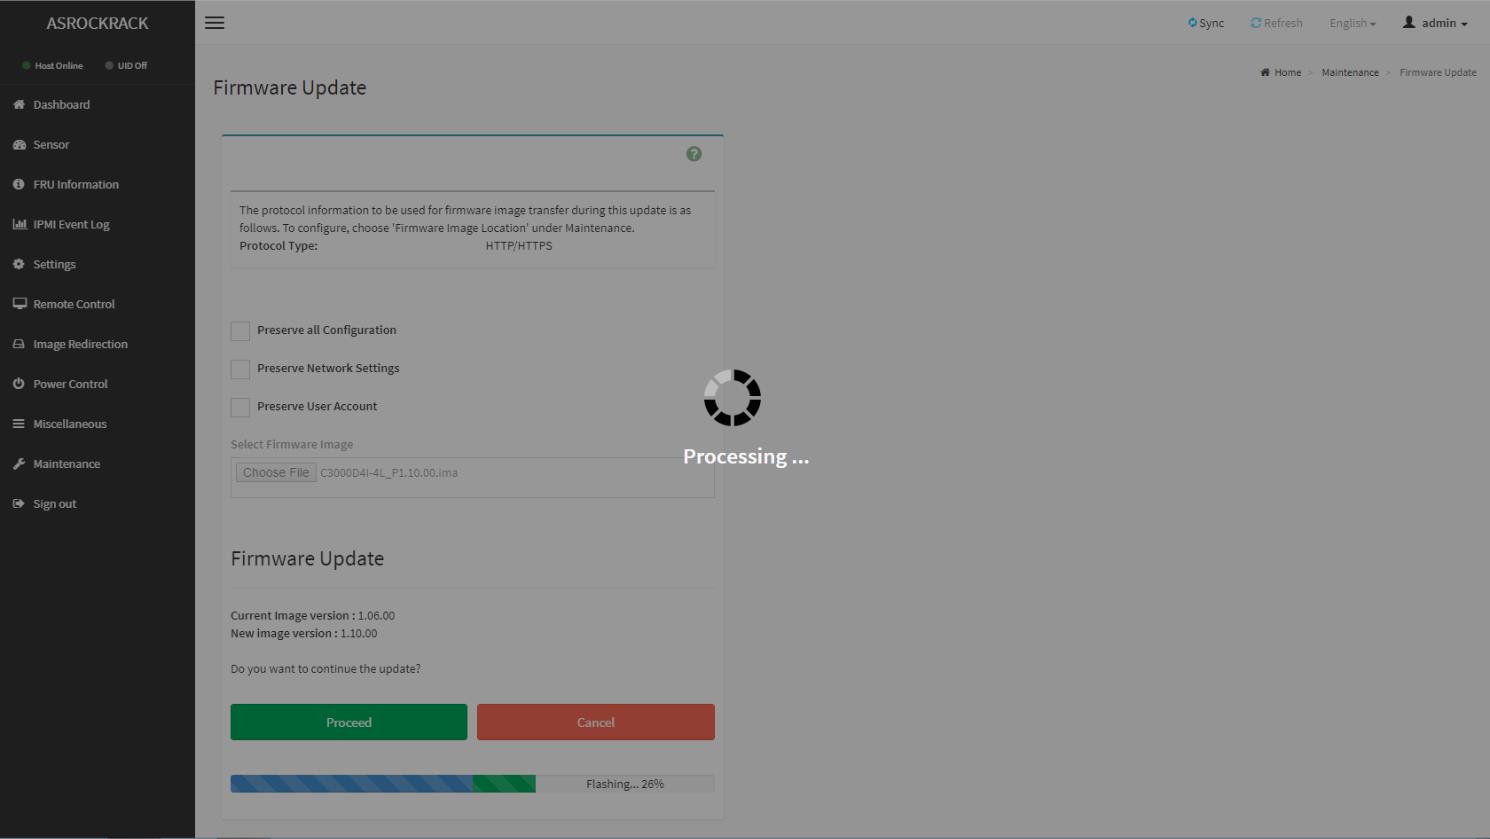
FW updrage is processing, please wait a few second..
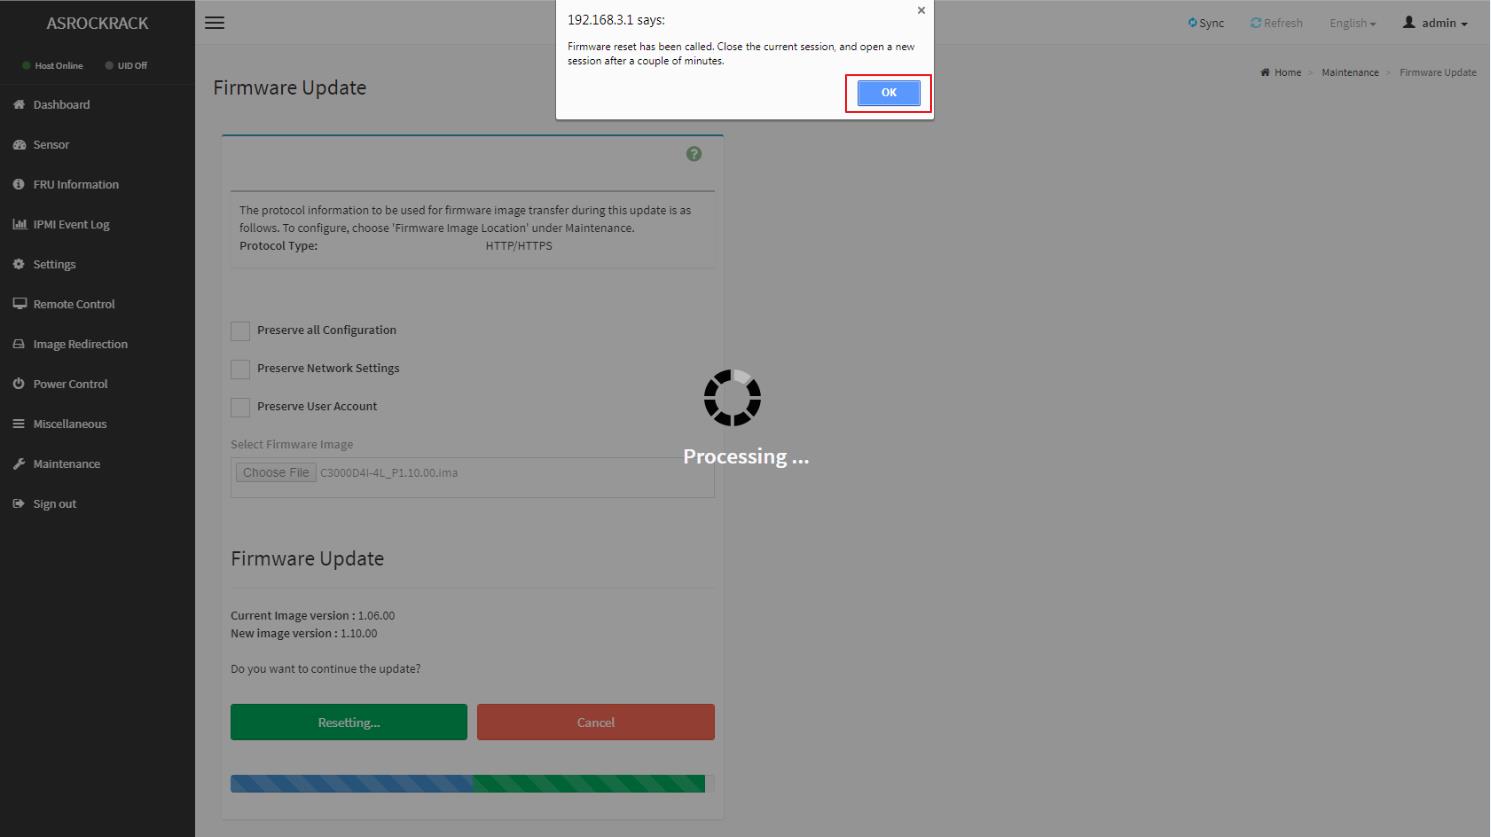
BMC FW upgrade process finished. Click “OK” and reboot the system.
Remark: Clear the browser cookies after the BMC FW upgrade process finished.
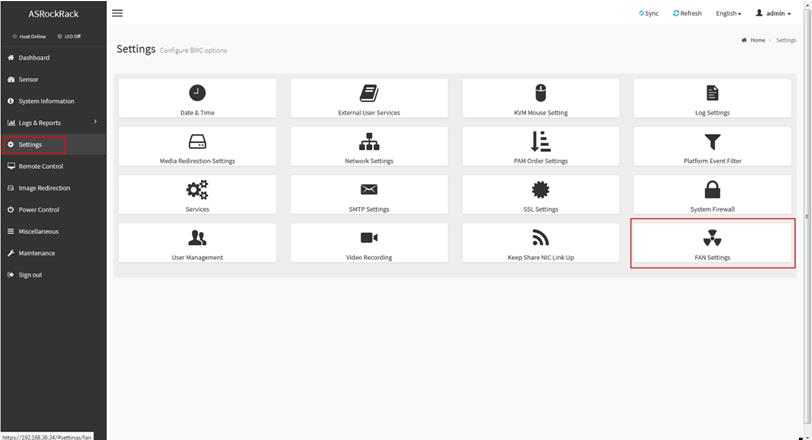
1. Login to IPMI webUI > Settings > FAN Settings
2. Chose Open Loop Control Table, then set your customize fan table and save.
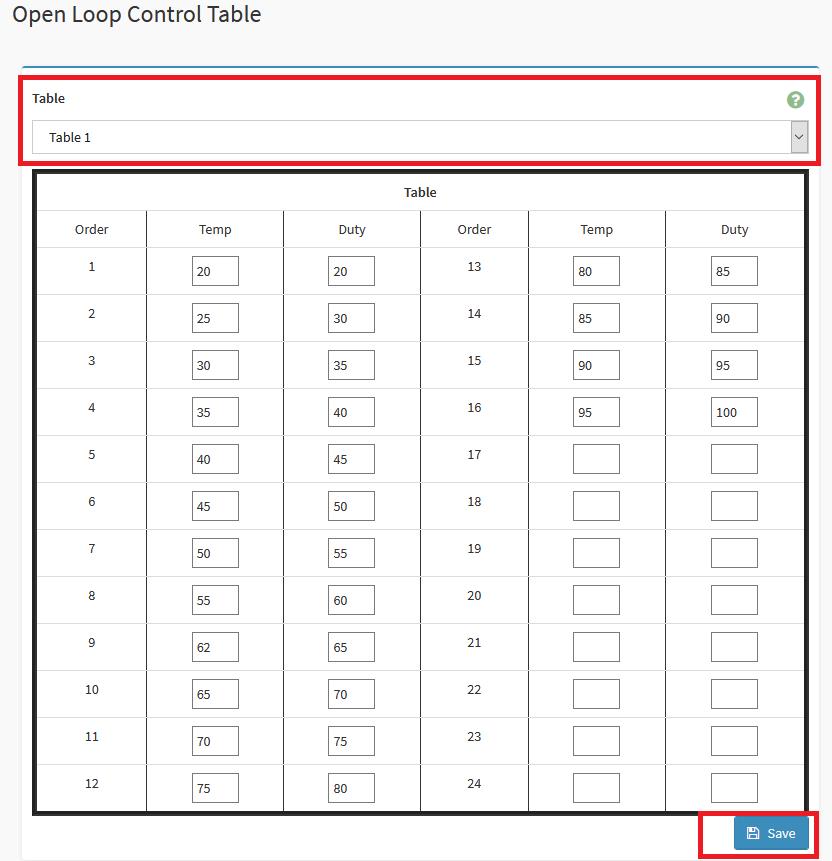
Sample Desc: Assuming the above Open Loop Fan Table is for CPU temperature sensor, when the CPU temperature reaches between 20~25 degrees, the fan duty will be at 30%. If CPU temperature reaches 57 degrees, fan duty will be at 60%.
3. Chose Close Loop Control Table, then set your customize fan table and save.
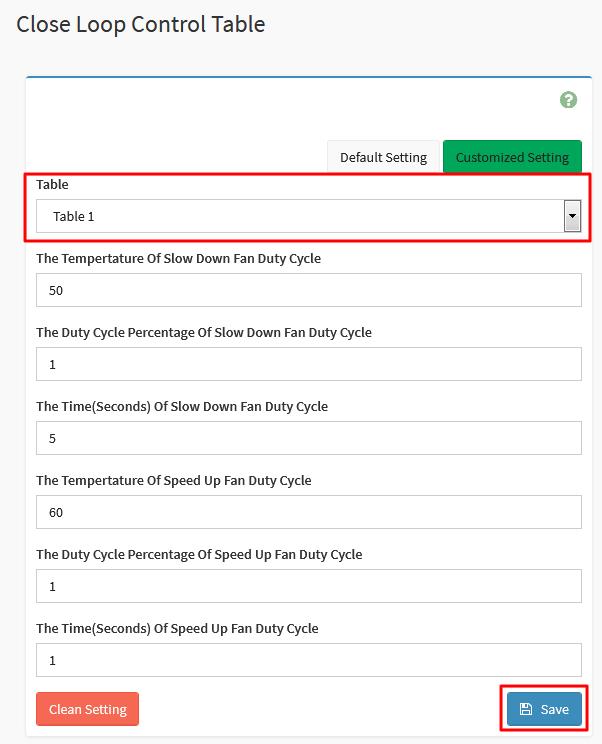
Sample Desc: Assuming above Close Loop Fan Table is for CPU temperature sensor, when the CPU temperature is higher than 60 degrees, the fan duty cycle will increase at a rate of 1% per second; when the CPU temperature is lower than 50 degrees, the fan duty cycle will decrease by 1% every 5 seconds.
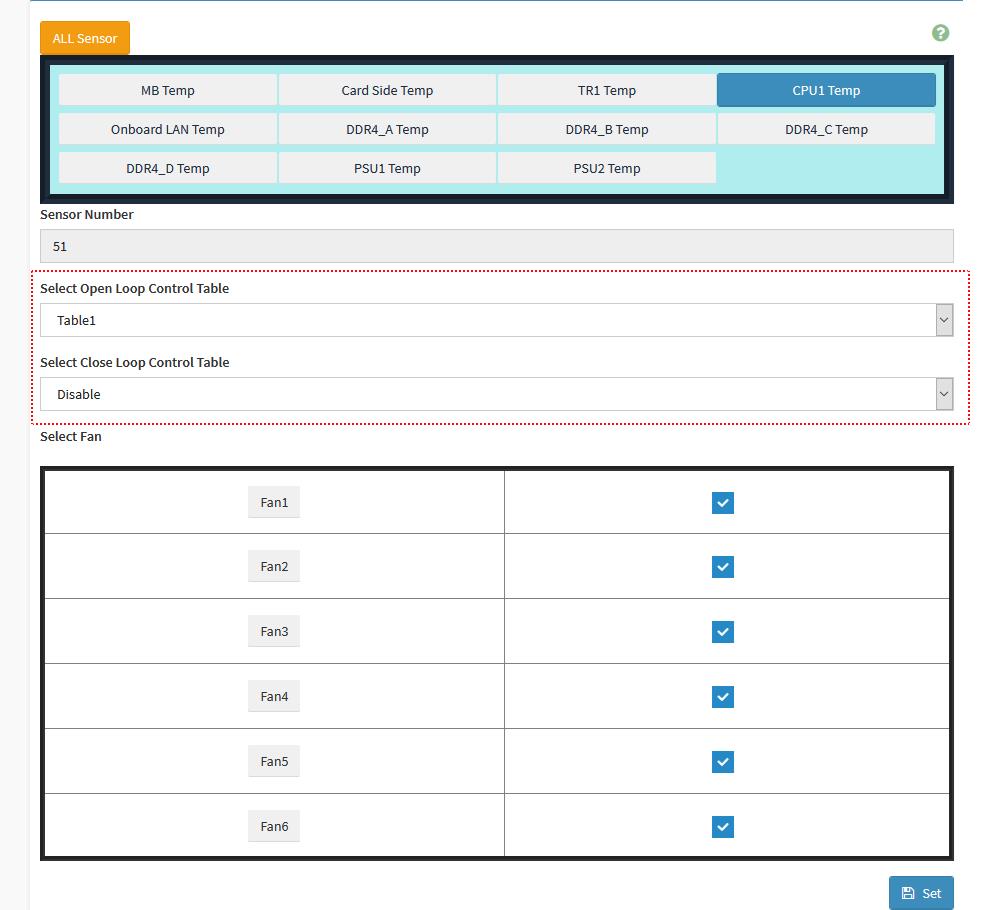
4. Go to IPMI webUI > Settings > FAN Settings > Temperature Sensor and Corresponding Fan Table
5. Chose the sensor and fan table you want to base on. And select the fan which will follow the rule.
For example, the following screenshot setting is
FAN1~6 will base on CPU1 temperature and follow to FAN table 1 which from the “Open Loop Control Table”.
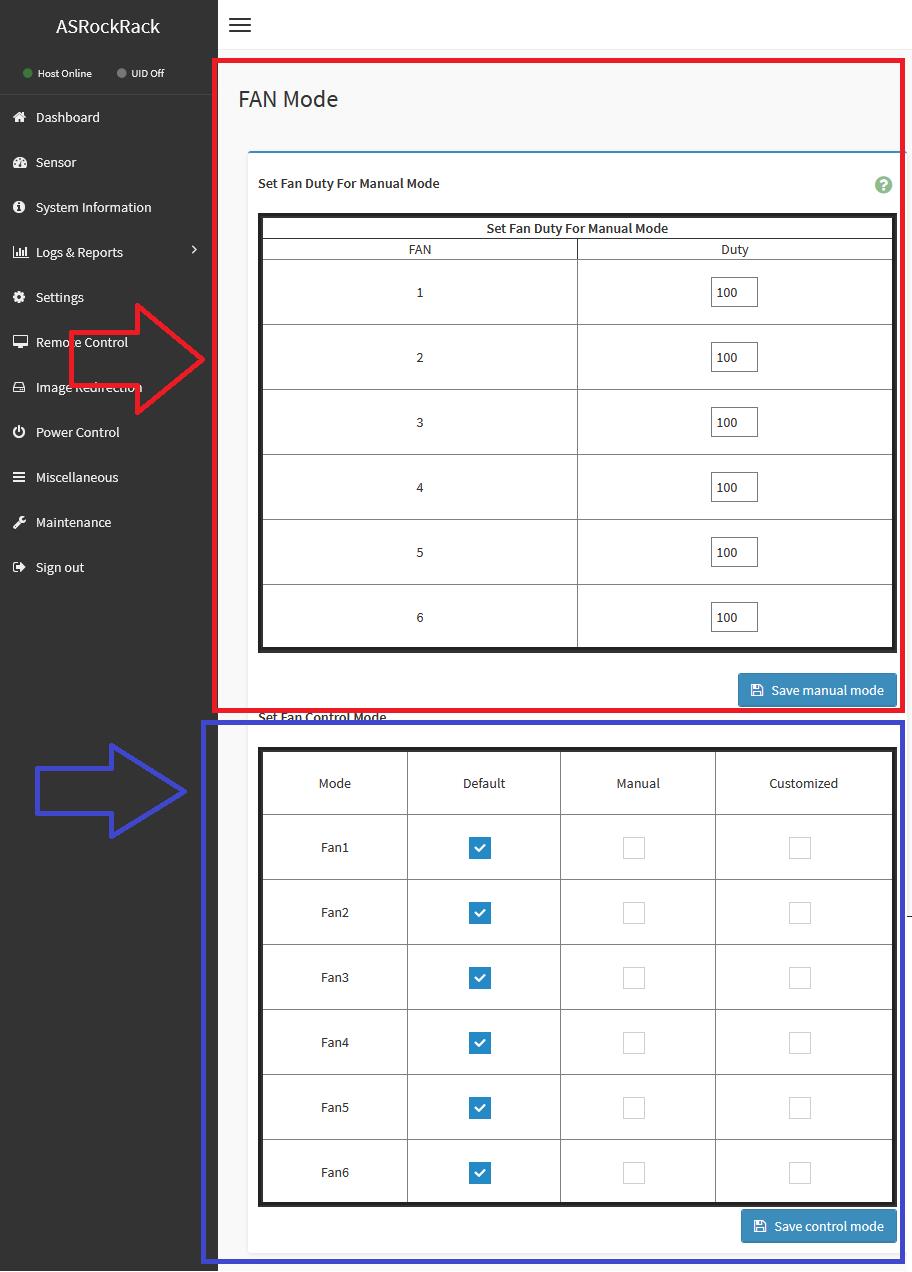
6. Go to IPMI webUI > Settings > FAN Settings > FAN Mode
7. Select different fan mode
Customized mode
If you want to let the fan to follow fan table
You will need to modify the fan you need to customized mode as following blue frame then save control mode
Manual mode
If you want to set fan to static mode, you need to set fan duty as following red frame first, then save manual mode
Second, select which fan you need in manual mode as following blue frame then save control mode
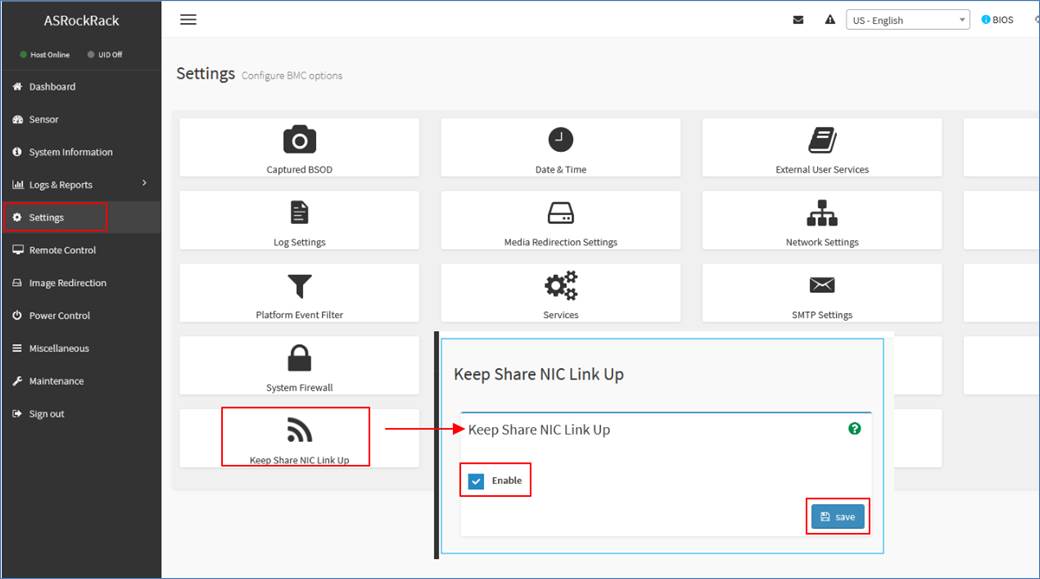
If your access to BMC Jviewer iKVM (Launch Java KVM) with NCSI port connected but encountered the intermittent connection issue, please try to enable the “Keep Share NIC UP” setting.
IPMI webUI -> Settings -> “Keep Share NIC UP” -> tick “Enable” and saved.
Preparation:
The IPMI connection to the very system to configure network bonding function must be established first.
Step:
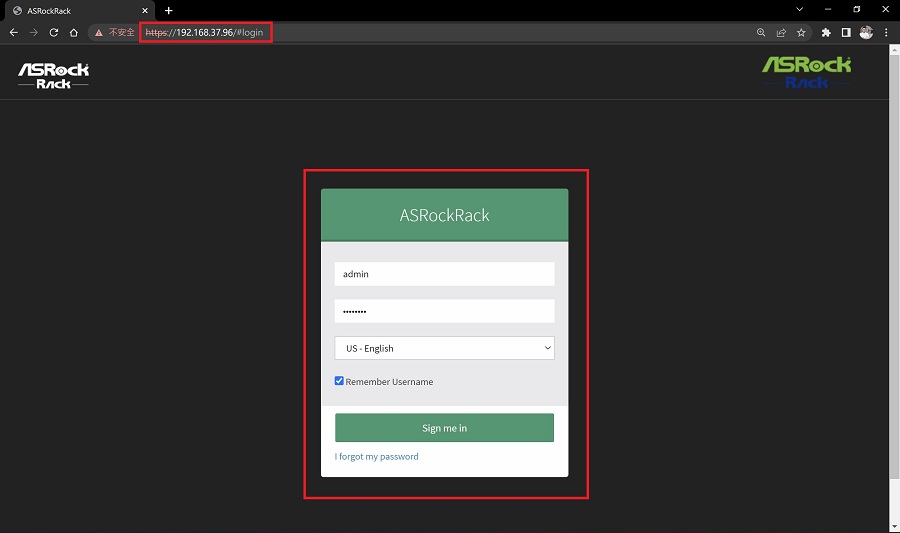
- Access HTML5 Web GUI using IE or chrome browser with the link https://[IP address] , and log in using IPMI user under the right domain.
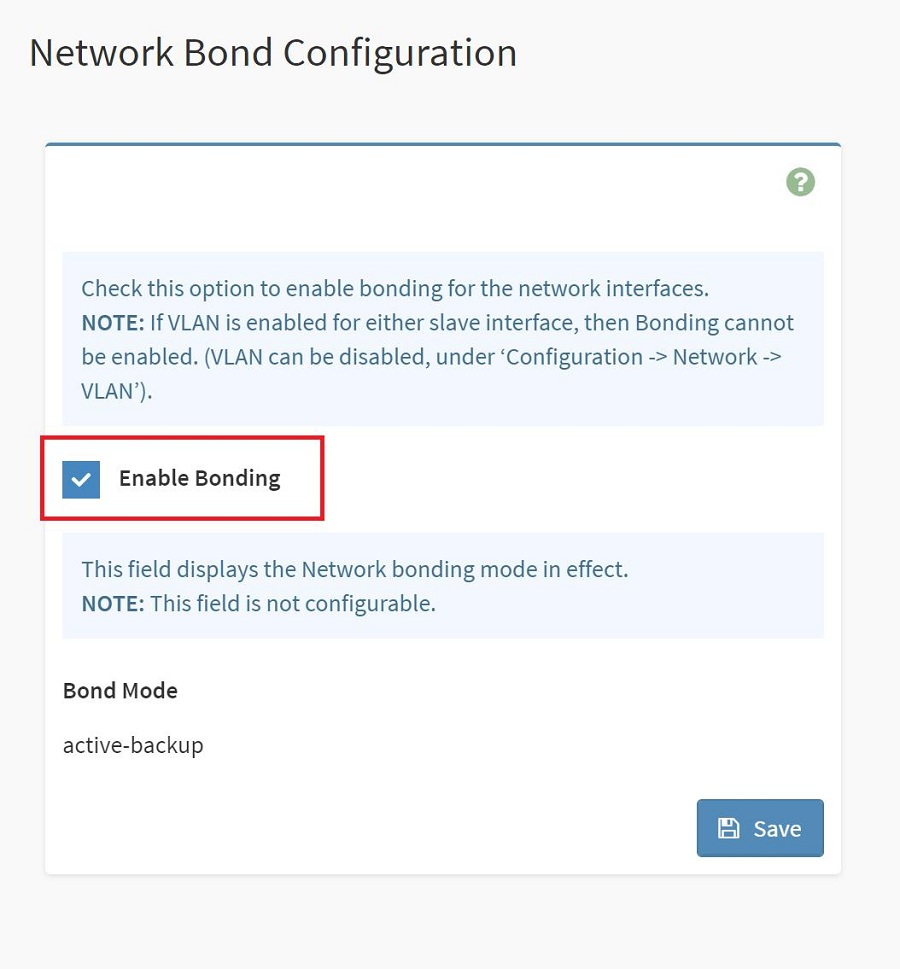
- To access bonding function in IPMI, go “Settings > Network Settings > Network Bond Configuration” and you shall see an “Enable Bonding” checkbox. And the bond mode is shown below as well. Tick the checkbox on your demand to configure bonding function, and click save.
 *Note that changing LAN settings will restart BMC network services. You will need to reconnect using new browser session after applying changes.
Bonding function check (with WebUI):
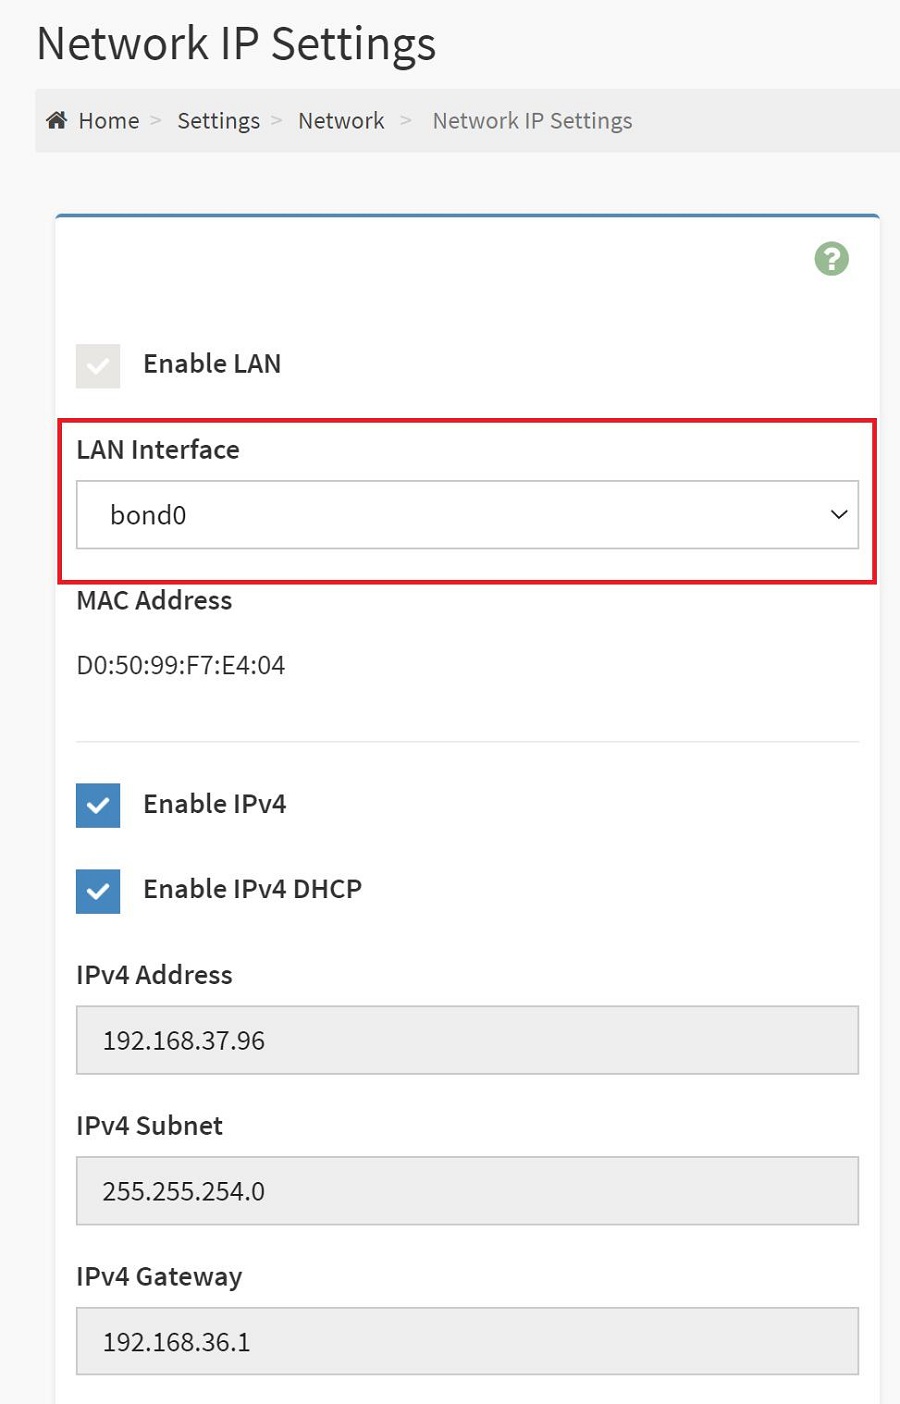
Bonding function could be checked with IPMI WebUI. If bonding is enabled, go “Settings > Network Settings > Network IP Settings”, you shall find the bond shown in LAN Interface.
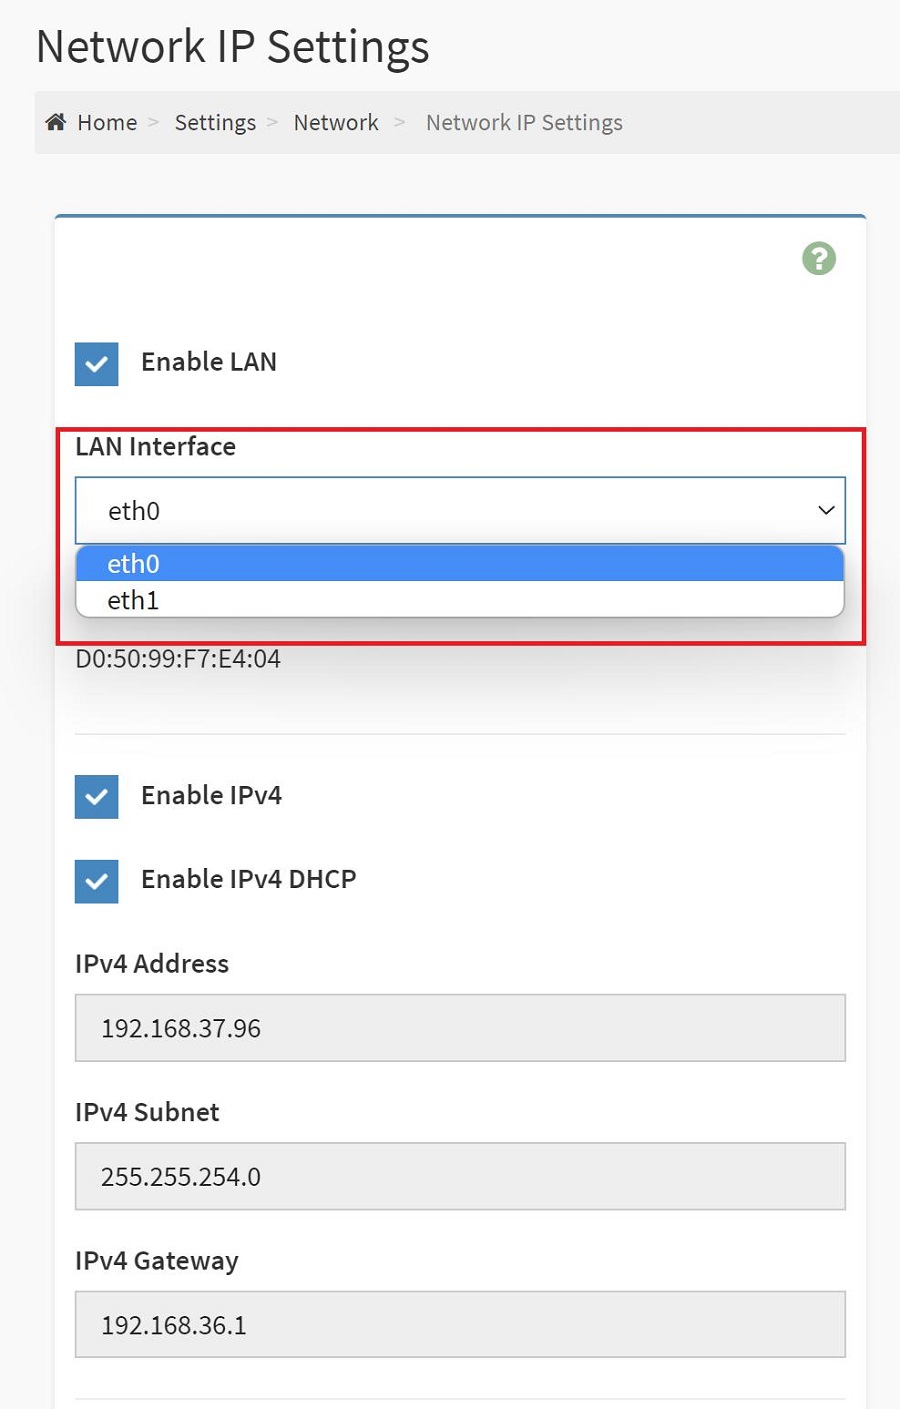
However, if the bond is disabled, you shall find the LAN inputs shown individually in LAN Interface.
Bonding Function Check (in BIOS):
To check if the bonding function is working and configured successfully, we may check it out in BIOS menu > Server Mgmt > BMC Network Configuration.
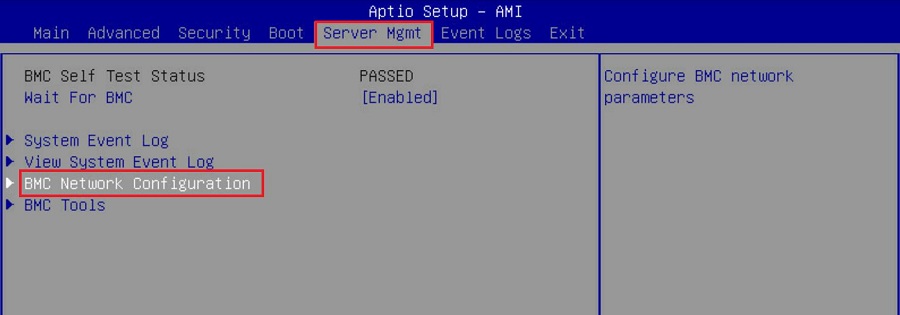
If bonding function is enabled, you shall find one and only one LAN signal detected with “(Failover)” written after the Lan channel.
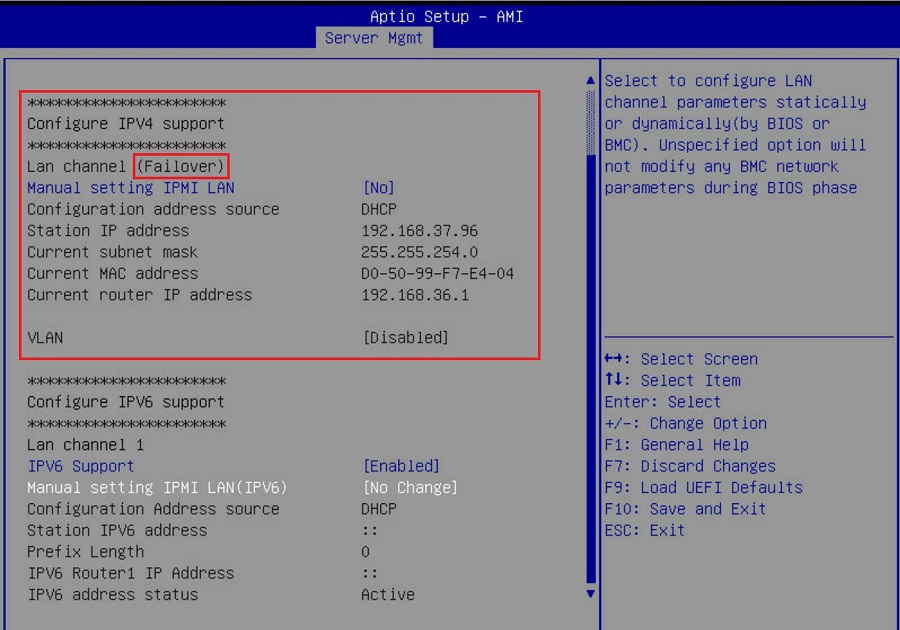
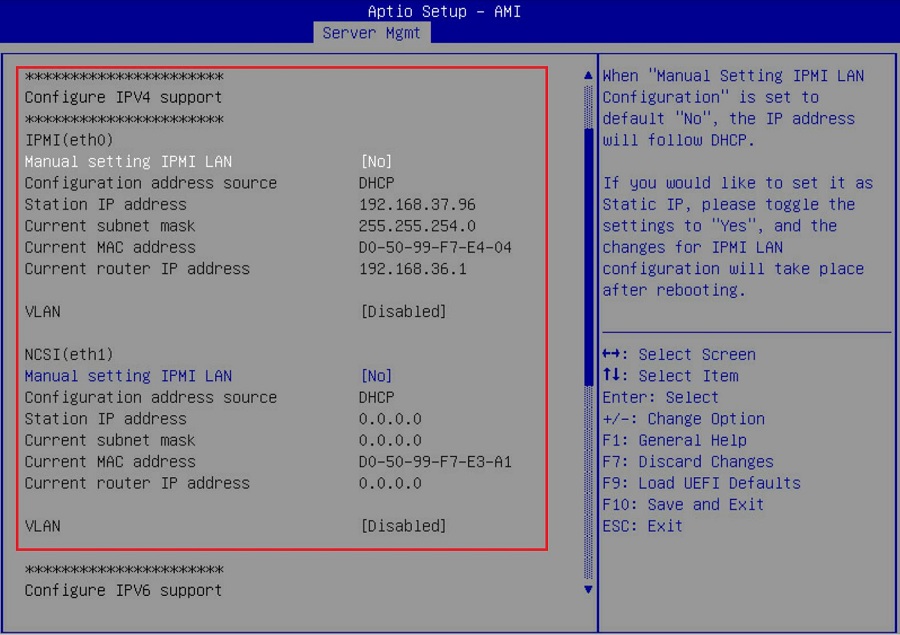
On the other hand, if the bonding function is disabled, you shall find Lan channels detected individually and listed below.
Done!
To enable/ disable network bonding using IPMI command, the following demonstration shows a way to install IPMI tool on a CentOS and configure with IPMI commands.
Preparation:
Access to the command line/ terminal window of a CentOS you have installed on the system you wish to configure network bonding.

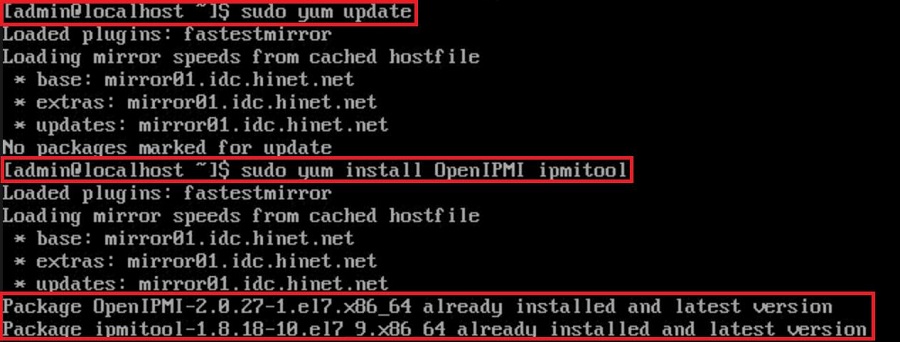
Input “sudo yum update” to update system repositories. Then, install IPMItool on a CentOS or RedHat system by running the command: “sudo yum install OpenIPMI ipmitool”. Wait for the installation to complete. The output should indicate that OpenIPMItool and IPMItool have been installed. You should see the version number of the software installed.
Once you have completed the installation, enable ipmitool access by running the command: “sudo /sbin/chkconfig ipmi on”. Then start the ipmitool service with the command: “sudo service ipmi start”.

Step:
- Now this OS is ready to configure local network bonding. Run:
“sudo ipmitool raw 0x32 0x71 0x1 0x0 0x0 0x1 0x64 0x0 0x3 0x1”
to DISABLE the IPMI bonding on default;
- To ENABLE bonding, it requires two command lines. First input:
“sudo ipmitool raw 0x32 0x71 6 0 3”, then
“sudo ipmitool raw 0x32 0x71 0x1 0x1 0x0 0x1 0x64 0x0 0x3 0x1”
- To check if the bonding is enabled or not, run:
”sudo ipmitool raw 0x32 0x72 0x1 0x0 0x0”
If the output shows “00 00 01 64 00 03 01”, the bonding is disabled.
If it shows “01 00 01 64 00 03 01”, the bonding is enabled instead.
Remote IPMI command:
If you wish to remotely configure network bonding, install ipmitool on both the target system and the one you are running commands on.
The preparations and procedures are basically identical, except that you will have to add some information to the configuring command lines.
That is, for instance, Run:
“sudo ipmitool -I lanplus -H $target_ip -U $username -P $passwd raw 0x32 0x72 0x1 0x0 0x0”
Instead of
”sudo ipmitool raw 0x32 0x72 0x1 0x0 0x0” to check if bonding is enabled.
*Please be advised to fill in the right information on the above section labeled in red.
Done!
Preparation:
1. For the BIOS method, it requires a more up to date motherboard and BIOS combination to include the “Load BMC Default Settings” item in BIOS Server Mgmt page.
2. For IPMI command, it requires a system with properly working BMC functions and IPMItool installed.
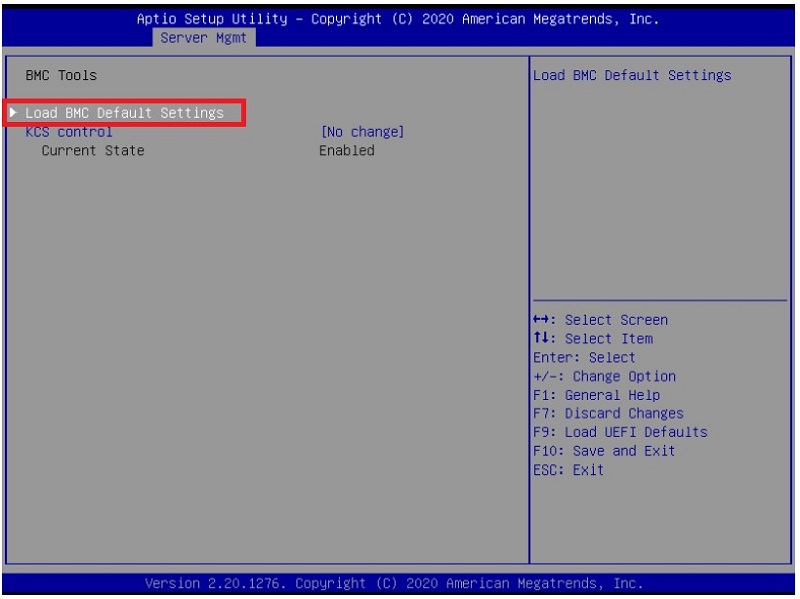
A. Load BMC Default settings via BIOS Configuration
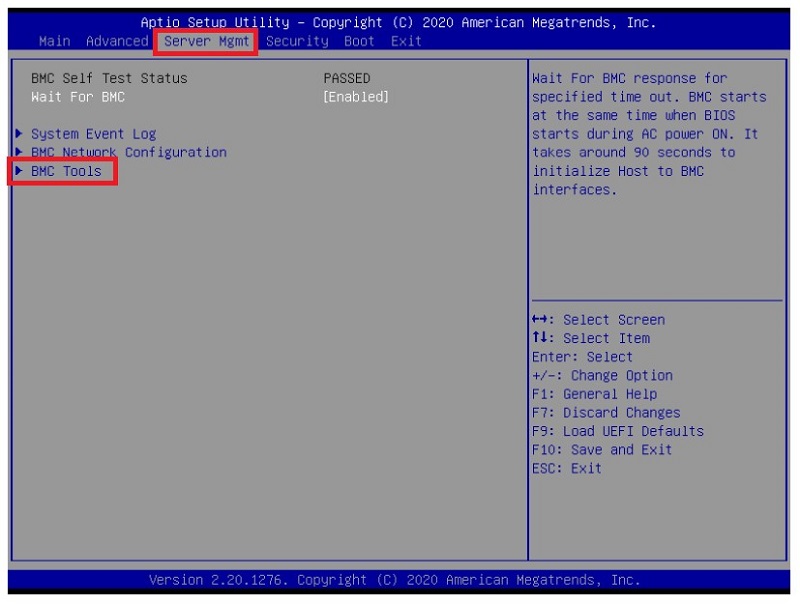
1. Access BIOS page, select “Server Mgmt > BMC Tools”.
*Note that NOT all the motherboards/ BIOS versions include this function.
2. Select “Load BMC Default Settings” and confirm the upcoming questions, the procedure shall begin.
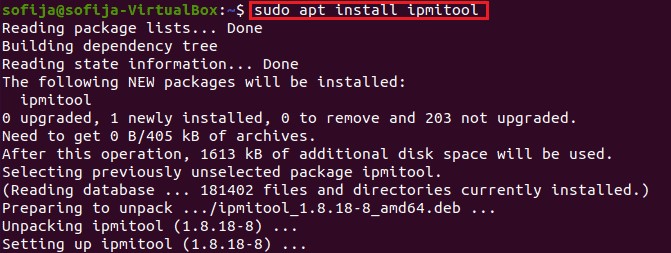
B. Load BMC Default Settings via IPMI Command
1. Open up an OS terminal, update system repositories and install IPMItool. Take Ubuntu for example, run “sudo apt update” and “sudo apt install ipmitool”.
2. Run “sudo ipmitool raw 0x32 0x66” to load BMC default settings.

3. Once the command is done, reboot the system to reset and complete the reset to the BMC.
C. Load BMC Default by updating to a new version/ same version again
It is rather intuitive to update to a whole new version of BMC or to the same version once again as loading to BMC default settings when the two methods mentioned above are unable to be performed.
Here is how: BMC Firmware Update by socflash
Done!
Steps to update BIOS/BMC firmware via OpenBMC
Login page
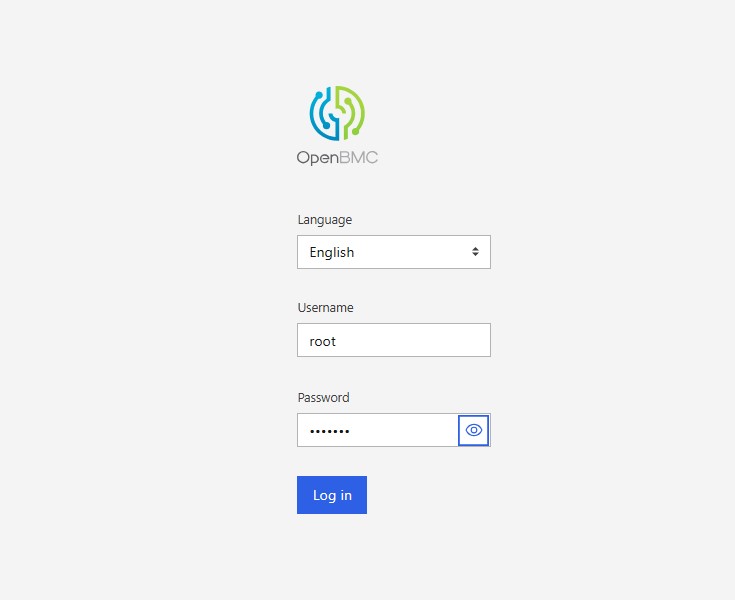
Default Username: root | Password: 0penBmc
BIOS/BMC Firmware Update
- [Operations] -> [Firmware]
This wizard will guide you through the firmware upgrade process.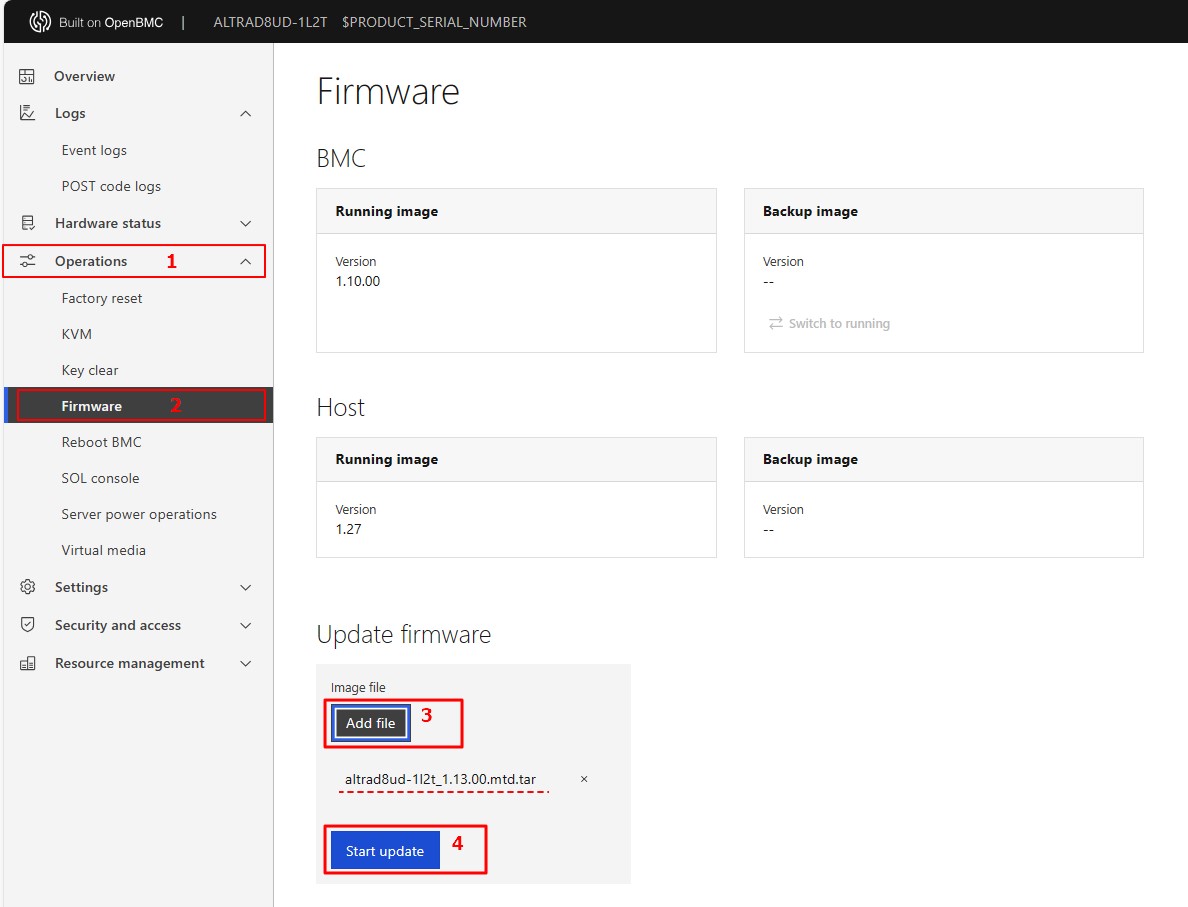
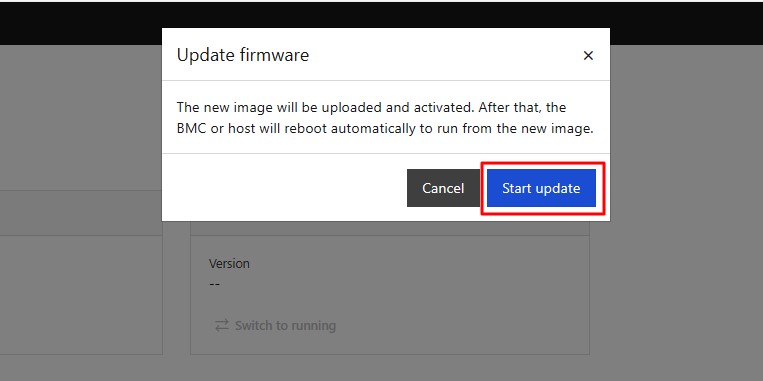
- Click “Add file” to select the BIOS/BMC FW file. Then click “Start update” for the upgrade process.
- Click “Start update” to continue the BIOS/BMC FW upgrade process.
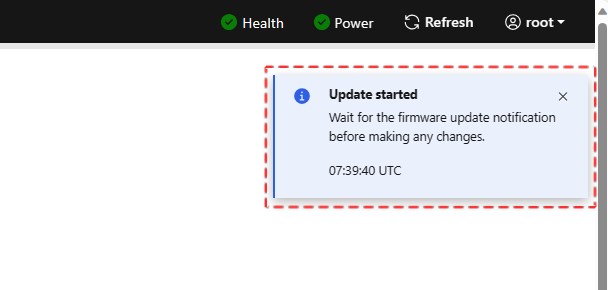
- The BIOS/BMC FW upgrade is being processed, please wait for a few minutes.
- BIOS/BMC FW upgrade is completed. Click "Refresh" and restart the system.
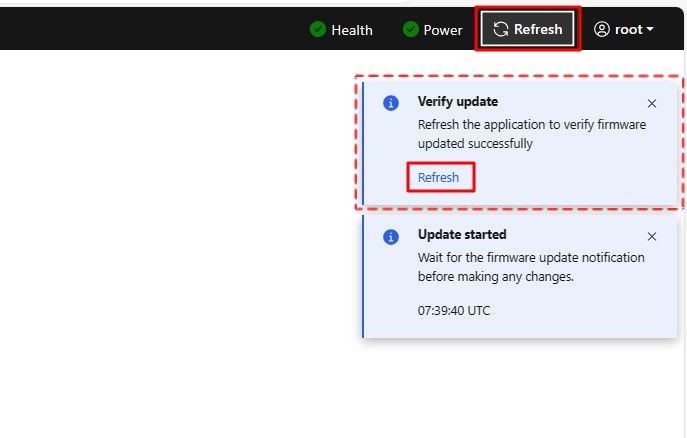
- Remark:
Clear the browser cookies after the BIOS/BMC FW upgrade is completed.
This guide features the cURL commands to update BIOS and BMC firmware for your server system which supports RedFish. Before we start, please make sure your host system has an IPMI or NC-SI LAN port connected to the internet and the BMC IP address of it for a client end in the same network segment to access.
1. BIOS Update:
curl -k -v -X POST https://[IP_address]/redfish/v1/UpdateService/upload --form 'UpdateFile=@[File_location]' --form 'UpdateParameters={"Targets":["/redfish/v1/UpdateService/FirmwareInventory/BIOS"]};type=application/json' --form 'OemParameters={"ImageType":"BIOS", "Config": 4, "Action": 3};type=application/json' -u [username]:[password] -H If-None-Match:W/\"1667287258\" -H "Expect:"
*We recommend this command which shuts down the host immediately and perform BIOS update.
For BIOS update, here are the definitions to the available values for "config" and "action":
'OemParameters={"ImageType":"BIOS", “Config”: config, “Action”: action}’
config
2: Preserve BIOS settings
4: Overwrite BIOS settings
action
1: Update on host shutdown
2: Update immediately without changing host state
3: Shutdown host to update
If the update request is successfully sent off, the system would return an Accepted message with a 2xx code: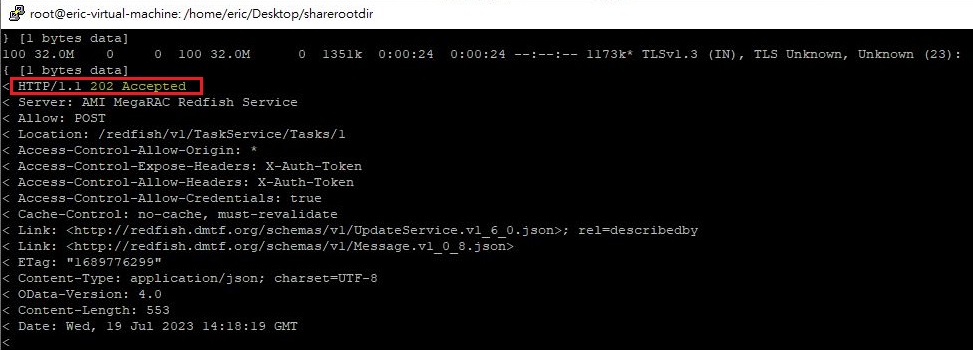
You may also check the update progress by visiting:
https://[host_IP_addr]/redfish/v1/UpdateService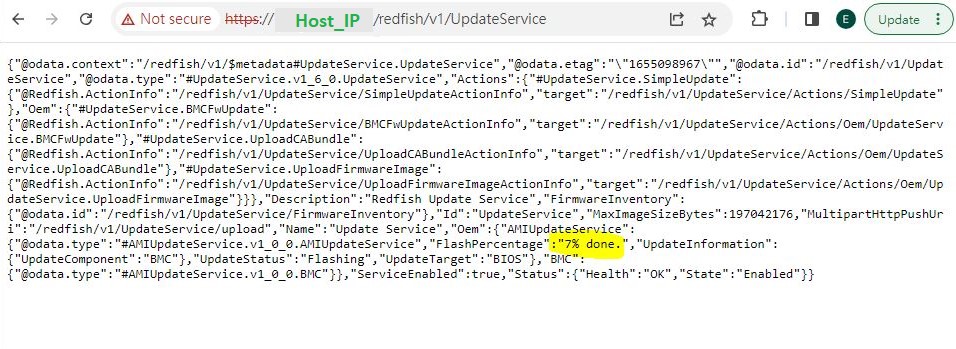
2. BMC Update:
curl -k -v -X POST https://[IP_address]/redfish/v1/UpdateService/upload --form 'UpdateFile=@[File_location] ' --form 'UpdateParameters={"Targets":["/redfish/v1/UpdateService/FirmwareInventory/BMC"]};type=application/json' --form 'OemParameters={"ImageType":"BMC"};type=application/json' -u [username]:[password] -H If-None-Match:W/\"1667287258\" -H "Expect:"
If the update request is successfully sent off, the system would return an Accepted message with a 2xx code as well.
3. Reboot Host:
In case you are not using a shutdown action parameter (3) for the BIOS update command, or to view the latest firmware information of your current host after the update, please reboot your host with the following command:
curl -k -v -X POST https://[BMC_IP]/redfish/v1/Systems/Self/Actions/ComputerSystem.Reset -d '{"ResetType" : "GracefulRestart"} -H "Content-Type: application/json" -H "X-Auth-Token: [token]"
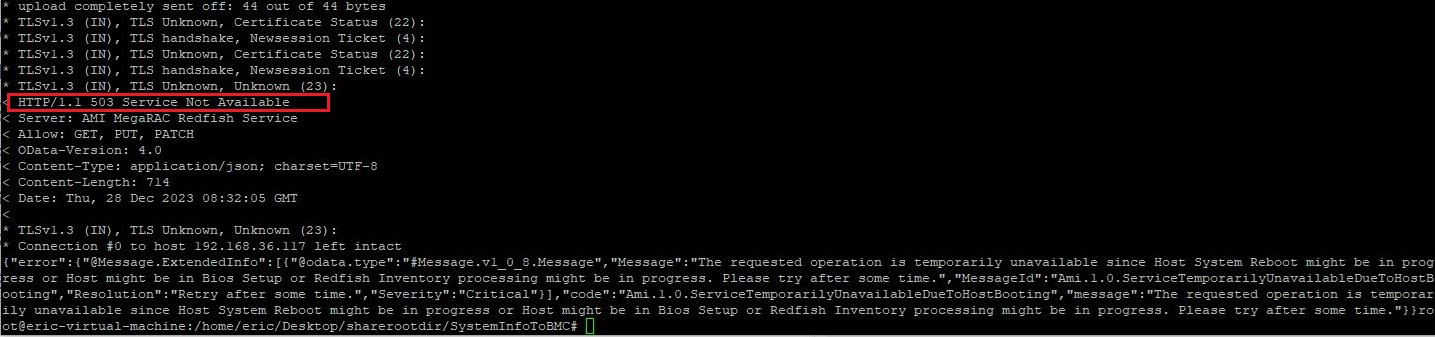
4. Troubleshooting:
If an issue occurs during the update (e.g. the procedure did not start, or an error code "Status:500 Internal Server Error" occurred), you can try below methods such as the power actions or resetting BMC to default according to the scenarios:
i. Double checking your command:
If your cURL request was returned by an error code 400, it means that the request command was incorrect. In other words, the request sent by the client to the host server did NOT follow the rules. The client should modify the request command before retrying so that it could be understood by the host.

ii. Reboot Host:
If the expected update procedure does not start up, you may try powering off your system, or try rebooting it:
curl -k -v -X POST https://[BMC_IP]/redfish/v1/Systems/Self/Actions/ComputerSystem.Reset -d '{"ResetType" : "GracefulRestart"} -H "Content-Type: application/json" -H "X-Auth-Token: [token]"
ResetType Allowable values :
“On” for Host power on
“GracefulRestart” for Host reboot
“GracefulShutdown” for Host soft power off
“ForceOff” for Host hard power off
iii. BMC set to default:
If you encountered an error code 500 issue, this could be related to corrupted RedFish data. The overall solution is to resend a brand new copy of RedFish data to the server again. To do so, we flash BMC to the same version with items other than RedFish preserved, or simply update your BMC.
To preserve your current BMC config:
curl -k -v -X PATCH https:// [BMC_IP]/redfish/v1/UpdateService -d '{"Oem": {"AMIUpdateService": {"PreserveConfiguration": {"Authentication": true,"FRU": true,"IPMI": true,"KVM": true,"NTP": true,"Network": true,"REDFISH": false,"SDR": true,"SEL": true,"SNMP": true,"SSH": true,"Syslog": true,"WEB": true} } } }' -u [username]:[password] -H If-None-Match:W/\"1667287258\" -H "Expect:" -H "Content-Type: application/json"
5. Report an issue to us:
If there is an issue that cannot be resolved or further assistance is required, please visit https://event.asrockrack.com/tsd.asp and fill out the form as detailed as possible so we could provide an efficient tech support.
