Category: BIOS
There are 2 methods for updating the BIOS using Instant Flash.
Method 1:
- Save the BIOS files on a device such as USB disk (FAT32 format), hard disk (FAT32 format) and floppy drive.
- Press [F2] during POST to get into BIOS setup menu.
- Select the Instant flash under [Advanced] menu to execute it.

- ASRock Instant Flash will automatically detect all devices and only list those BIOS versions which are suitable for your motherboard, and select the suitable BIOS version and flash.
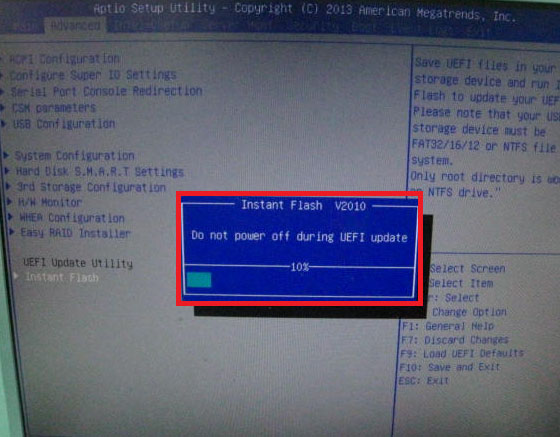
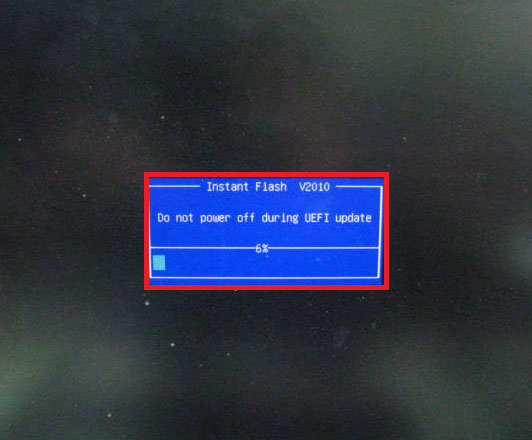
- Please DO NOT power off during BIOS update.
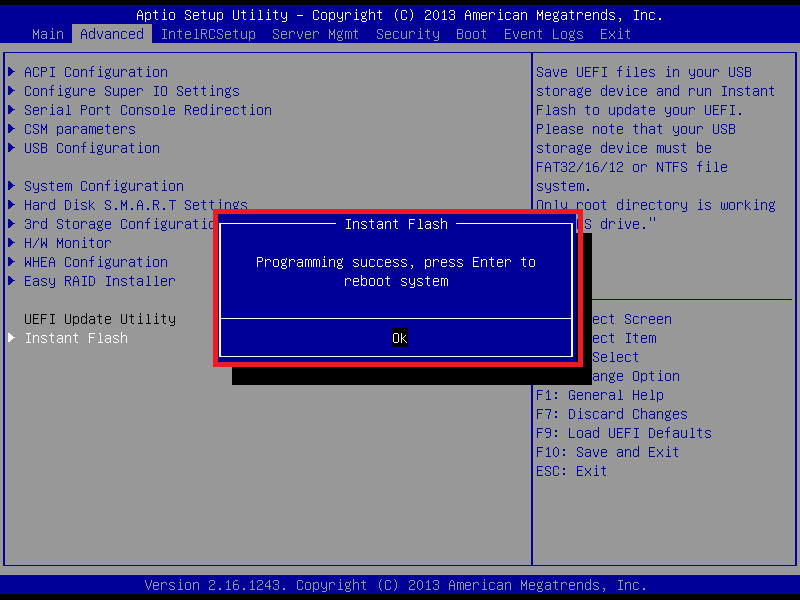
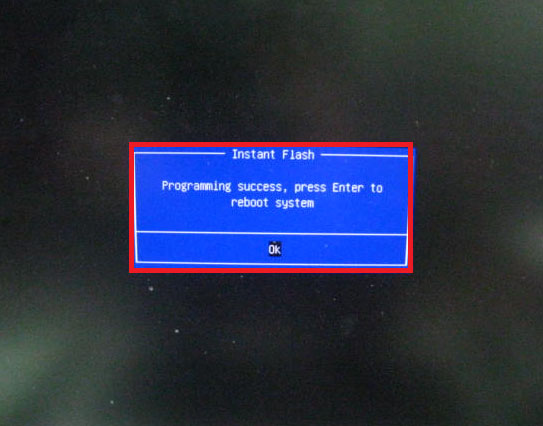
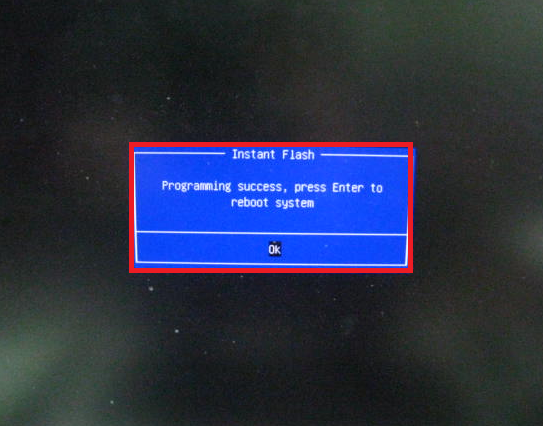
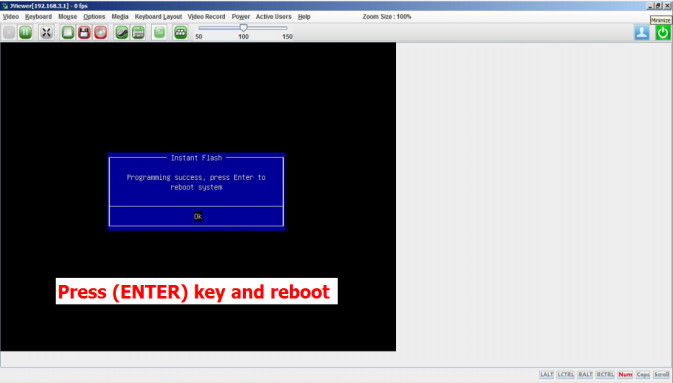
- After update success, it will pop up below massage. Please press Enter to reboot system.
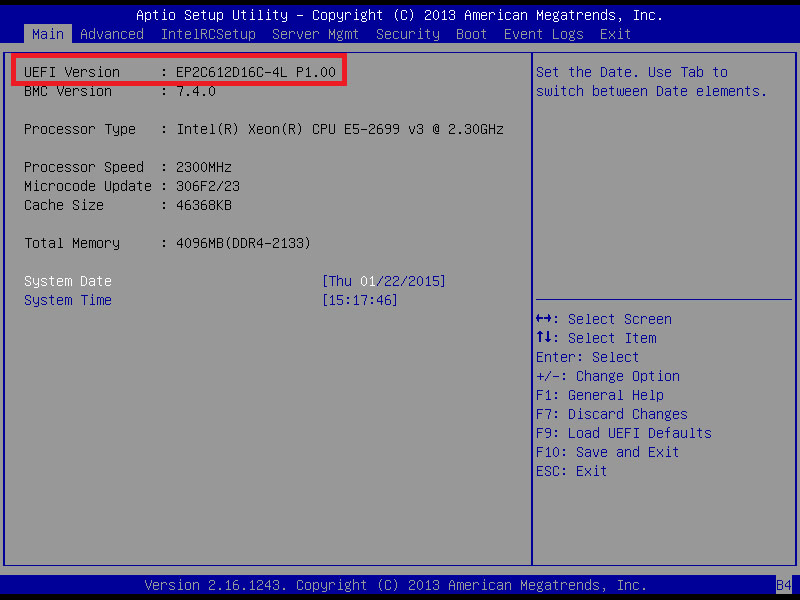
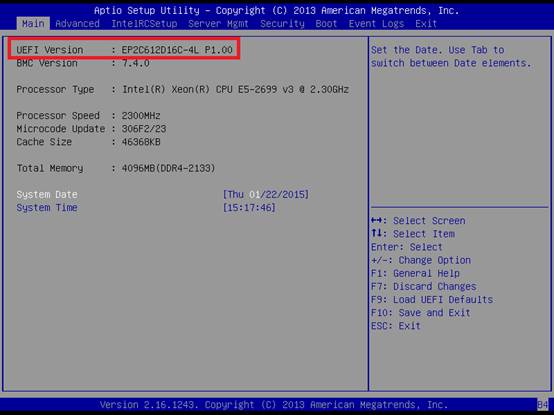
- After system restart, press [F2] or [Del] to enter the BIOS setup utility during boot up to check BIOS version.
- In Exit menu, please select "Load Default Settings" and press [Enter] to continue.
- Select "Exit Saving Changes" and press [Enter] to exit the BIOS setup utility.
Method 2:
- Save the BIOS files on a device such as USB disk (FAT32 format), hard disk (FAT32 format) and floppy drive.
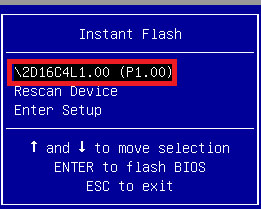
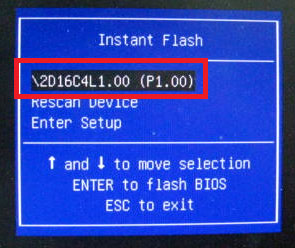
- Press [F6] when you see this (or similar) page.

- Select the suitable BIOS version and flash.
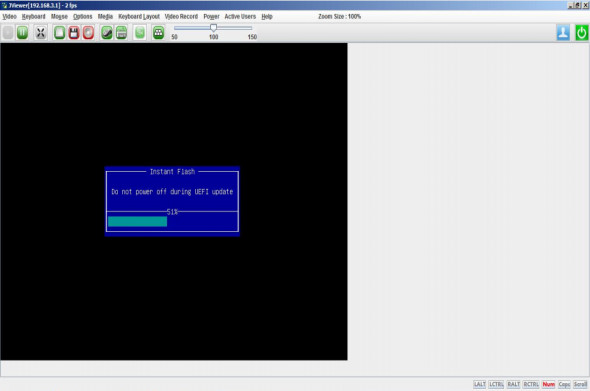
- Please DO NOT power off during BIOS update.
- After update success, it will pop up below massage. Please press Enter to reboot system.
- After system restart, press [F2] or [Del] to enter the BIOS setup utility during boot up to check BIOS version.
- In Exit menu, please select "Load Default Settings" and press [Enter] to continue.
- Select "Exit Saving Changes" and press [Enter] to exit the BIOS setup utility.
- Now, system is booting up with new BIOS.
If you encounter problems while updating the new BIOS, DO NOT turn off your system since this corrupt BIOS might cause your system failed to boot up. Just repeat the process, and if the problem still persists, update the original BIOS file. If the Flash Memory Writer utility was not able to successfully update a complete BIOS file, your system may not be able to boot up. If this happens, your system will need service.
This utility works in Microsoft® Windows 7 (32 / 64 bit), Windows 8 (32 / 64 bit), Windows 8.1 (32 / 64 bit), Server 2008 R2 SP1 (64 bit), Server 2012 (64 bit),Server 2012 R2 (64 bit).
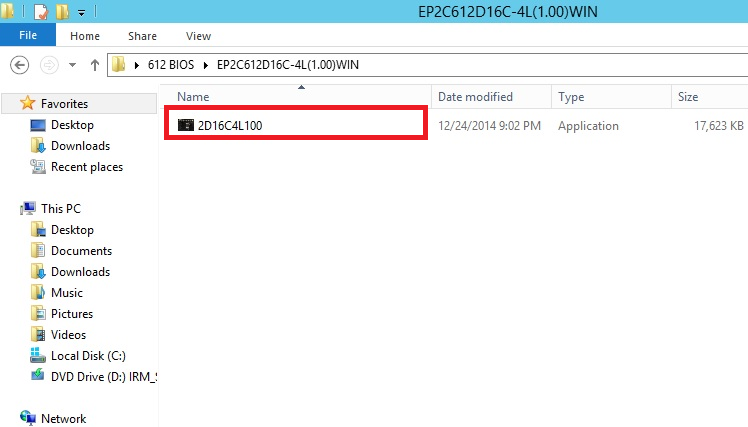
- Download the BIOS package (WinZip format with .zip file extension). And close all programs.
- Unzip and save all files to the same directory of any storage location accessible by the host system.
- Click BIOSfilename.exe
- It shows a dialog icon to remind you need to restart the system before updating BIOS. Click "Yes".
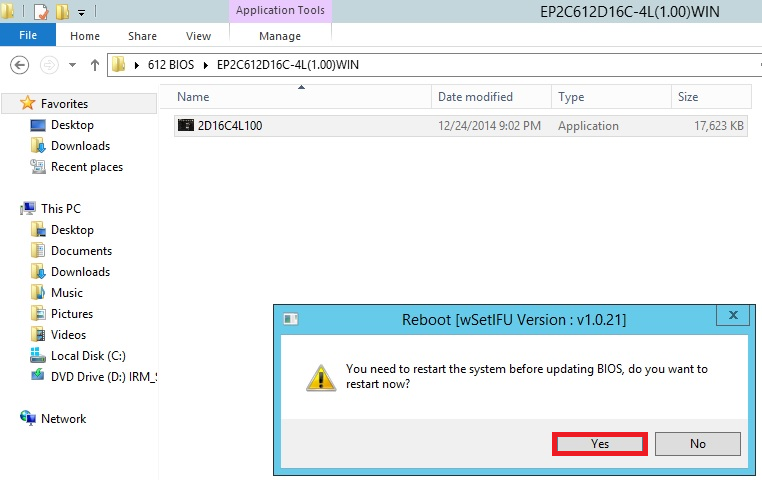
- System will auto restart, and update BIOS. Please DO NOT power off during BIOS update.

- After update success, it will pop up below massage. Please press Enter to reboot system.
- After system restart, press [F2] or [Del] to enter the BIOS setup utility during boot up to check BIOS version.

- In Exit menu, please select "Load Default Settings" and press [Enter] to continue.
- Select "Exit Saving Changes" and press [Enter] to exit the BIOS setup utility.
- Now, system is booting up with new BIOS.
If you encounter problems while updating the new BIOS, DO NOT turn off your system since this corrupt BIOS might cause your system failed to boot up. Just repeat the process, and if the problem still persists, update the original BIOS file. If the Flash Memory Writer utility was not able to successfully update a complete BIOS file, your system may not be able to boot up. If this happens, your system will need service
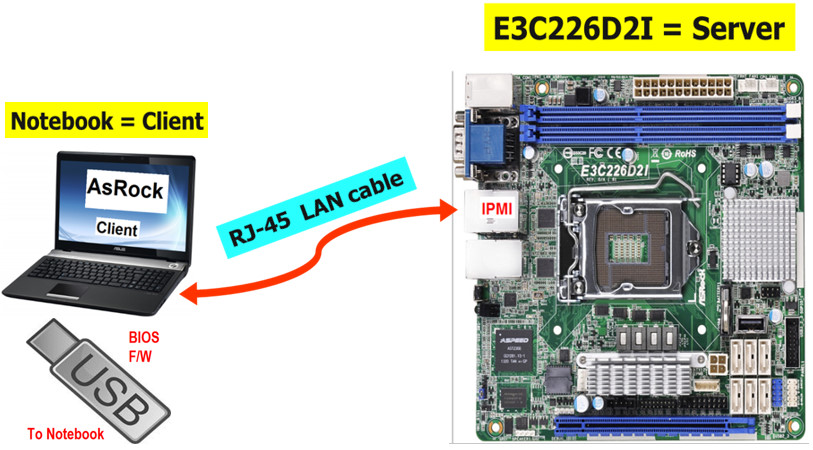
- Make sure you have connected a LAN cable from the laptop (client) to the dedicated IPMI LAN port on the Server. Prepare an USB device with the BIOS firmware installed.
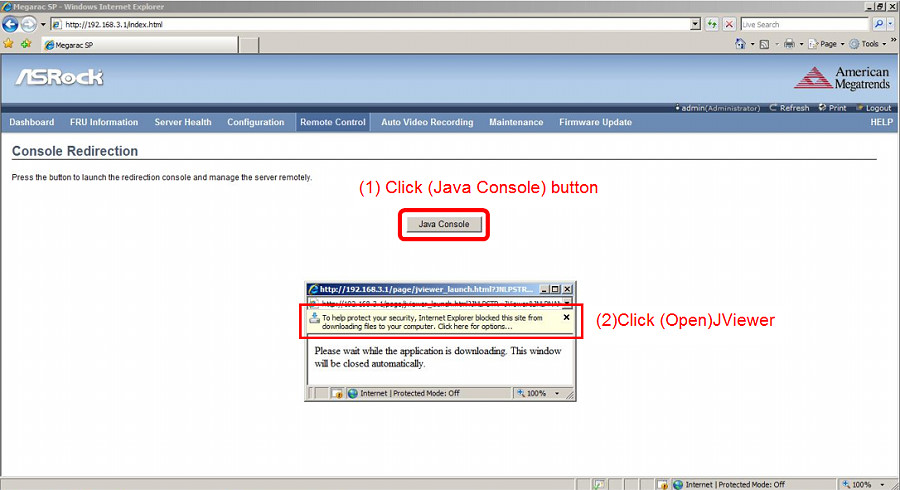
- Enter the management system from your laptop (client). Go to Remote Control > Console Redirection.

- Click Java Console > Open to open the JViewer.
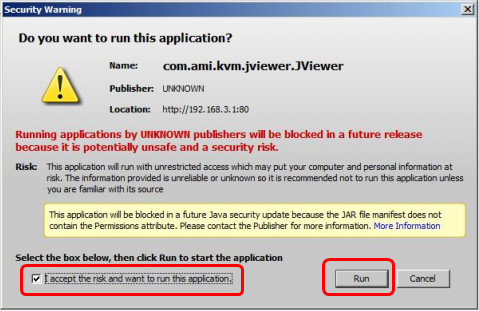
- Select “I accept the risk and want to run this application.” and click Run to launch the JViewer.
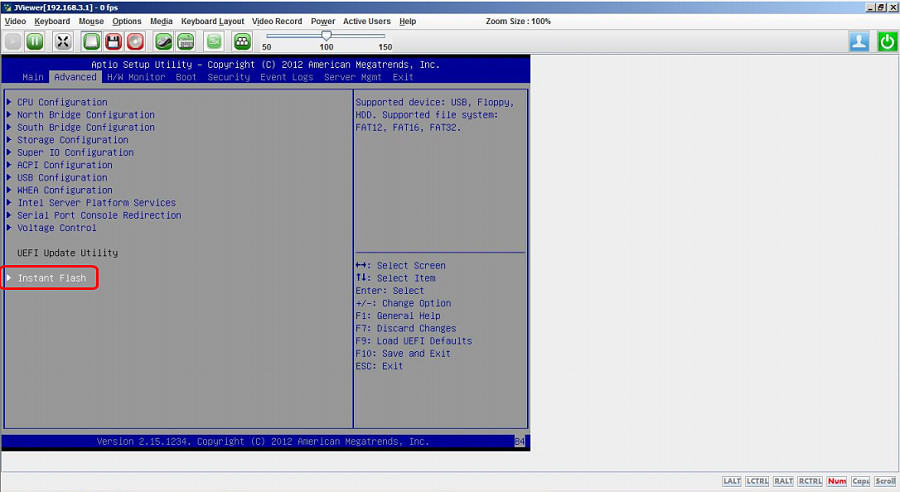
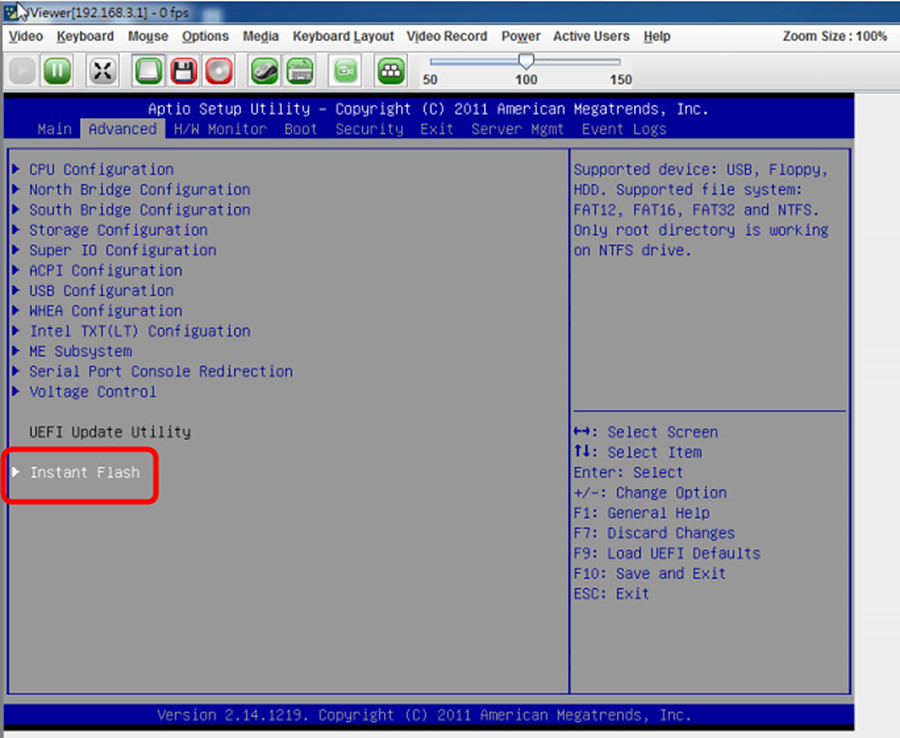
- In the BIOS screen, go to Advanced > Instant Flash.
- Insert the USB device with the BIOS firmware installed into your laptop (client).

- Click Hard Disk/USB Redirection.

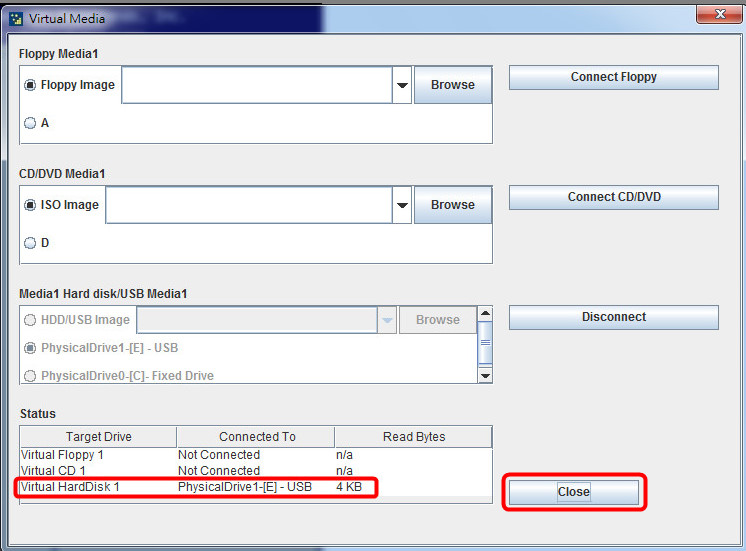
- Select the inserted USB and click Connect Hard disk/USB.
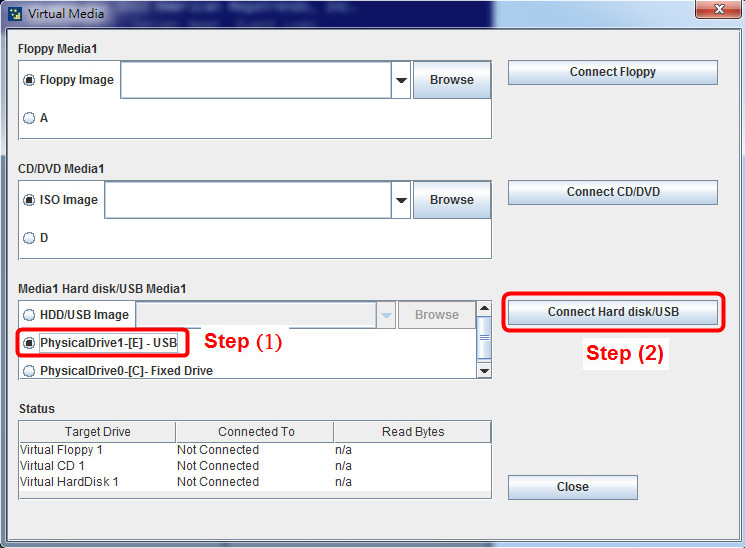
- Confirm the inserted USB device is found and click Close to exit.
- In the BIOS, go to Advanced > Instant Flash and press the [Enter] key on the keyboard to select.
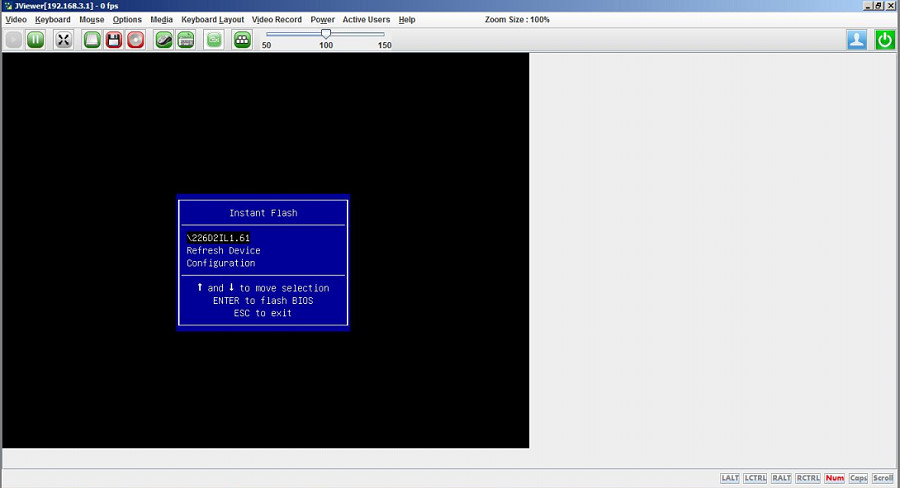
- Choose the desired BIOS firmware and press [Enter].
- The BIOS updating begins.
- After upgrade, press [Enter] key to reboot the server and confirm the BIOS and BMC versions.
How to update BIOS through Server Management Utility?
(Supports server motherboard built with BMC AST2500 controller)
Preparation
1. Download and install the Server Management Utility.
(Download: http://www.asrockrack.com/support/SMU.asp)
Steps
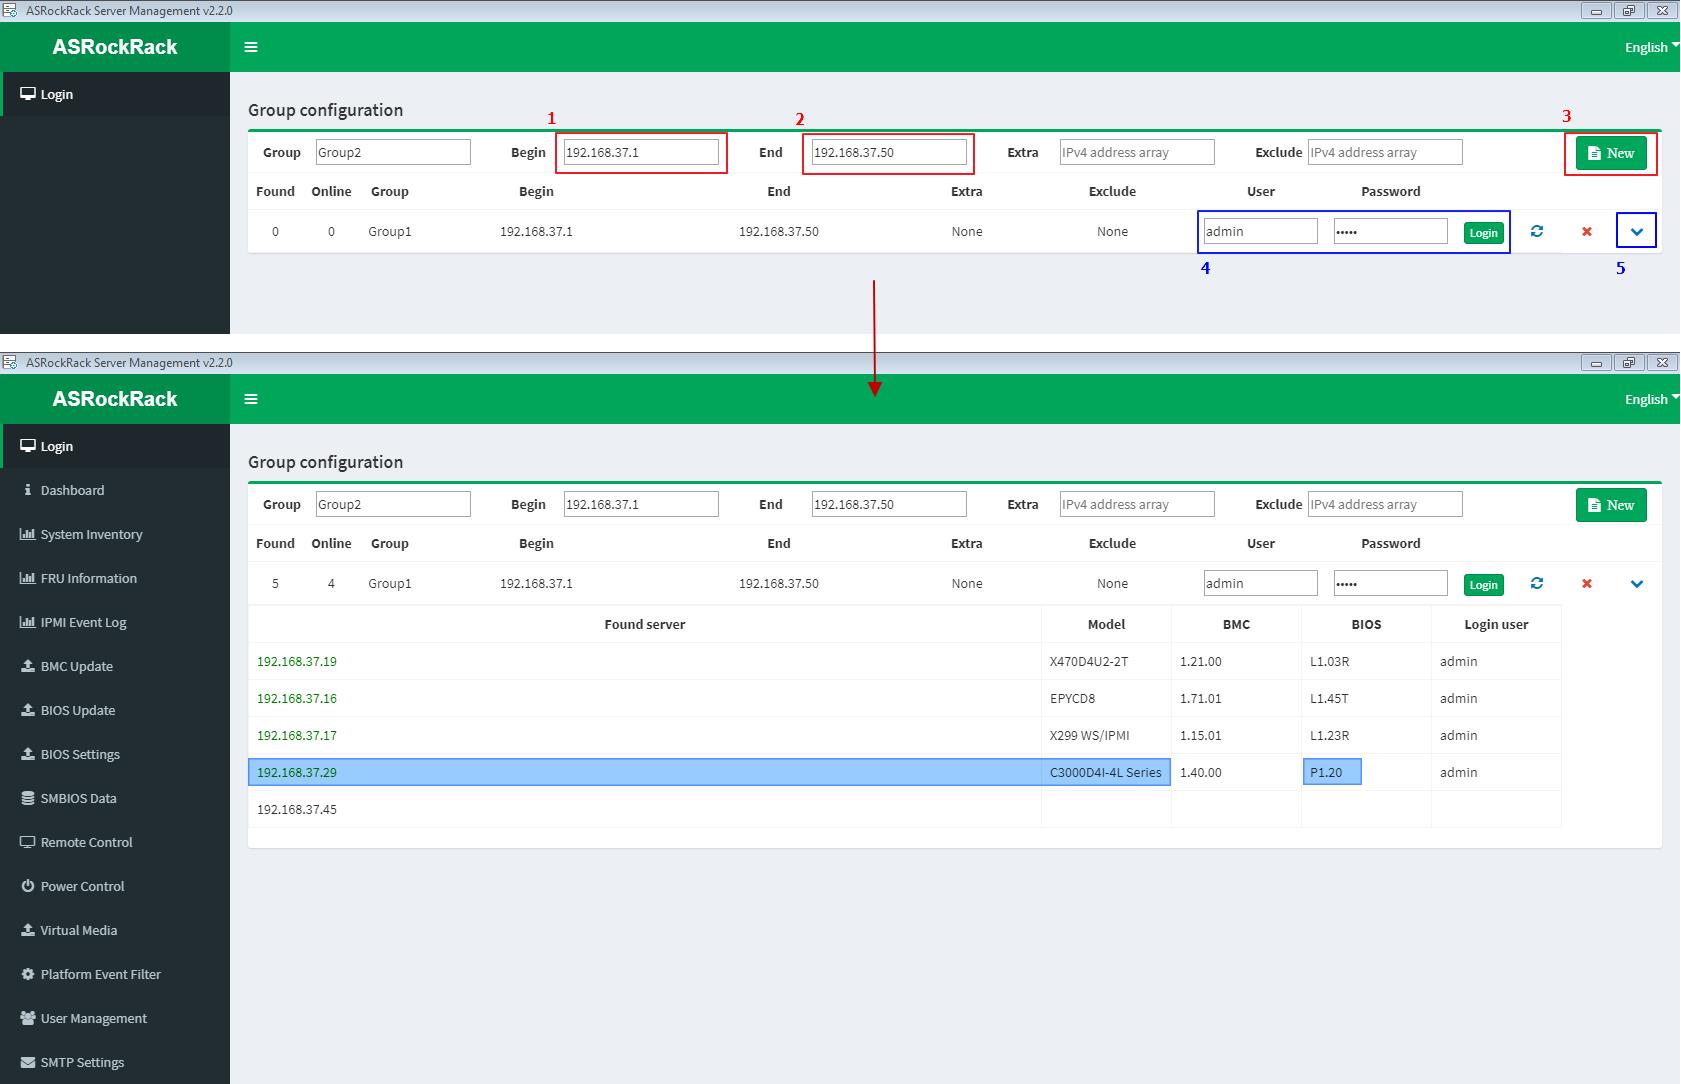
Step 1: Login
1~3: Key-in the IP address range to search out the host machine where need to do the BIOS update procedure.
4~5: Key-in BMC login account, then pull-down to check those searched machines.
(For example: Host machine IP = 192.168.37.29)
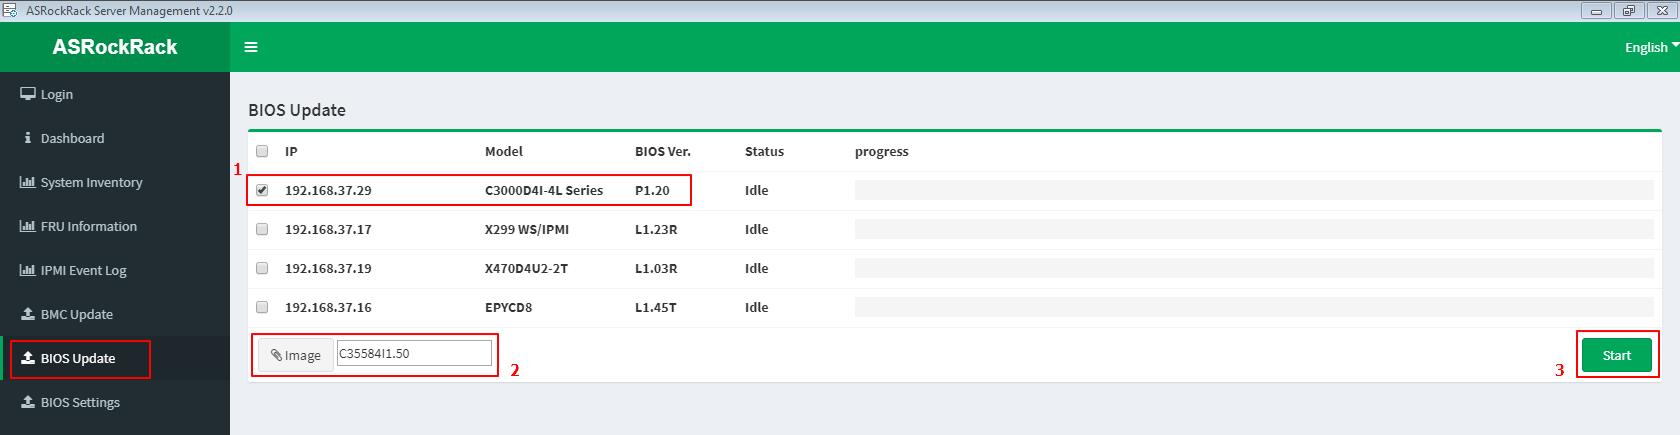
Step 2: BIOS Update
- Tick to select the host machine (ex. 192.168.37.19)
- Import the host machine BIOS image file
- Click “Start” button to start the BIOS update process
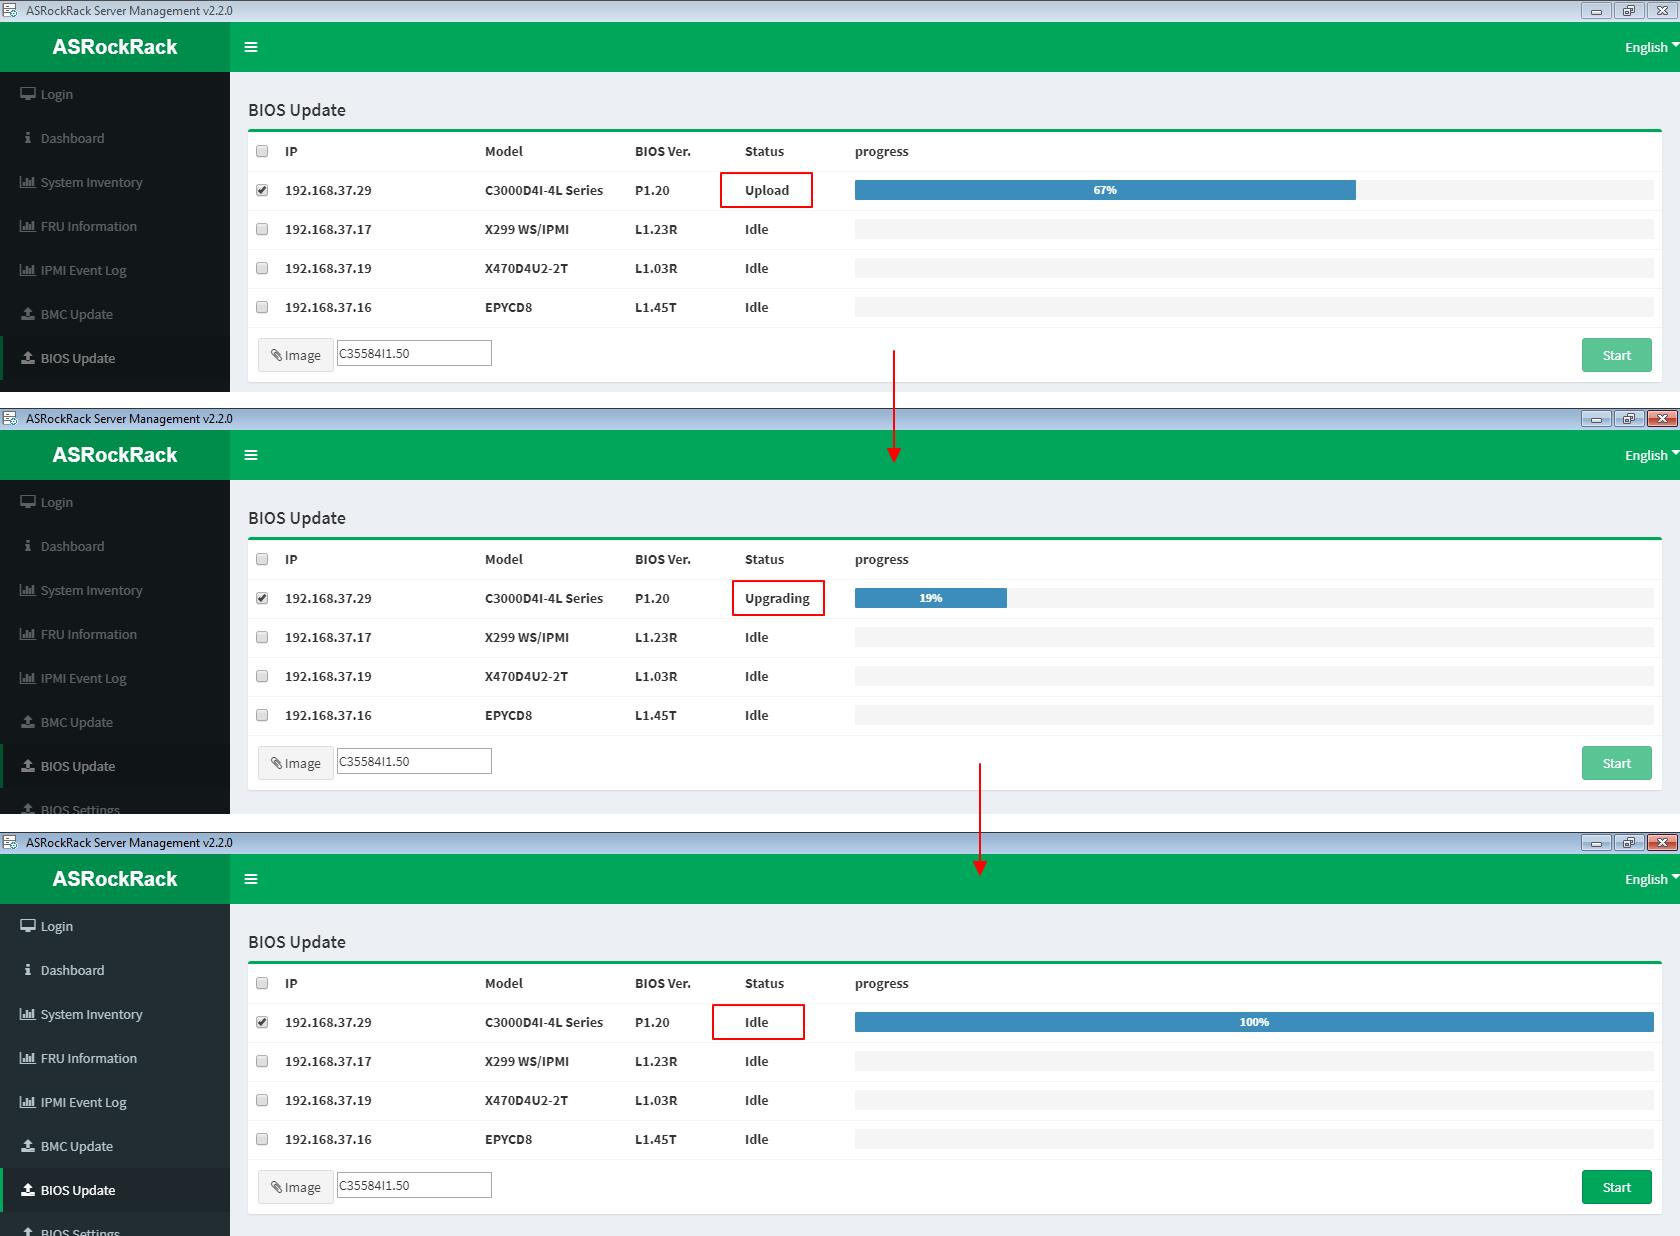
BIOS update is processing with procedures [Upload --> Upgrading --> Idle]
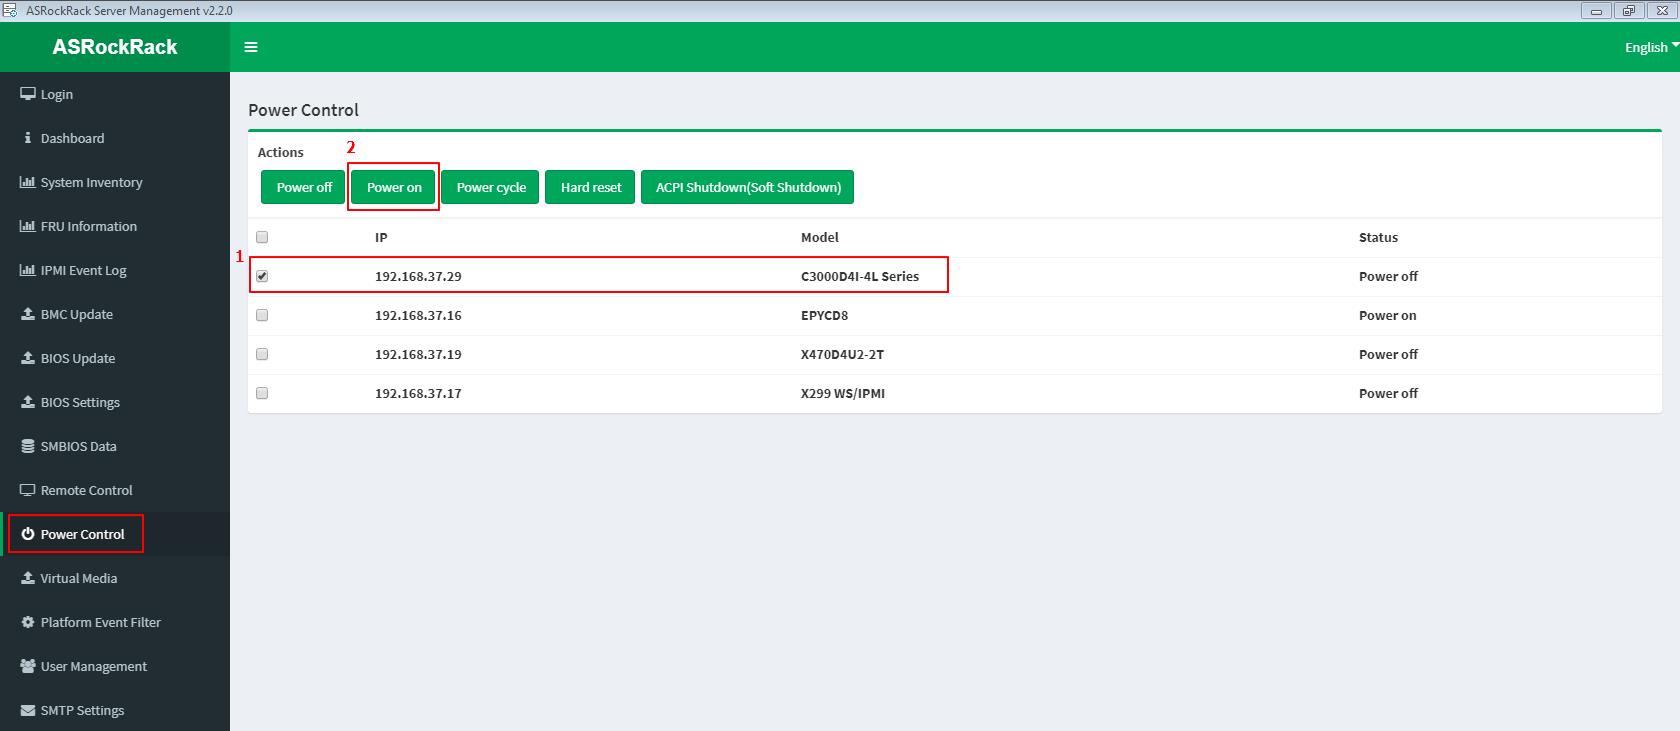
Step 3: Power ON/Reboot system remotely
- Tick to select the host machine IP (ex. 192.168.37.19)
- Click “Power on” (“Hard reset” if for reboot)
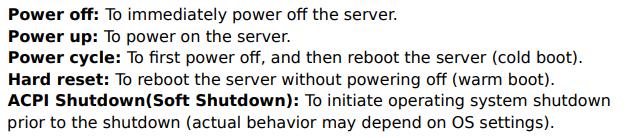
Step 4: Remote control system
- Select the host machine (ex. 192.168.37.19)
- Click “Launch JAVA KVM”
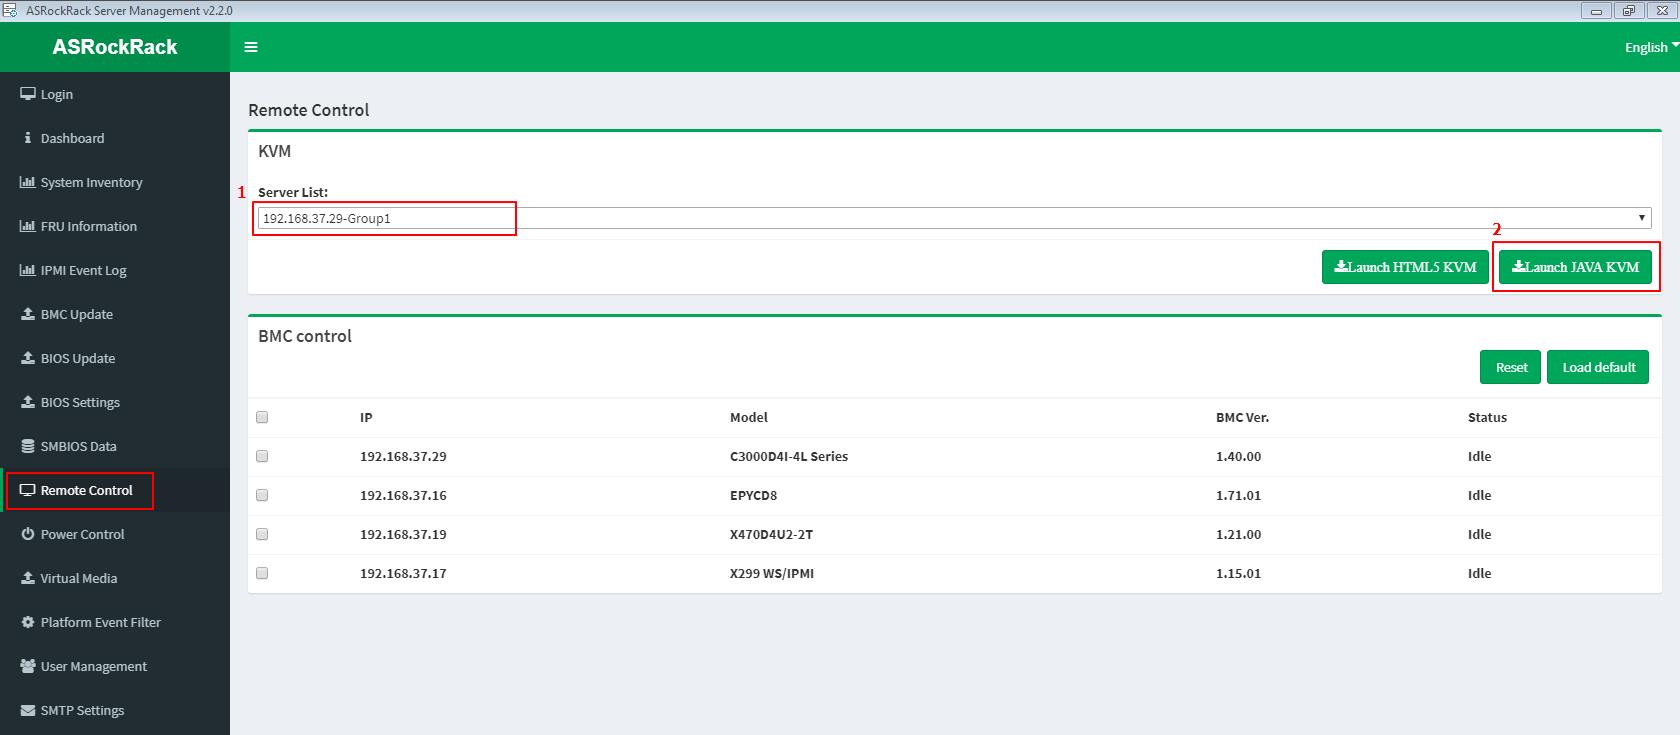
- Remote the host machine by Jviewer. And check to whether the BIOS update process is success or fail.
Step 5: Back to Step 1: Login
Check to the latest BIOS version of the host machine.
(For example: Host machine IP = 192.168.37.29)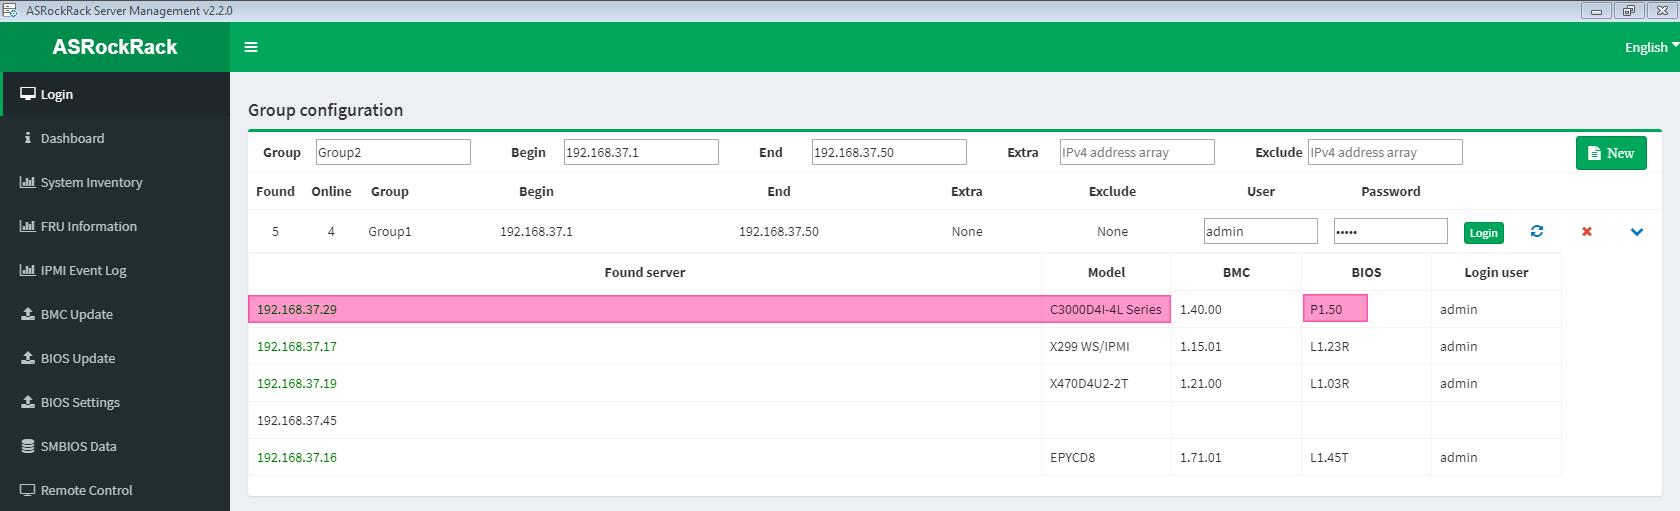
Steps to update BIOS firmware via IPMI webUI
(Supports server motherboard built with BMC AST2500/AST2600 controller)
BIOS Firmware Update
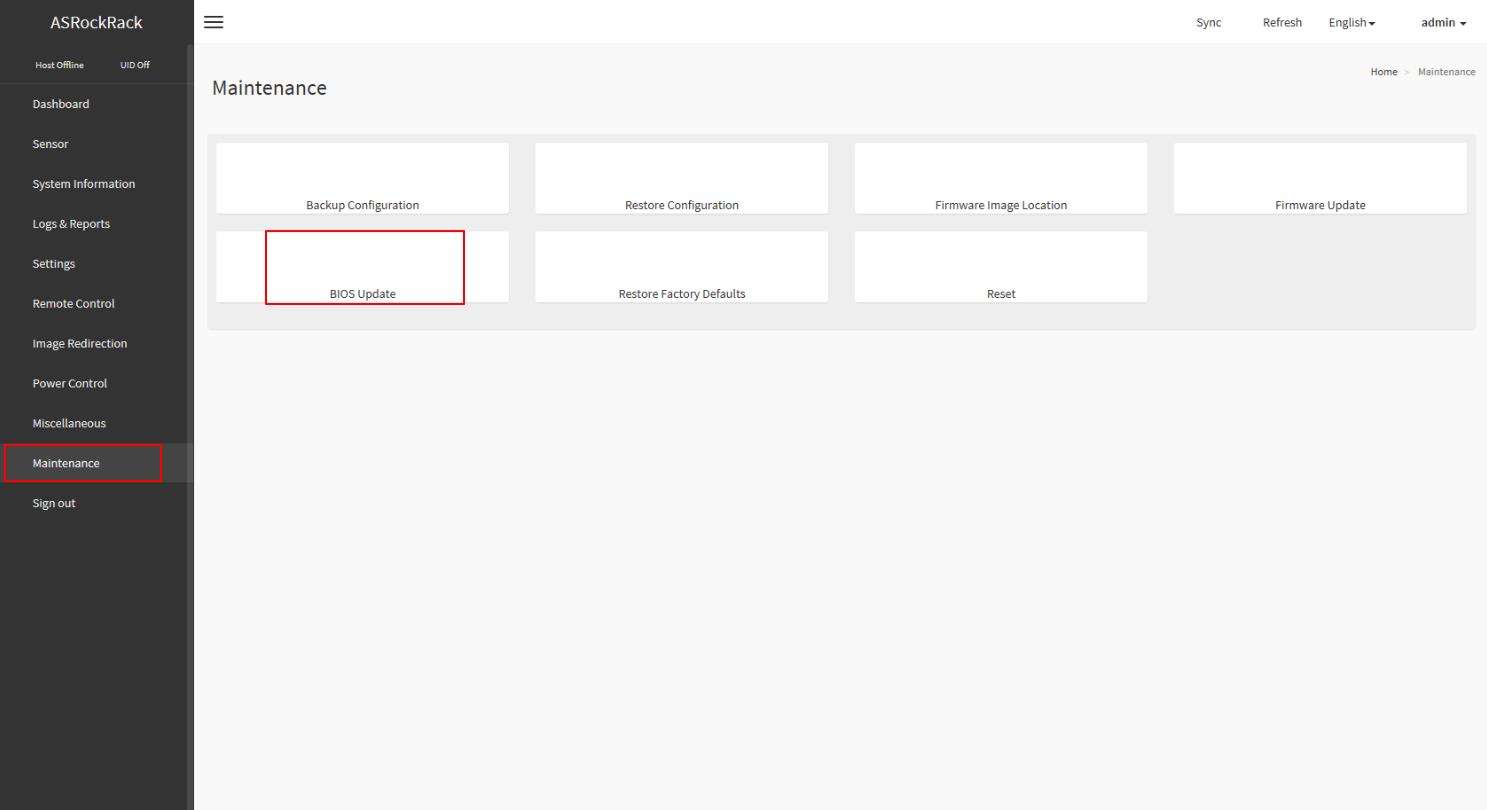
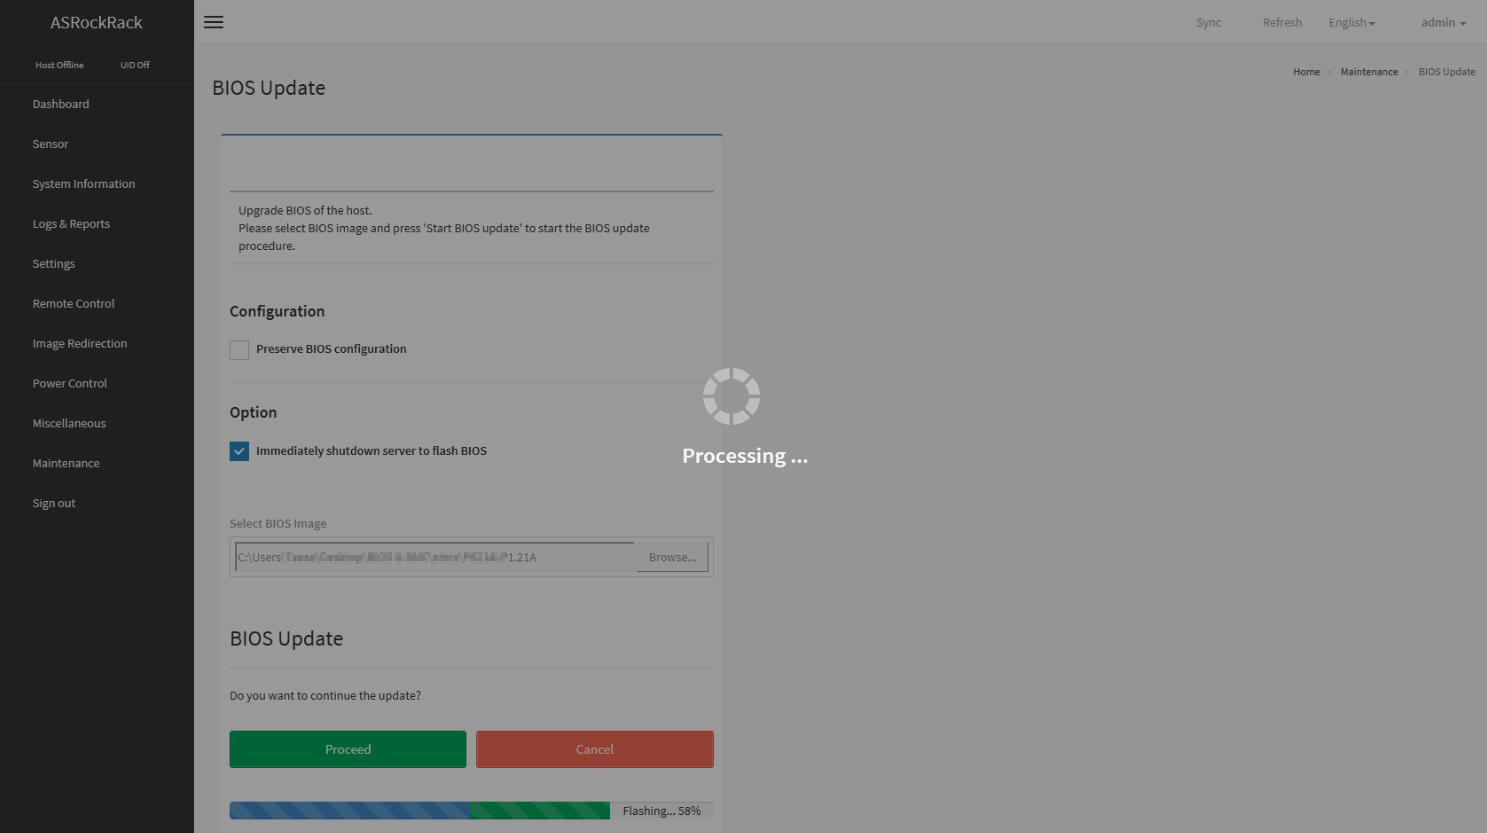
[Maintenance] -> [BIOS Update]
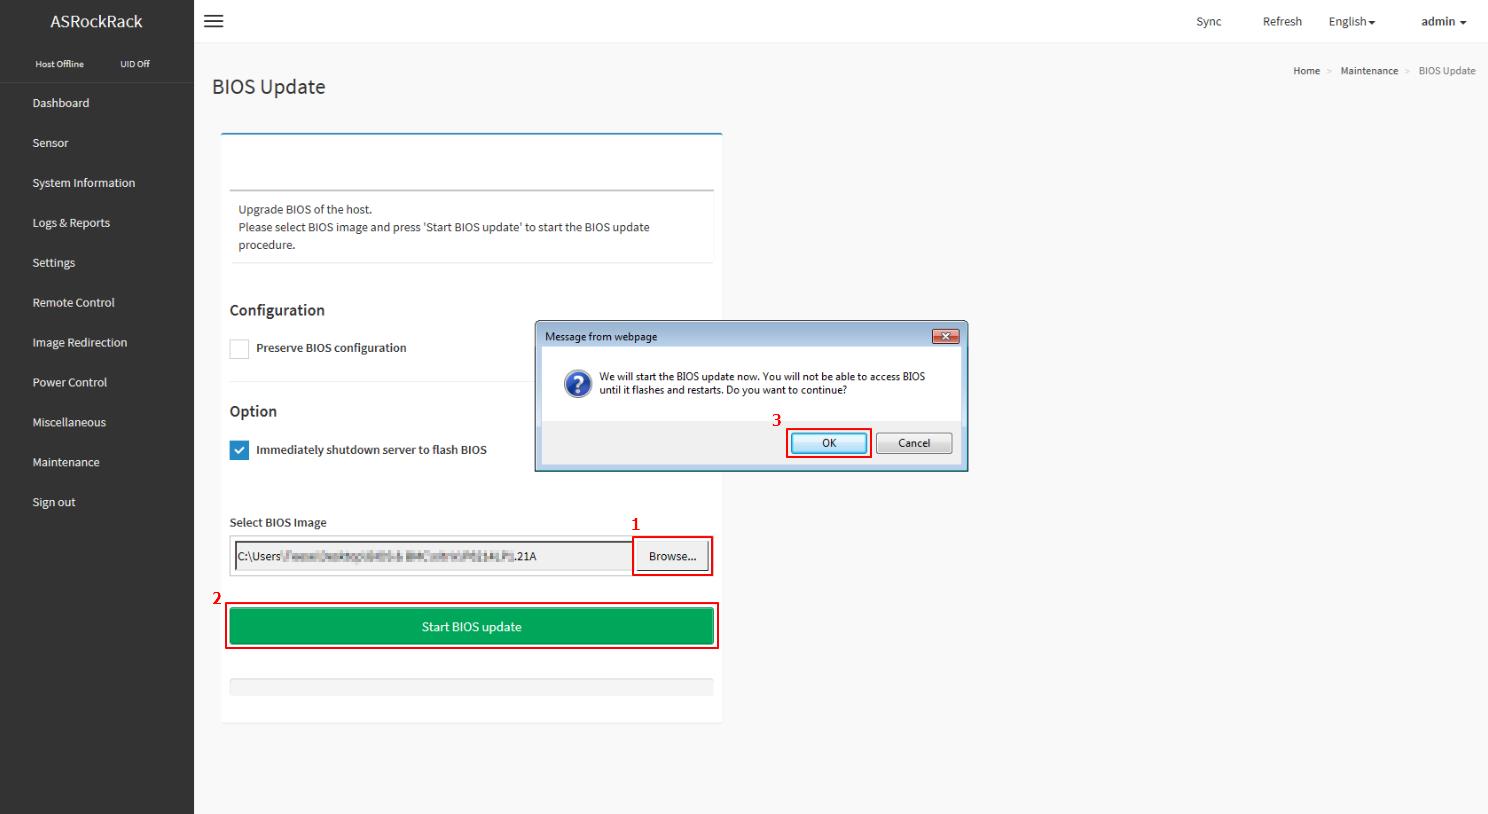
This wizard will takes you through the process of firmware upgrades.
Click the “Browse...” to select the BIOS FW file. Then click “Start BIOS update” for the upgrade process. And click “OK” if confirmed to continue the process.
FW verification processing, please wait a few second..
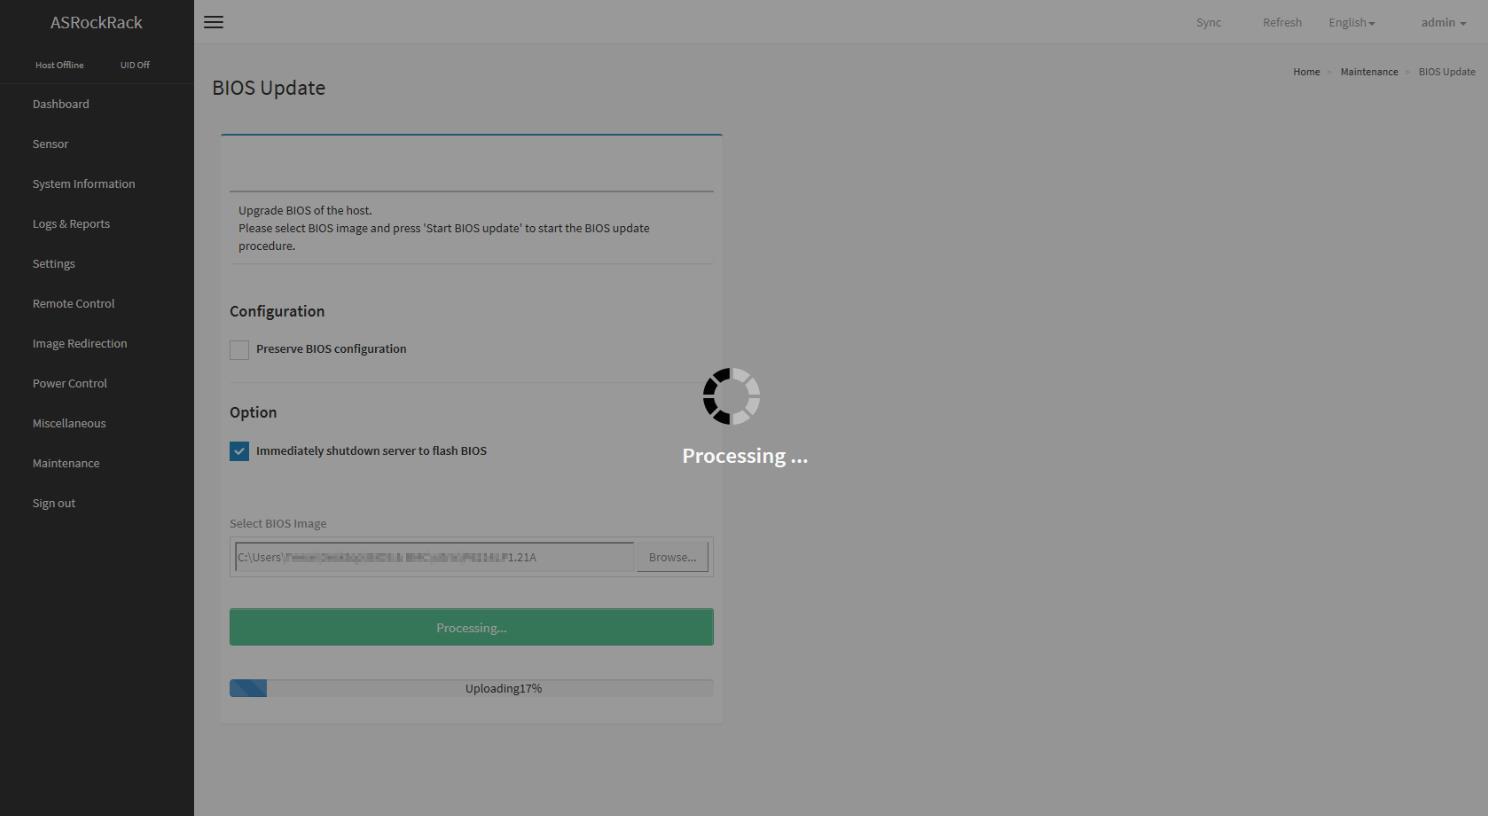
Click “Proceed” to continue the BIOS FW upgrade process. Then click “OK” to start the actual BIOS FW upgrade operation.

FW updrage is processing, please wait a few second..
BIOS FW upgrade process finished. Click “OK” to reload the webpage.
Remark: Clear the browser cookies after the BIOS FW upgrade process finished.
Steps to update BIOS/BMC firmware via OpenBMC
Login page
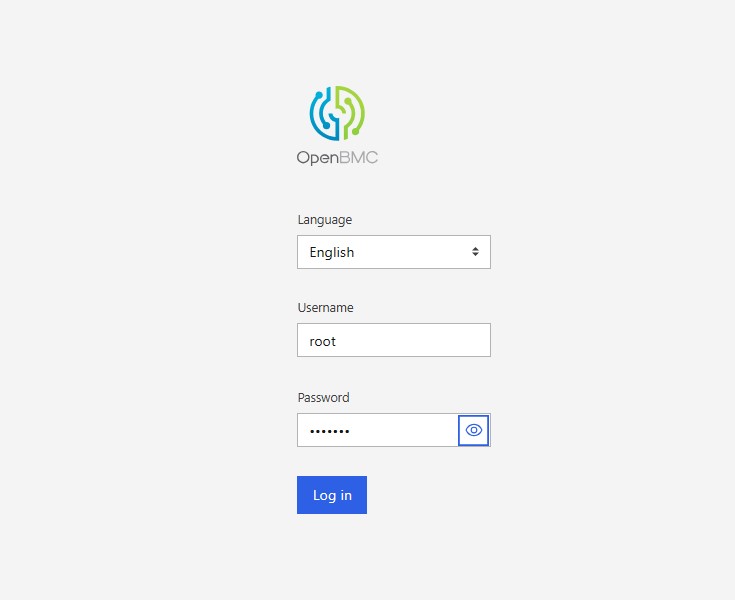
Default Username: root | Password: 0penBmc
BIOS/BMC Firmware Update
- [Operations] -> [Firmware]
This wizard will guide you through the firmware upgrade process.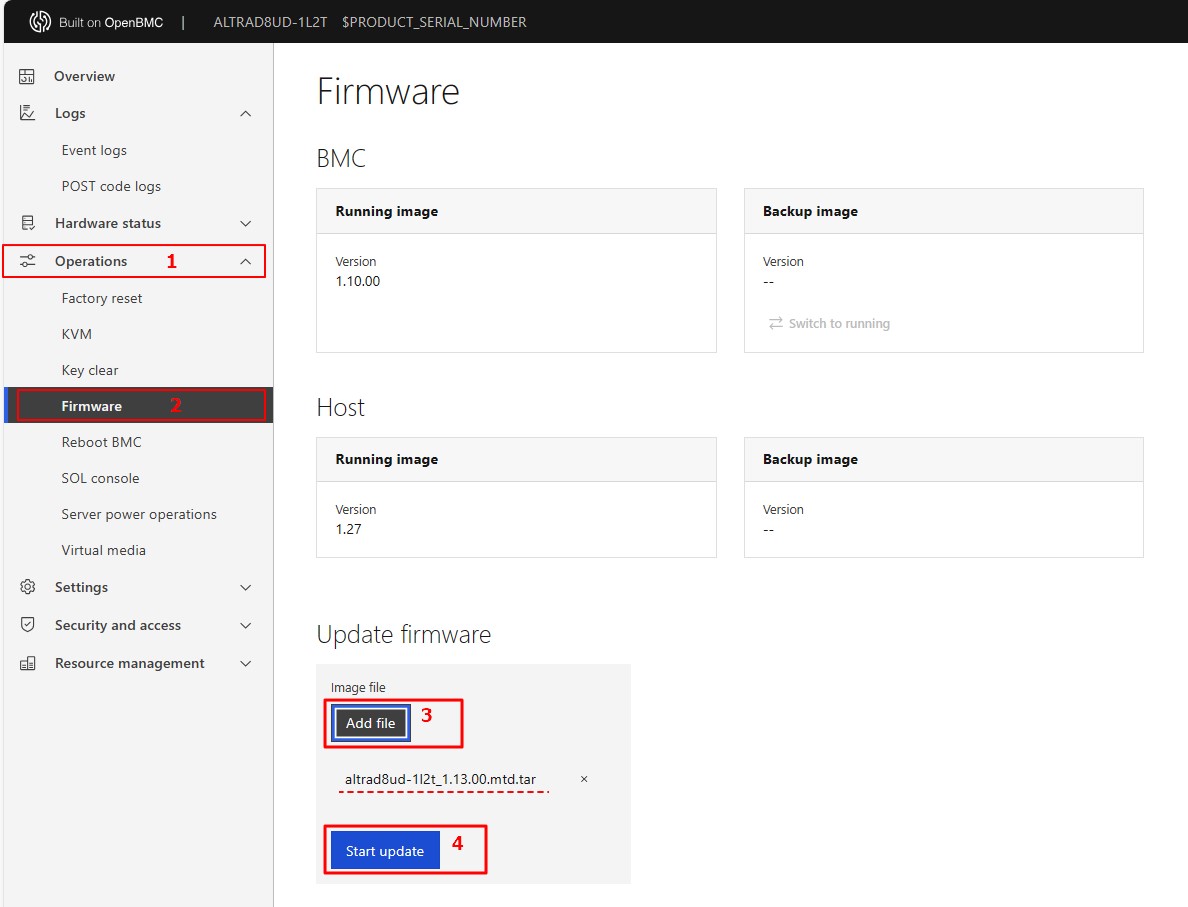
- Click “Add file” to select the BIOS/BMC FW file. Then click “Start update” for the upgrade process.
- Click “Start update” to continue the BIOS/BMC FW upgrade process.
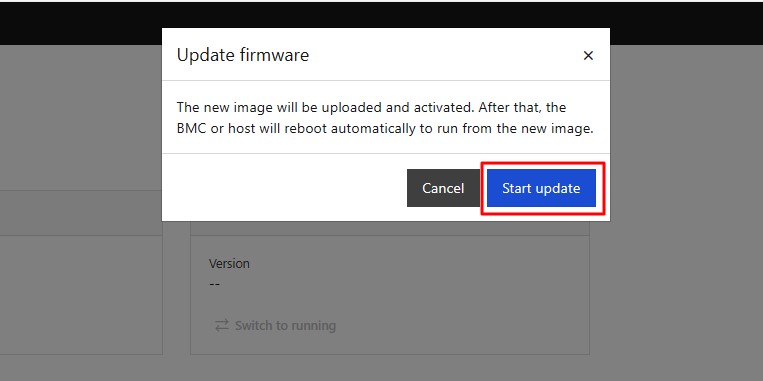
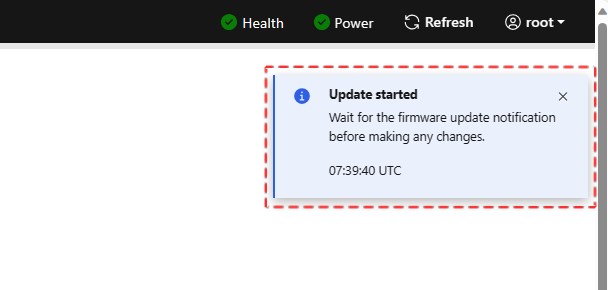
- The BIOS/BMC FW upgrade is being processed, please wait for a few minutes.
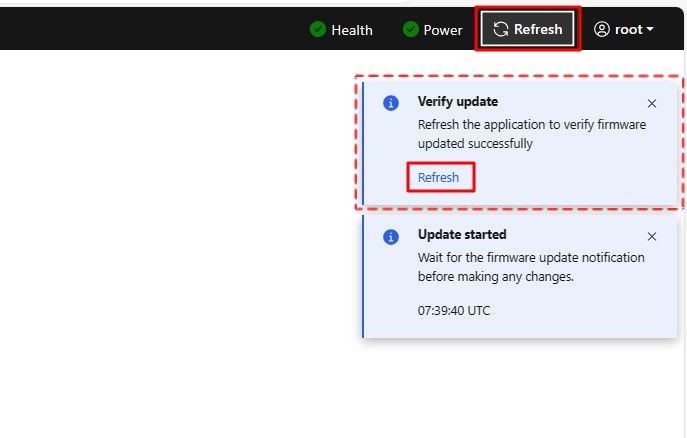
- BIOS/BMC FW upgrade is completed. Click "Refresh" and restart the system.
- Remark:
Clear the browser cookies after the BIOS/BMC FW upgrade is completed.
This guide features the cURL commands to update BIOS and BMC firmware for your server system which supports RedFish. Before we start, please make sure your host system has an IPMI or NC-SI LAN port connected to the internet and the BMC IP address of it for a client end in the same network segment to access.
1. BIOS Update:
curl -k -v -X POST https://[IP_address]/redfish/v1/UpdateService/upload --form 'UpdateFile=@[File_location]' --form 'UpdateParameters={"Targets":["/redfish/v1/UpdateService/FirmwareInventory/BIOS"]};type=application/json' --form 'OemParameters={"ImageType":"BIOS", "Config": 4, "Action": 3};type=application/json' -u [username]:[password] -H If-None-Match:W/\"1667287258\" -H "Expect:"
*We recommend this command which shuts down the host immediately and perform BIOS update.
For BIOS update, here are the definitions to the available values for "config" and "action":
'OemParameters={"ImageType":"BIOS", “Config”: config, “Action”: action}’
config
2: Preserve BIOS settings
4: Overwrite BIOS settings
action
1: Update on host shutdown
2: Update immediately without changing host state
3: Shutdown host to update
If the update request is successfully sent off, the system would return an Accepted message with a 2xx code: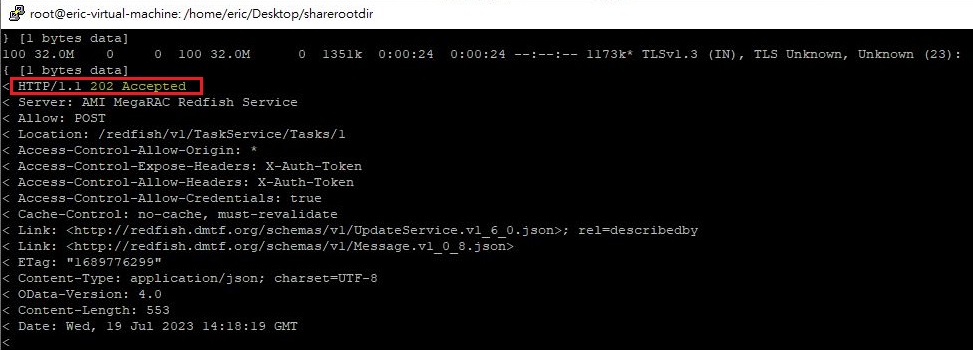
You may also check the update progress by visiting:
https://[host_IP_addr]/redfish/v1/UpdateService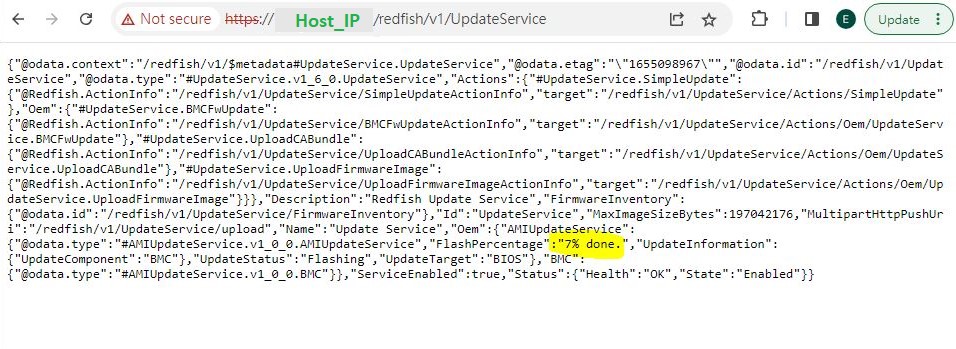
2. BMC Update:
curl -k -v -X POST https://[IP_address]/redfish/v1/UpdateService/upload --form 'UpdateFile=@[File_location] ' --form 'UpdateParameters={"Targets":["/redfish/v1/UpdateService/FirmwareInventory/BMC"]};type=application/json' --form 'OemParameters={"ImageType":"BMC"};type=application/json' -u [username]:[password] -H If-None-Match:W/\"1667287258\" -H "Expect:"
If the update request is successfully sent off, the system would return an Accepted message with a 2xx code as well.
3. Reboot Host:
In case you are not using a shutdown action parameter (3) for the BIOS update command, or to view the latest firmware information of your current host after the update, please reboot your host with the following command:
curl -k -v -X POST https://[BMC_IP]/redfish/v1/Systems/Self/Actions/ComputerSystem.Reset -d '{"ResetType" : "GracefulRestart"} -H "Content-Type: application/json" -H "X-Auth-Token: [token]"
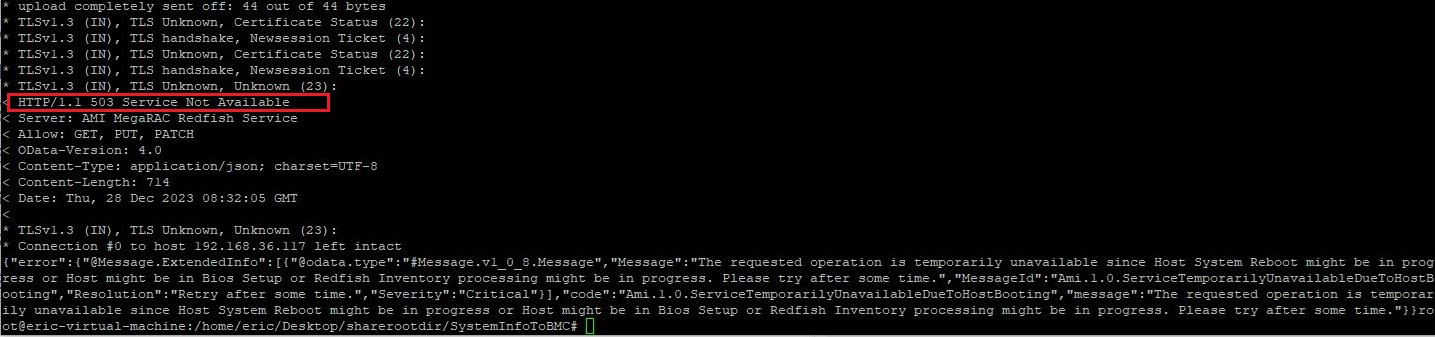
4. Troubleshooting:
If an issue occurs during the update (e.g. the procedure did not start, or an error code "Status:500 Internal Server Error" occurred), you can try below methods such as the power actions or resetting BMC to default according to the scenarios:
i. Double checking your command:
If your cURL request was returned by an error code 400, it means that the request command was incorrect. In other words, the request sent by the client to the host server did NOT follow the rules. The client should modify the request command before retrying so that it could be understood by the host.

ii. Reboot Host:
If the expected update procedure does not start up, you may try powering off your system, or try rebooting it:
curl -k -v -X POST https://[BMC_IP]/redfish/v1/Systems/Self/Actions/ComputerSystem.Reset -d '{"ResetType" : "GracefulRestart"} -H "Content-Type: application/json" -H "X-Auth-Token: [token]"
ResetType Allowable values :
“On” for Host power on
“GracefulRestart” for Host reboot
“GracefulShutdown” for Host soft power off
“ForceOff” for Host hard power off
iii. BMC set to default:
If you encountered an error code 500 issue, this could be related to corrupted RedFish data. The overall solution is to resend a brand new copy of RedFish data to the server again. To do so, we flash BMC to the same version with items other than RedFish preserved, or simply update your BMC.
To preserve your current BMC config:
curl -k -v -X PATCH https:// [BMC_IP]/redfish/v1/UpdateService -d '{"Oem": {"AMIUpdateService": {"PreserveConfiguration": {"Authentication": true,"FRU": true,"IPMI": true,"KVM": true,"NTP": true,"Network": true,"REDFISH": false,"SDR": true,"SEL": true,"SNMP": true,"SSH": true,"Syslog": true,"WEB": true} } } }' -u [username]:[password] -H If-None-Match:W/\"1667287258\" -H "Expect:" -H "Content-Type: application/json"
5. Report an issue to us:
If there is an issue that cannot be resolved or further assistance is required, please visit https://event.asrockrack.com/tsd.asp and fill out the form as detailed as possible so we could provide an efficient tech support.
